The new smartUI Nuc. A closer look.

The new NUC package in smartUI

Disclaimer: The discussed topic is on Content Server 21.2 smartUI SDK and may change anytime without notice after today (I dont hope so, but….)

The new package nuc in the smartUI SDK is the

(quote) nucleus of the nucleus (endquote)

and something like “the Best of the best, Sir” (Men in Black I)

What is nuc?

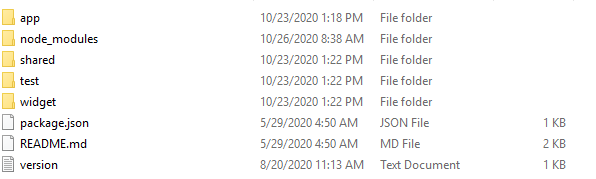
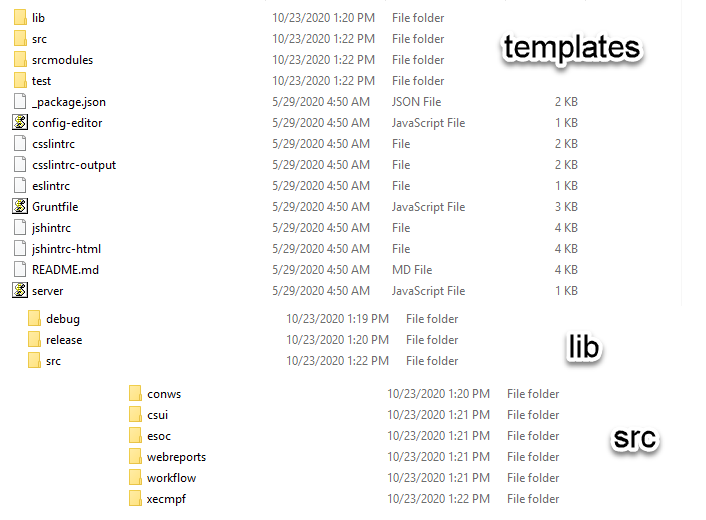
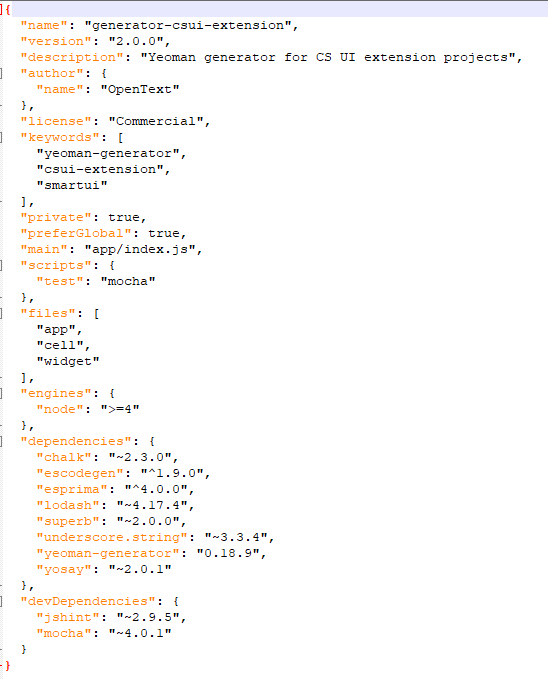
Lets take a look at the lib/src folder in an initialized 21.2 project. To see the images larger, right click and open the image in a new tab.

Nuc, The Nucleus of the Nucleus

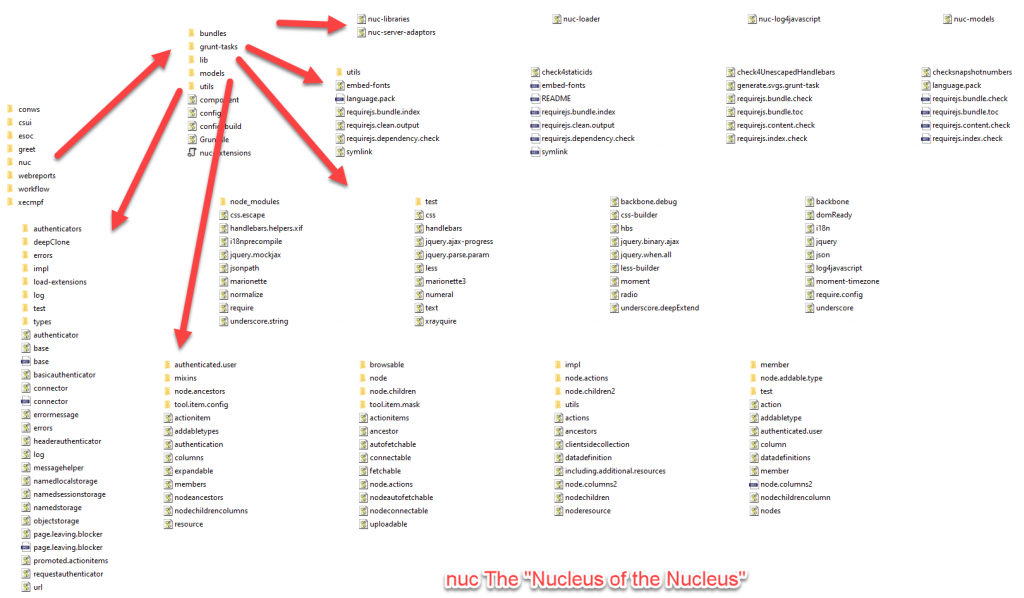
The nuc consists of these folders:

utils

This folder was located in the csui package in ancient time. Nowadays it has moved to nuc.

If you compare that to the csui/utils(21.1), you’ll discover a few differences

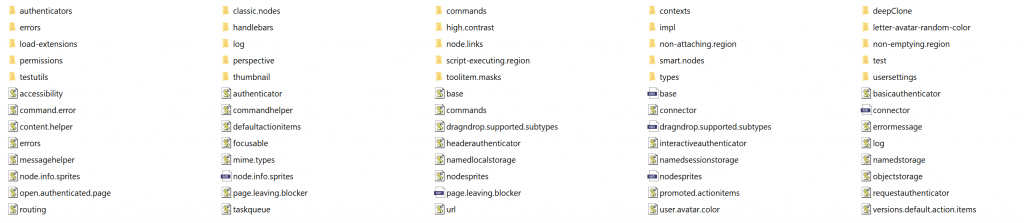
And also csui/utils(21.2)

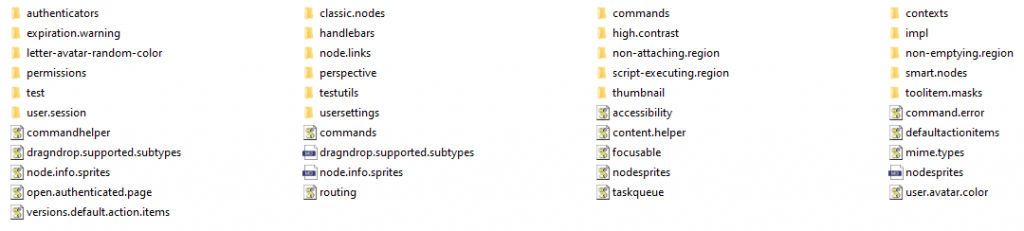
If you use requirejs paths to elements, which are not in csui/utils(21.2), you should check these references and edit them to point to the proper element if needed.

models

This folder was located in the csui package in ancient time. Nowadays it has moved to nuc.

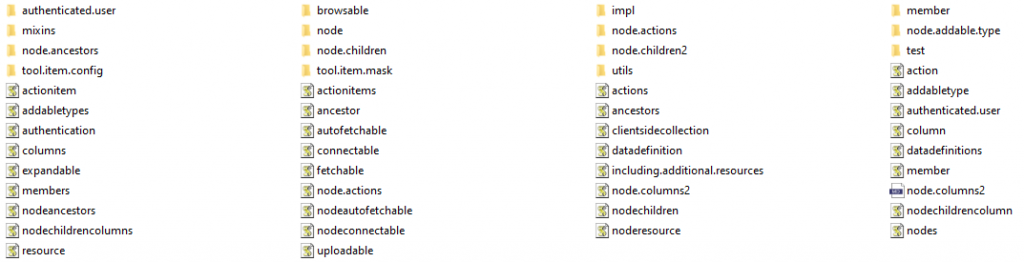
If you compare this with the csui/models(21.1), you’ll notice a few differences.

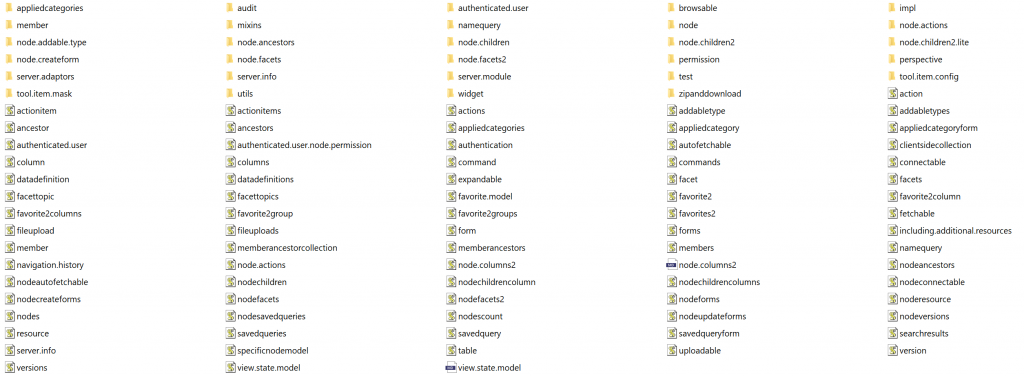
And also compared to the csui/models(21.2) there are differences:

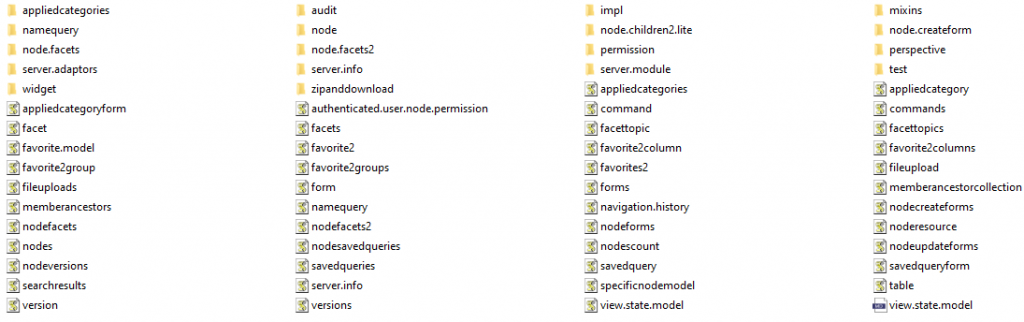
A closer look reveals, that the csui/models(21.2) is not identical to csui/models(21.1) and therefore you are supposed to correct manually any requirejs paths in your js code, if you have to require those models moved from csui/models to nuc/models.

lib

This folder was located in the csui package in ancient time. Nowadays it has moved to nuc. The folder contains

If you compare that with lib at csui (21.1) and also with that lib folder existing in the csui (21.2), you’ll discover, that csui/lib(21.1) is the same as csui/lib(21.2), whereas nuc contains a subset of the entries of 21.1. At least on 21.2 the csui/lib references seem to work perfect, so that those in nuc/lib could be ignored.

grunt-tasks

This folder was located in the csui package in ancient time. Nowadays it has moved to nuc. It contains that:

If you compare that with the grunt-tasks at 21.1, you’ll discover a surprisingly large amount of additional documentation files. The old 21.1 csui/grunt-tasks had only the README.md, whereas there are a lot of additional md’s on 21.2 nuc/grunt-tasks available.

bundles

this is a new folder consisting of a couple of pre-defined bundles. These Defines([]) are quite handy to use. Nothing special here.

Amending the tabbed perspective

Tabs in the header: Playing hide&seek

In the tabbed perspective there is a nice game of hide and seek implemented. This gives you excellent entertainment, but you can amend this to simply display tabs as usually in any non-gaming environment. All examples here are displayed using the index.html from the /lib/src/csui/perspectives/tabbed.text/index.html. (Version 21.1)

The described way tabbed perspectives behave in smartUI is not a bug, its a feature.

The initial game

It goes like this:

The not so hidden hide&seek tab mode

If you have defined a header and several tabs, filled with standard data, you’ll see this initially. But when you click on any but the first header, the game is activated.

Hide&seek mode activated

A simple click on the tab name activates the hide &seek mode. The tabs try to hide and you are supposed to seek for them. This is really a nice and entertaining game.

The conservative Amendment

But what if you want to switch off this challenging mode?

Deactivating the hide&seek mode to allow the more conservative tab display

The build in hide&seek mode can be switched off by commenting this two lines in the tabbed.perspective.view.js.

A reload of the test page gives you by clicking to the second or thirth tab this:

The converwative Tab Display.

Although you switched of the hide&seek mode, you can now use the SDK to display the tabs in a more conservative way.

The smartUI SDK is very versatile and can be used for several purposes, even for conservative tab displays.

The only thing to decide for you is how to change that in the smartUI. Either spawn this into your own perspective or map your changed .js file over the standard requirejs path, this is up to you. You can even try to clear the cs-collapse.css and cs-toggling.css classes using the csui-stype-override-kit (I have not tested that for side-effects).

Happy tabbing.

New in Content Server 21.1: New Webreport Widgets and Extensions

Nodestable

There is already an amazing set of webreport related widgets in the smartui (like HTML Webreport, Nodes List WebReport, Visual Count and Widget Carousel) in smartUI along with a couple of controls, models and actions which make the usage of webreports in smartUI much easier (like parameter.prompt.form, table.report, status.screen, open.webreport, WRTextModel etc). More detailled informations can be found in my Training “Advanced Workshop Webreports”.
At the dawn of the new version, we got a couple of new and extended widgets to be used with webreports.

Some amazing new full-page widgets hit the road


New in Content Server 21.1: New Webreport Widgets and Extensions. They display a full-page of data in a folder or Business Workspace in the Smart View. Three new full-page Content Intelligence widgets are now available to use with Perspectives:

  • Nodes Table Report – Full page
  • Table WebReport – Full page
  • Visual Count – Full page

Users may want to display visual countable data as a full-page chart or present a list of nodes, for example documents to be processed, in a full-page format in the Smart View.
The new full-page widgets will also work with Business Workspace tabbed perspectives, to add various reports sourced using WebReports. Full-page widgets can also be used with other Perspective layouts.

New Webreport Destination

A new WebReport destination, Full Page Widget, sees action for the Nodes Table WebReport, Table WebReport, HTML WebReport and Visual Count destinations.
Once the Full Page Widget output destination is selected, the Nodes Table WebReport, Table WebReport, HTML WebReport or Visual Count can be selected for the Type.
To support the new transport destination added for full page widgets, the transport destination page now has references to the Table Report SubWebReport node and the Visual Count button node to be transported.

Nodes Table WebReport – full page

The Nodes List WebReport widget displays a list of items (nodes) generated from the WebReport’s data source in a full-page view, similar to the browse view.
Parameter prompts can be added for the user to input date ranges, attribute values, etc. using the commands, actions and models mentioned above (since 20.1). If in use, an edit pencil button will display to edit the parameters.
Custom columns, scrolling, name search and pagination are supported.
The node action menu and multi-select actions are available to work with the items in the result set.
All titles and labels support multilingual metadata.

Configuration is done this way. Configure thhis widget and add the title and the node id of the webreport to display in the perspective manager. An Icon Class displays the appropriate Icon on the widget.

Table Web Report – full page

The Table WebReport widget displays a list of items based on the WebReports data source in full page mode.
Parameter prompts can be added for the user to input date ranges, attribute values, etc. using the commands, actions and models mentioned above (since 20.1). An edit pencil button will display to edit the parameters.
Additional data columns, scrolling, column filtering for multiple columns and pagination are supported.
Additional actions can be added, for example a sub-WebReport to initiate a workflow, send an email or create a document node from the item.
Titles and labels support multilingual metadata.

Visual Count – full page

The Visual Count helps visualize countable data using a full-page chart in the Smart View. The chart view (can use bar, donut or pie) has controls for users to filter and drill into data easily.
Parameter prompts can be added for the user to input date ranges, attribute values, etc. using the commands, actions and models mentioned above (since 20.1). If in use, an edit pencil button will display to edit the parameters.
Action buttons can be added, such as export to CSV file, email report data and initiate workflow.
Titles and labels support multilingual metadata.
The Visual Count tile widget and full-page Visual Count widget has a new Horizontal Bar type option.
The original Bar type has been renamed to Vertical Bar to distinguish the two bar types.
The horizontal bar, vertical bar, donut and pie chart types can be changed in the Perspective Manager and Edit page.

New WebReport features

New Enable Row Filters Tag


This new tag [LL_WEBREPORT_ENABLEROWFILTERS /] is designed to automatically filter a WebReport data source when the report is used as a button with the Visual Count widget.
This has also been added to the tag guide as a general feature. This allows WebReports to have better out- of-the box support for dynamic complex filters.


Hidden columns allowed to be included in Table WebReport widget


A new tag option is now available for Table WebReport widgets, INCLUDEHIDDENCOLUMNS:, to specify a list of columns that you want to include in the data returned to the client for each data row. The column will not be included in the columns array in the response.

OS-Package in OScript

Oscript OS Package

The famous OS package in OScript is very important for the internal functionalities of the Content Server Modules, but its hardly documented. This post is an overview of the methods in this package.

A closer look

All of these methods van be used by adressing tzhe methods with the package name (OS) in any oscript program. For example OS.Features(Object) lists all features of the object in the argument.

Disclaimer: This list is not complete and may change any time and any Content Server Version, as long as there is no official documentation of this package. And there is (of course) no guarantee on this list by me.

Methods

CreateOSpace(sPath)ObjectCreates a new OSpace
New(oParent)ObjectCreates a new OSpace object
Delete(Object)Deletes an OSpace object
NewTemp(MasterObject)Creates a new instance of an OSpace object
IsTemp(Object)IntegerWas the object created using newTemp. Result 0,1.
Root(MasterObject)ObjectReturns the module root object
Roots()ArrayReturns all loaded root objects
Orphans(Object)ArrayReturns all orphans in the objects ospace
Children(Object)ArrayGets children objects from the object
Patent(Object)ObjectGets the parent object
Name(Object), FileName(Object)StringReturns the name of the object/ospace of the object
ReadOnly(Object)BooleanIndicates, if the current ospace is locked
Features(Object)ListLists all features in the current object
IsFeature(Object, sFeatureName)BooleanReturns, if the Feature sFeatureName exists in Object
AddFeature(Object, sFeatureName, [optional] CopyableBoolean)Add a new feature to the object
DeleteFeature(Object, sFeatureName)Removes the feature sFeatureName from the object
ClearValue(Object, sName)Clears the content of the feature nName
IsObject(objRef)BooleanChecks, if the object still exists

Happy OSpace Changing

How to check if the smartUI SDK is working

Test the sdk

If you get new Content Server Versions, you also have to upgrade your existing smartUI projects to the new version.

In this post, I’ll give a short receipe how to check the functionality of the sdk.

The primary component of the sdk is the generator. It contains the compete sdk and all infrastructural things (grundfiles etc) to build a project folder. All other zip files (except the style override kit for webdesigners) are secondary.

The following receipe builds on a running SDK of any older version.

The Check

So to check, if a new generator is working, do this: (can be done in parallel to existing versions).

  • Unzip the new generator to a folder.
  • if you do have older generator installed and you want to keep it:
    • change the name of the new generator to reflect the test, for example generator-test21.2.
    • Also configure this name in the generator. Click here for details
  • go inside the unzipped generator folder and link it to your npm
Yo Generator Links
Yo Generators
  • init the new test project with the new generator (here yo csui-21.1-standard). Then wait and check, if there are any issues. You can ignore minor issues, as long as the folder is initialized.
  • install the demo widget from the generator by typing yo <your-generatorname>:widget. Do not try to install the demo widget from different sources, you want to test if the generator runs.
  • run grunt from the commandline for the new project
    • Should not indicate any issues.
    • in the out-module folder should be the module to install in the Content Server
    • in the out-release folder should be at least a json file and a bundles folder with content.
Output files

But if you get a result like this:

Non working SDK

then the generator is broken und the whole SDK wont work. You can try to grunt –force, but the results will be not defined. In this case, you should wait for a working version of the SDK.

If the thing is working, you should be able to install the module and see the hello widget in the perspective manager.

Happy Testing

New in 21.1: Dynamic Security Clearance Level Part 1

Dynamic Security Levels

Good news for security concerned organisations. Finally, its possible to assign different Security Clearance Levels for different organizational conditions, such as devices logged in or network used to login.

Let me explain this using an example.

A company manager called John Doe is regularily working with secret and top secret docs. Therefore he is assigned the highest level of SCL, 100, which allows him to access the most confidential docs of the enterprise, like the canteen menu or so……

All from his normal office with a secured network.

But, when he is on the road, he occasionally is in other offices of the company using the company network. Or even in Home Office, which is a good idea in these times. Here, from time to time he has to check things, but on a lower security level.

Also, from time to time, he wants to have a coffee in some coffee shops. But he wants to hide all information from other guests (maybe Mary Jane?) , so he wants only access to the company intranet docs. This implies an even lower SCL.

How dynamic security levels work

And, of course, he an amend his SCL up to the level originally granted anytime he wants.

How does it work?

At first, it works only with a SAML Identity Provider of any kind. SAML means Security Assertion Markup Language and is an open standard for exchanging data between an identity provider and a service provider.

Wow, sounds like an alien thing.

Not really, we already know OTDS (OpenText Directory Services. And our Content Server (Cluster) is the Service Provider. If a user logs into the Content Server, he is redirected to OTDS, his ID is verified and he can log in the Content Server.

In all cases, the Service Provider has to trust the OTDS.

Logins can be handled in the easiest cases directly from OTDS, OTDS can also utilize any LDAP directory for getting the Verification.

Identity Provider. An example

Next in our chain is the Identity Provider. There are many Identity Providers available, but let’s start with ADFS (Microsofts Active Directory Federation Services).

In this schematic there is the so called “Claims based application” which is OTDS with Content Servers. There must be also any information to tell something abount the user and if he is ok or not. This is dprovided by Active Directory / Active Directory Lightweight Directory Services or any Database or custom storages for the user information.

ADFS is only an example, there are many other Identity Providers avaliable, like Octa, OneLogin, Google, Centrify, Azure, Salesforce, SAP, …….

Here at ADFS there are three things left to do.

  1. define an Access Control Policy

2. Define the rule against attributes

3. Define the Assertion to send

Here, its an example “ID, email, Given Name and Surname” – Rule.

OTDS – Mon amour

In the next post, we’ll deal with OTDS.

Possible amendment of the search results

We just discussed a possible amendment in the OpenText smartUI Content Server Search Results. Whats about an addition of a thumbnail for each document found?

Tabular View with Thumbnails

It looks like this:

https://youtu.be/HQR50f0o6Hk

Yeoman & generator-csui-extension secrets

Yeoman and smartUI

Have you ever wondered about the yeoman and the genererator-csui-extension? And whats going up in the somewhat bumpy installation and generation of a project dir? This are the Yeoman & generator-csui-extension secrets.

Yeoman & generator-csui-extension secrets: Lets unveil this secrets

First, recap the installation steps from scratch:

  1. Download and install node.js Version 11.15.0 (In you try a newer version, you will be rewarded by the famous primordials not defined error on starting yo, see this post )
  2. Set npm (part of node.js) to npm version 3 globally (npm install -g npm@3 (I am using 3.3.10)
  3. Install the grunt cli globally (npm install -g grunt-cli@1)
  4. Optional path: Unpacking the sdk and setting up the sampes)
    1. Unpack the SDK in a folder (p.ex. sdk)
    2. go inside this folder
    3. Use npm to install all requirements (npm install)
    4. Then you can start the internal webserver (Default under post 7777) by npm start and browse to sample-index.html inthis dir. Here you will get a listing of certain samples.
    5. The doc folder contains a very basic documentation of the smartUI SDK
  5. But for practical work, you need to gererate at least one project folder. This is a complete structure, containing the actual sdk and a place to build your own packages. So lets generate a project folder named project
    1. Preparation, only to do once
      1. unpack the gererator-csui-extension to a dedicated folder (p.ex. generator)
      2. While not(!) in this folder, install yeoman globally (npm install -g yo@1)
      3. go inside the folder generator
      4. link this as an extension to npm (npm link)
    2. Lets generate the project folder
      1. make the folder named project
      2. go inside the folder named project. Its empty
      3. Start yo to execute the csui-extension (yo csui-extension)
        1. you need to define the name of your oscrippt module and the requirejs base name. Then its doing a lot.
        2. Now your project is really full. You can optionally add a demo widget (yo csui-extension:widget)
      4. Now, build the project (grunt)

Ok, now the project folder project is operable. Lets take a close look on the generator.

(Remark: The versions mentioned are the working versions in my dev machines. Other, newer versions may work, but this is not guaranteed.)

Close Look at the Generator

When you do a npm link, a symbolic link is is build from the folder to [roaming dir]\npm\node_modules\generator-csui-extension.

Symlink Generator and Yeoman

So the extension folder is used as input for the yo execution.

Our Generator source folder looks like

Mann Content of the Generator

The app folder here is interesting

App folder of the Generator

First lets take a look on the rest of the templates folder

Some deeper folders in the hierarchie

Here we see, we have the same structure as lib…. in the sdk. SO the complete SDK is copied fron the generator folder to the project dir unter lib. There is no need to use the sdk folder (except for docs and samples)

A closer look at index.js (Excerpt). This file is executed during “yo csui-extension”.

Index.js

Here you see, the whole structure is copied directly from the templates folder to the destination project. All contents in this templates folder are later in the project folder.

A closer look at package.js

Package.js

The package.json contains as always the definition of this generator extension like, name, description and depedencies of this extension.

Areas for Customizations are at this areas (for example):

  • Custom gruntfiles, which shoulkd apprear in all new generated project folders
  • A different setup for the linters which should apprear in all new generated project folders
  • Added libraries
  • Added documentation structures

How to do this

Simply modify the generatot folder, add your customizations and modifications. You can save this folder as .zip to distribute internal standards.

Happy Customizing

New in 21.1: Business Events

Business Events

Good News for Content Server Administrators. They are no longer aloane on monitoring the system.

A new type of Administrator is born, the Business Administrator. The Content Server now has two kinds of events. The “System Events” are for Administrators, the “Business Events” are for Business Administrators.

Business Events are not only for a relief of System Administrators but also to capture events of interest to Business Administrators operating their normal day business.

New in System Monitoring

There is a new link in the System Monitoring Admin Pages

New link in System Monitoring

In the Configuration, email Notofications will be send automatically to the group BENotifyGroup. This group is created for new installs and upgrades. An option to send these notifications also to Administrators is per default on.

email Notifications in Business Monitoring

This Events are also scriptable and exportable

Export Admin Settings

And also there is a new Usage Privilege called “System Monitoring”. With that privilege you can access the “Business Events” configuration page ans the “System Events” reports page.

To access, the group “Business Administrators” must be enabled, which is the default, otherwise the access will be restricted.

The new privilege System Monitoring

Business Event Reports

The “System Event Reports” is a shared admin page for reviewing and exporting reports. Here we have two kinds of users:

  • Business Administrators see Business Events, no System Events.
  • System Administrators see only System Events, unless the “send to Administrators” is checked. If its checked, they see both.
System Event Report

New on this page is the filter by Event Type.

Happy Event Monitoring for Business Administrators and Happy Spare Time for Administrators.

New in 21.1: Search MyAssignments Widget

The new Search Box

A minor improvement in OpenText’s new Content Server 21.1 is the addition of a Search Box in the MyAssignments Widget in smartUI.

The new MyAssignments Search Box - not expanded

Here, the MyAssignments widget is marked. To marvel at the new Search Box, you need to expand the widget.

The new MyAssignments Search Box - the Loupe

Then click on the loupe

Next, the Search Box is displayed.

The new MyAssignments Search Box -the Search Box

Happy Searching