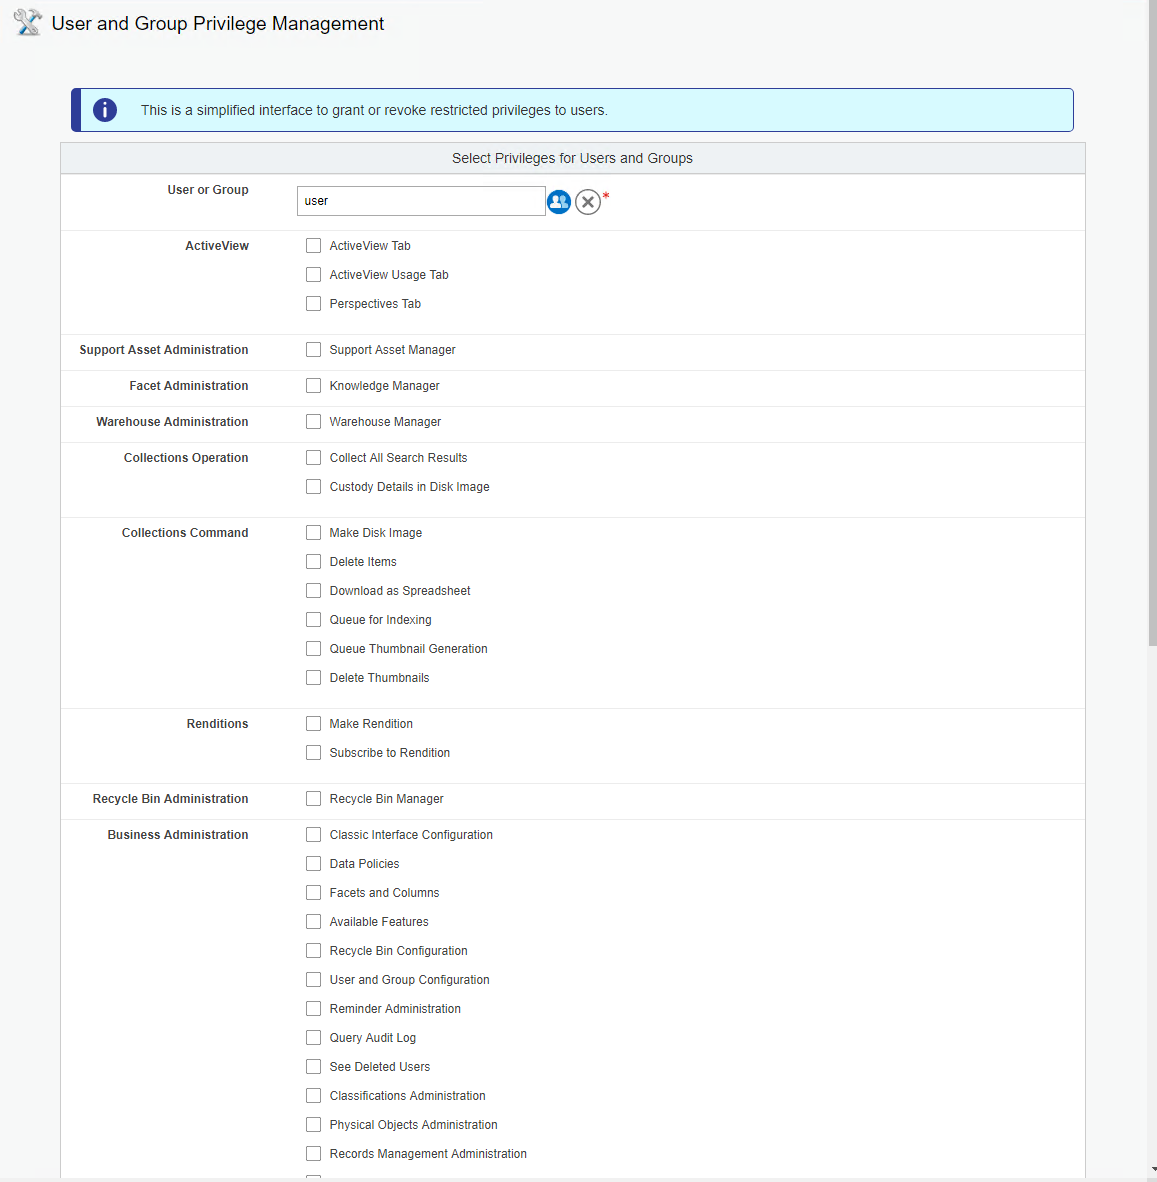
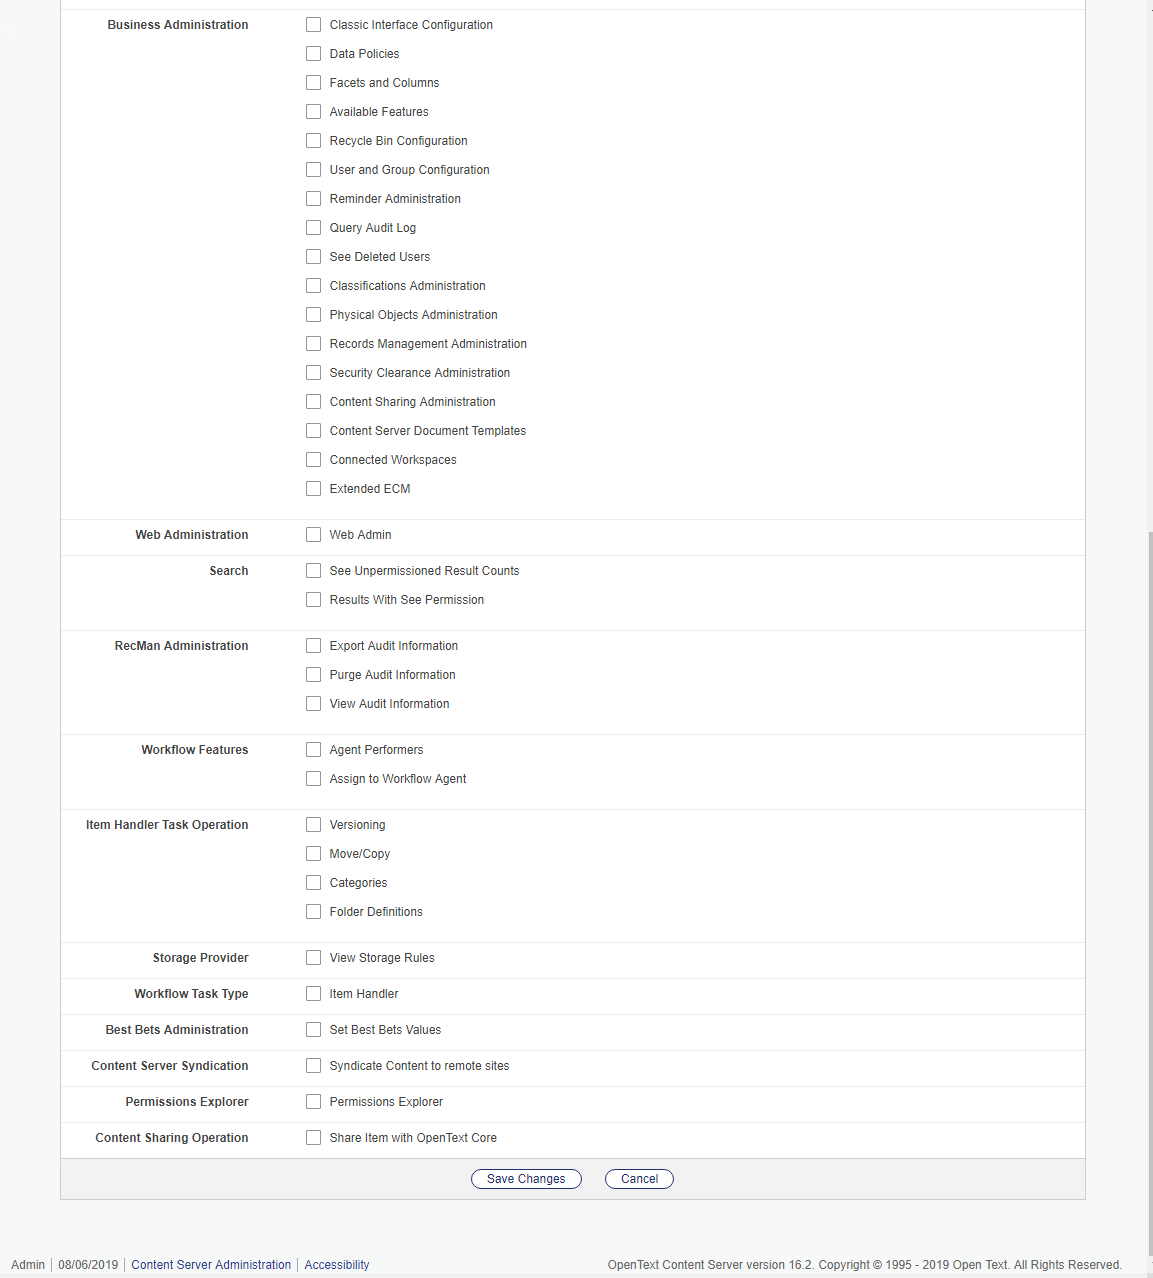
The new “User and Group Privilege Management” Admin Page allows a user to be assigned to multiple privileges. This is mainly to simplify the Business Admin Roles. Here are two screenshots:

The wonderful World of Opentext Content Server
The new “User and Group Privilege Management” Admin Page allows a user to be assigned to multiple privileges. This is mainly to simplify the Business Admin Roles. Here are two screenshots:
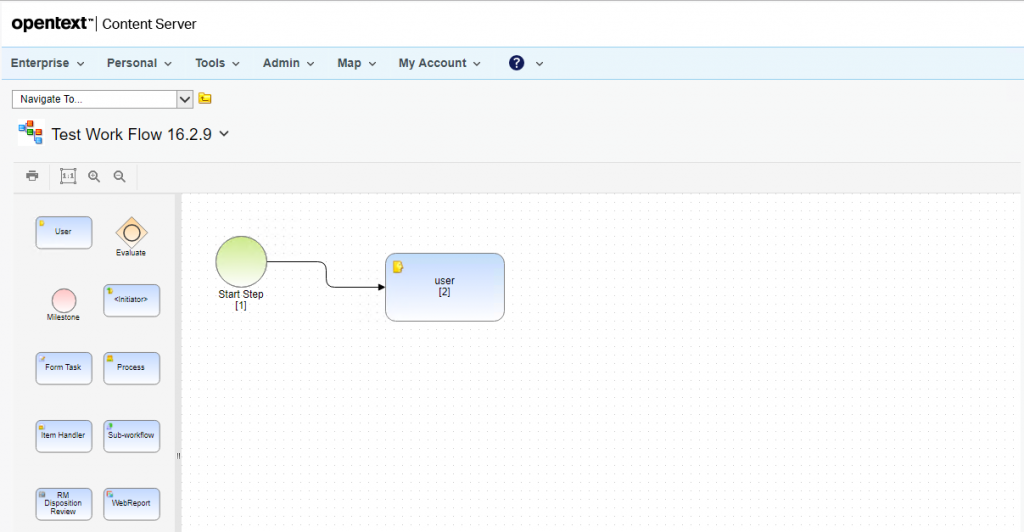
There are seveeral new things implemented in the Workflow area of Content Server 16.2.9.
First think of a very simple workflow defined like this.
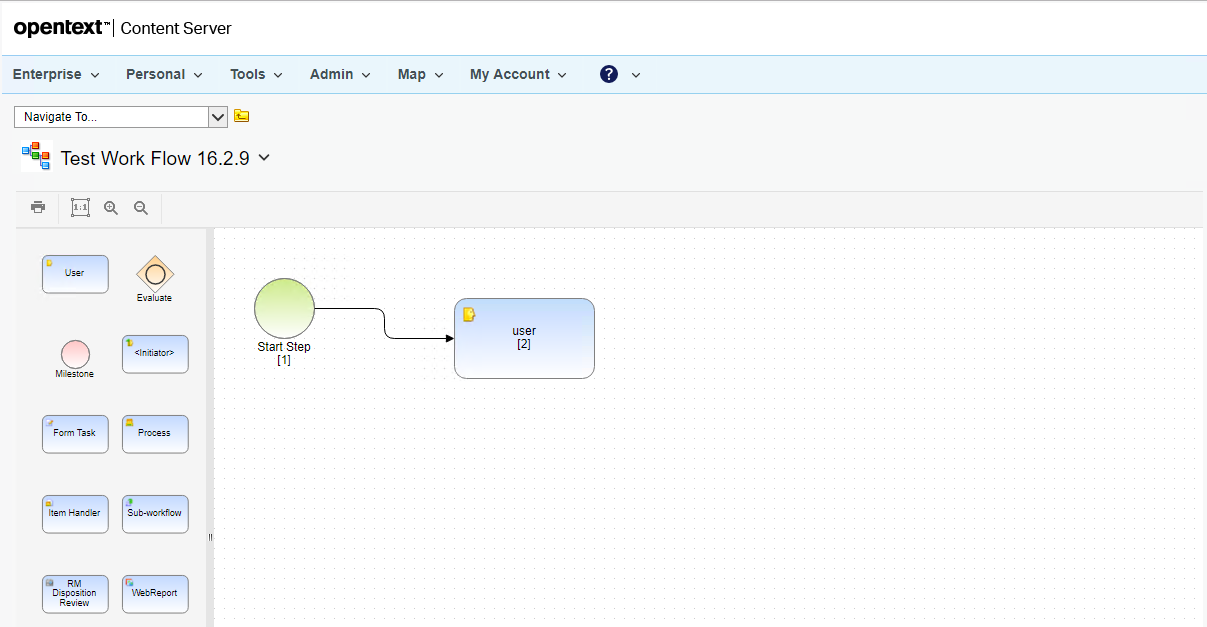
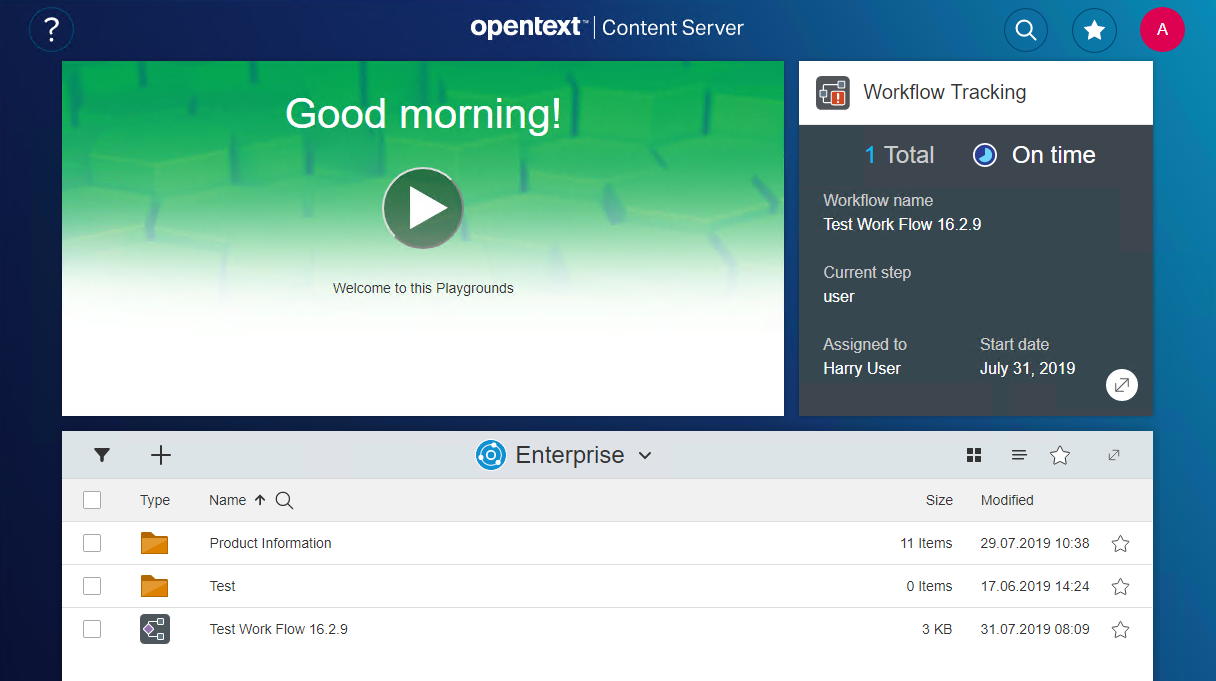
Lets set the name of our workflow to “Test Work Flow 16.2.9”. Lets initiate it.
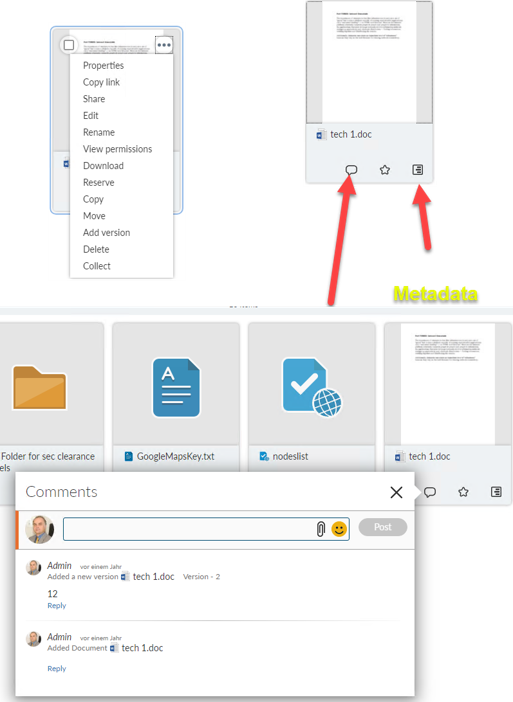
Stop Action in smartUI
If configured on a landing page, the workflow tracking widget shows our workflow, once initiated like this
If you click on the extension button on the lower right of the workflow tracking widget, then there will be a list of all workflows belonging to or initiated by this person will open.
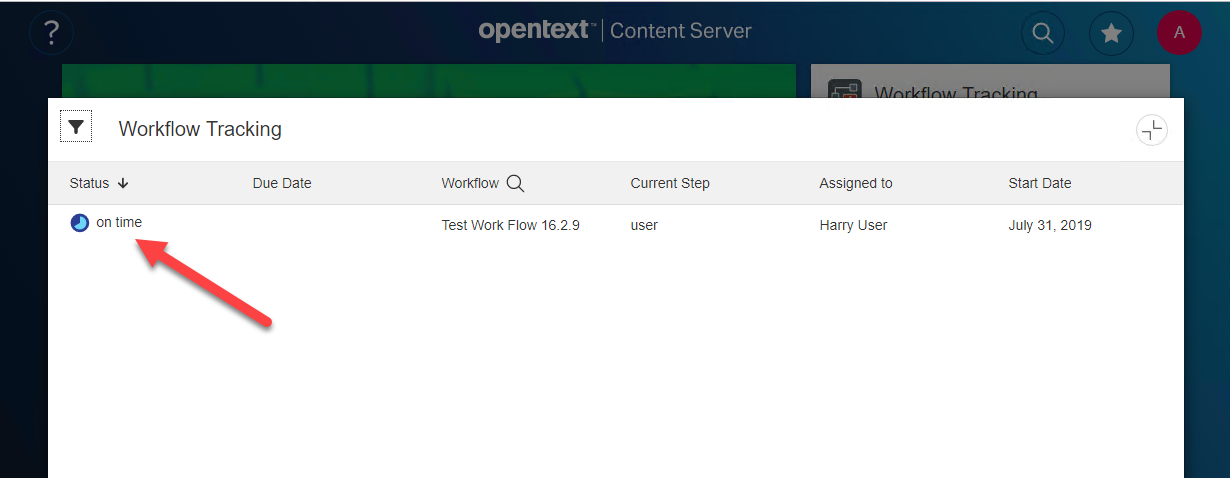
If you click on the status of a workflow (here we have only one workflow to click onto), the details of this workflow instance opens
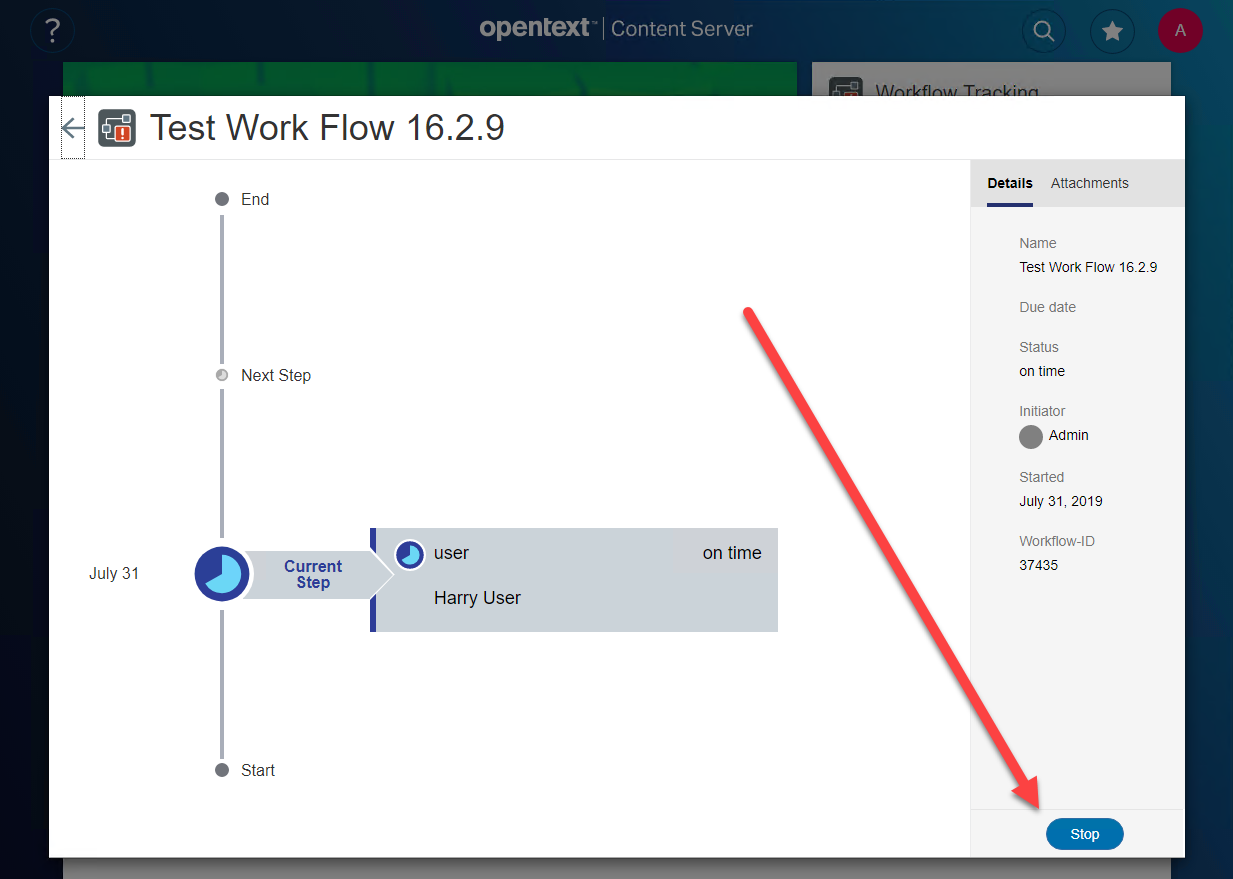
Here you see a graphical overview of the current step along with all steps of the workflow. This instance of the workflow an be stopped by pressing the “Stop” Button.
Open the Workflow Map from smartUI
A new Edit Action has been added to allow the edit of a Workflow Map
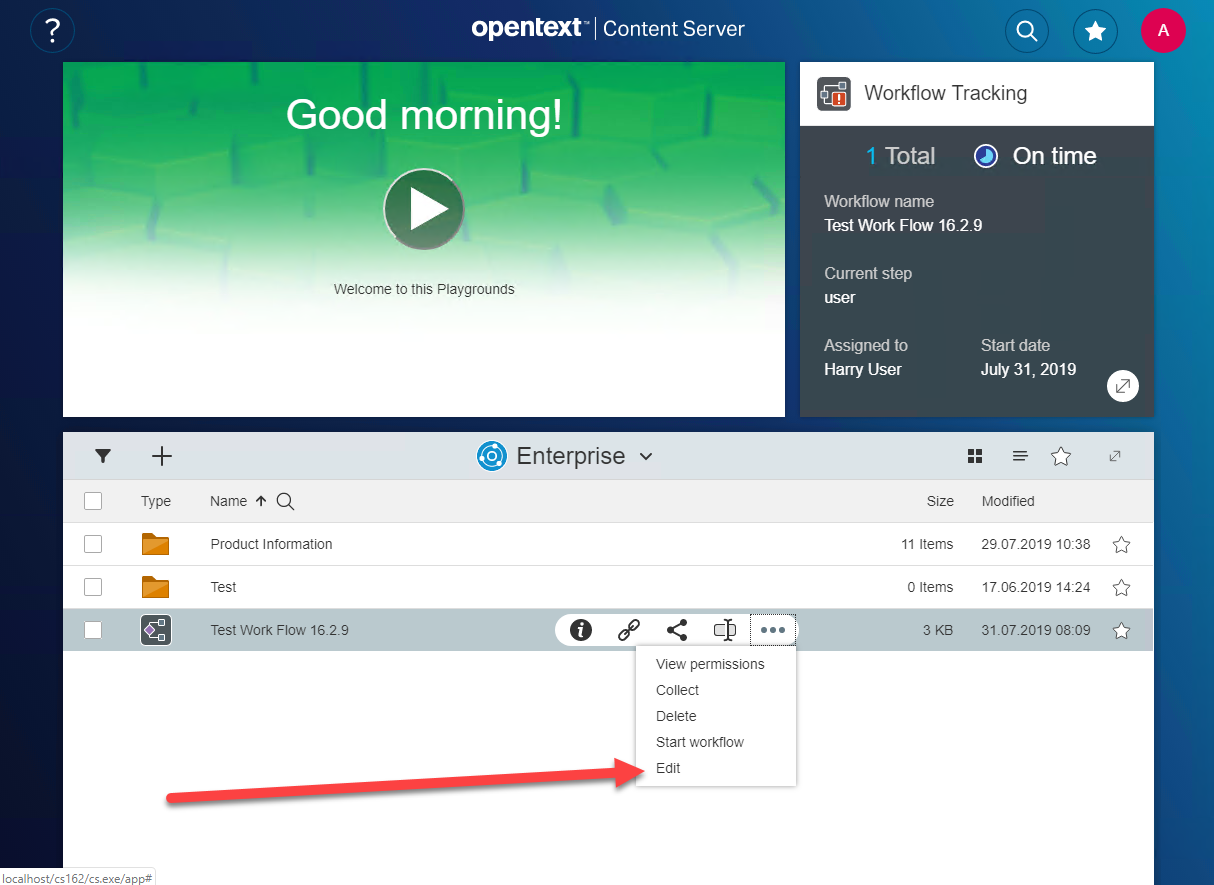
This will open the Workflow Map Editor in the legacy gui
Copying or Moving Workflow Attachments in smart UI
Workflow Attachments can now be moved of copied within the Workflow Attachment Panel
In 16.2.9, there is a nice thing added to smartUI:
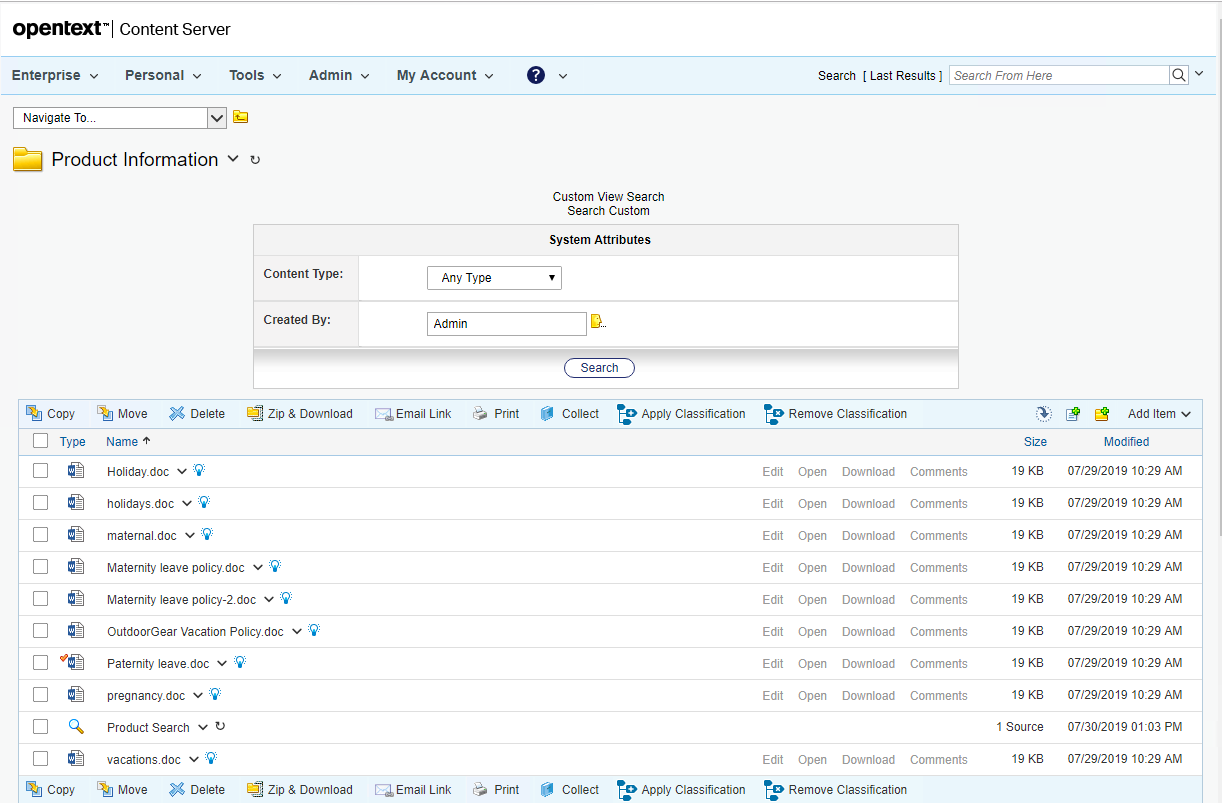
Custom View Search Form
First, a custom view search form has to be configured in the legacy gui, something like this:
When switched to the smartUI, a doubleclick on the stored Search “Product Search” starts the Custom View Search

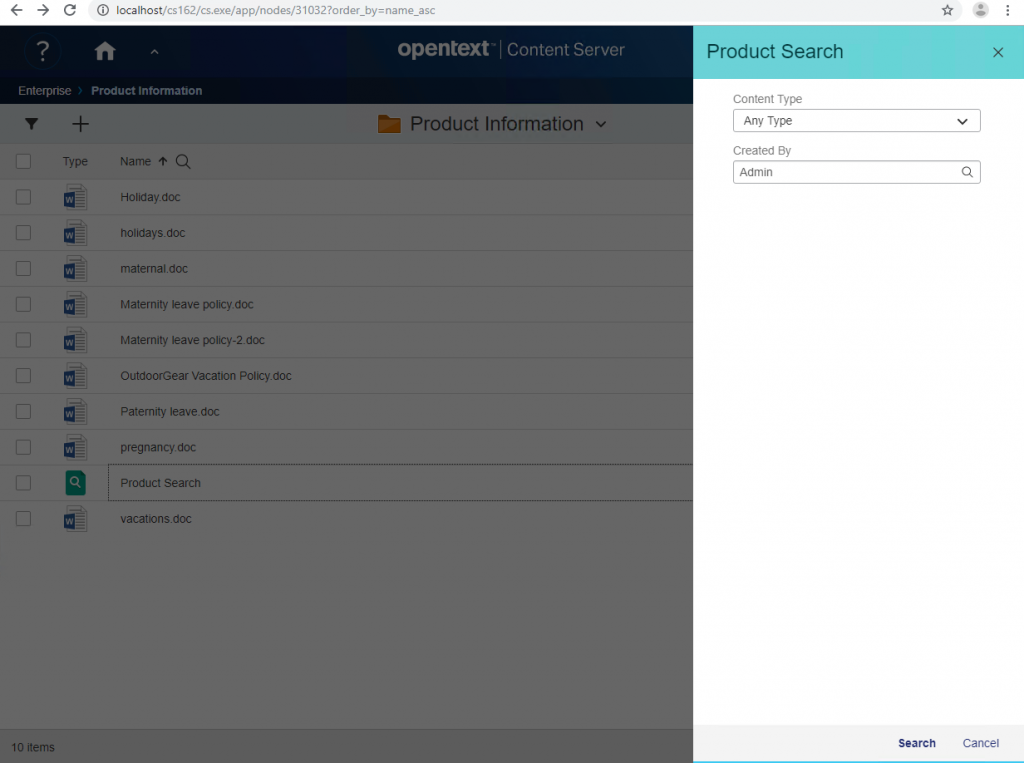
Then the Search Panel appears on the left. Clicking on the “Search” Button will start the search. A click on the icon in the upper right will switch between the standard form and the tabular form of the search results.
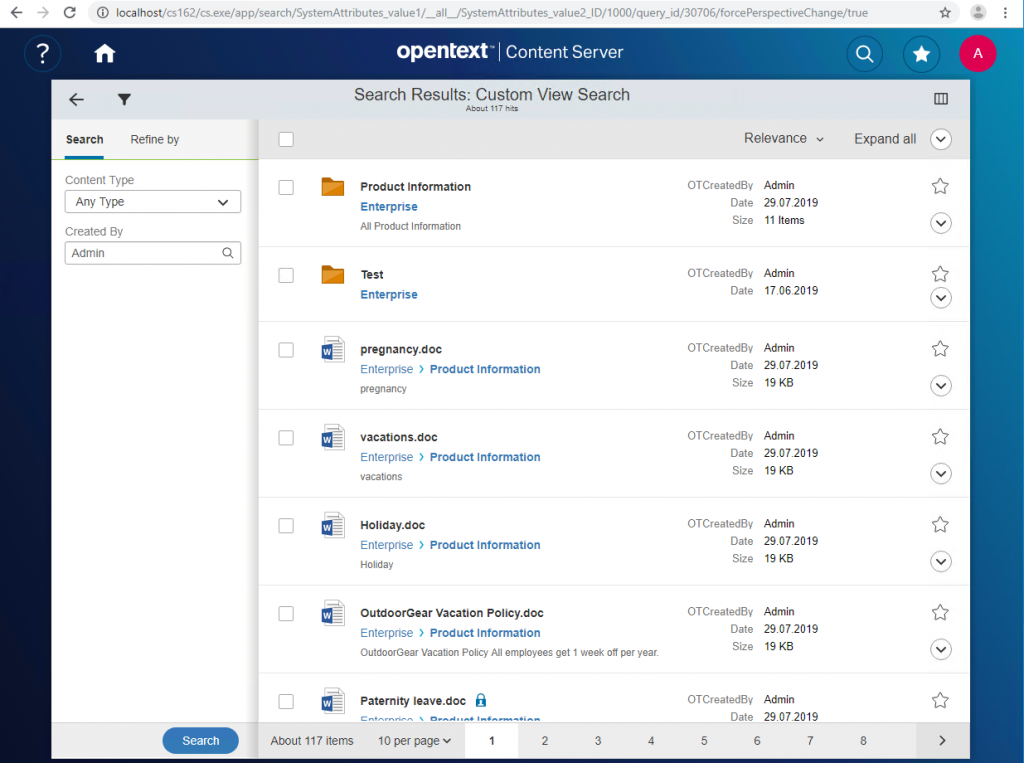
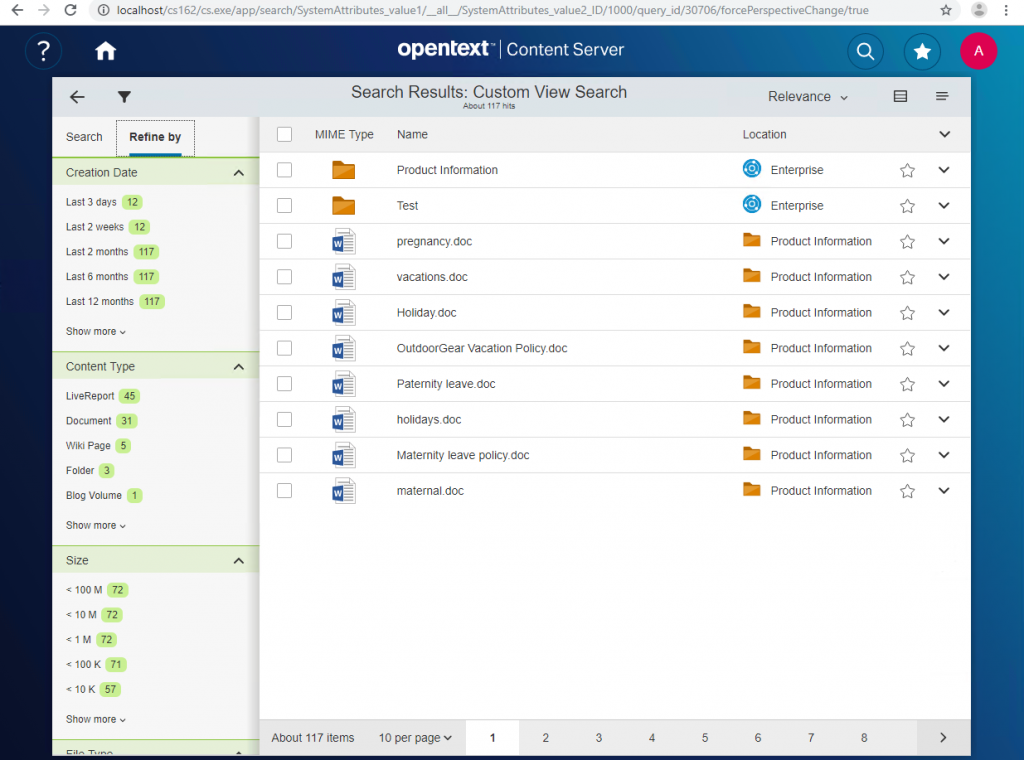
Nice, isn’t it?
Wondered, how expandable Tiles work in smartUI?
The base Widget is a simple Tile:
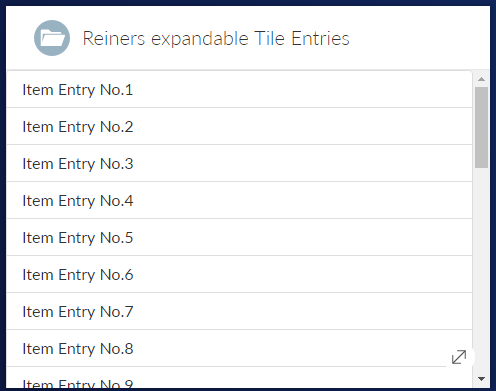
Pressing the Expand Button (lower right) shows a different view with more details as a list:
Implementation:
For simplicity sake, all require.js setups are omitted. The complete javascript would run on a simple html page without connecting to Server.
First, we need a collection and a model. The model does have 3 attributes, name, desc, adv. 30 Models are filled automatically in the collection.
     var  ItemModel = Backbone.Model.extend({
              defaults: {
                  id: null,
                  name: 'Unnamed',
                  desc: 'Unnamed',
                  adv: 'Unnamed'
              }
          }),

      ItemCollection = Backbone.Collection.extend({
              model: ItemModel,
              initialize: function (models, options) {
                  this._items = _.times(30, function (index) {
                          ++index;
                          return {
                              id: index,
                              name: 'Item Entry No.' + index,
                              desc: 'the ' + index + 'th. Description',
                              adv: 'the adv attribute of the ' + index + '-Description Model'
                          };
                      });
                  this.makeFetchable(options)
                  .makeClientSideBrowsable(options);
              },
              sync: function (method, collection, options) {
                  if (method !== 'read') {
                      throw new Error('Only fetching the collection is supported.');
                  }
                  console.log('Getting', collection._items.length, 'items');
                  var deferred = $.Deferred();
                  setTimeout(function () {
                      var response = _.clone(collection._items);
                      if (!options) {
                          options = {};
                      }
                      if (options.success) {
                          options.success(response, options);
                      }
                      collection.trigger('sync', collection, response, options);
                      deferred.resolve(response);
                  }, 250);
                  return deferred.promise();
              }
          }),
Second, we need two views, a base view and an expanded view.
The base view with its template is:
      ListItemView = Marionette.ItemView.extend({
              className: 'binf-list-group-item',
              template: Handlebars.compile($('#list-item-template').html())
          }),
script id="list-item-template" type="text/x-handlebars-template"
  {{name}}
/script
<> around the script tags are omitted
The extended view with its template is
ListFieldItemView = Marionette.ItemView.extend({

                  className: 'binf-list-group-item',

                  template: Handlebars.compile($('#list-item-template1').html()),

                  initialize: function () {

                      this.listenTo(this.collection, 'sync', this.render);

                      this.collection.fetch();

                  },

                  serializeData: function () {

                      if (!this.model && !this.collection) {

                          return {};

                      }
                   var args = [this.model || this.collection];
                  if (arguments.length) {
                      args.push.apply(args, arguments);
                  }

                  if (this.model) {
                      return this.serializeModel.apply(this, args);
                  } else {
                      return {
                          items: this.serializeCollection.apply(this, args)
                      };
                  }
              },
          }),
script id="list-item-template1" type="text/x-handlebars-template"
   {{#each items}}
      p class="items"a href=#{{name}}  ----     {{desc}}---{{adv}}/a/p
  {{/each}}
/script
<> brackets around the html and script tags are omitted
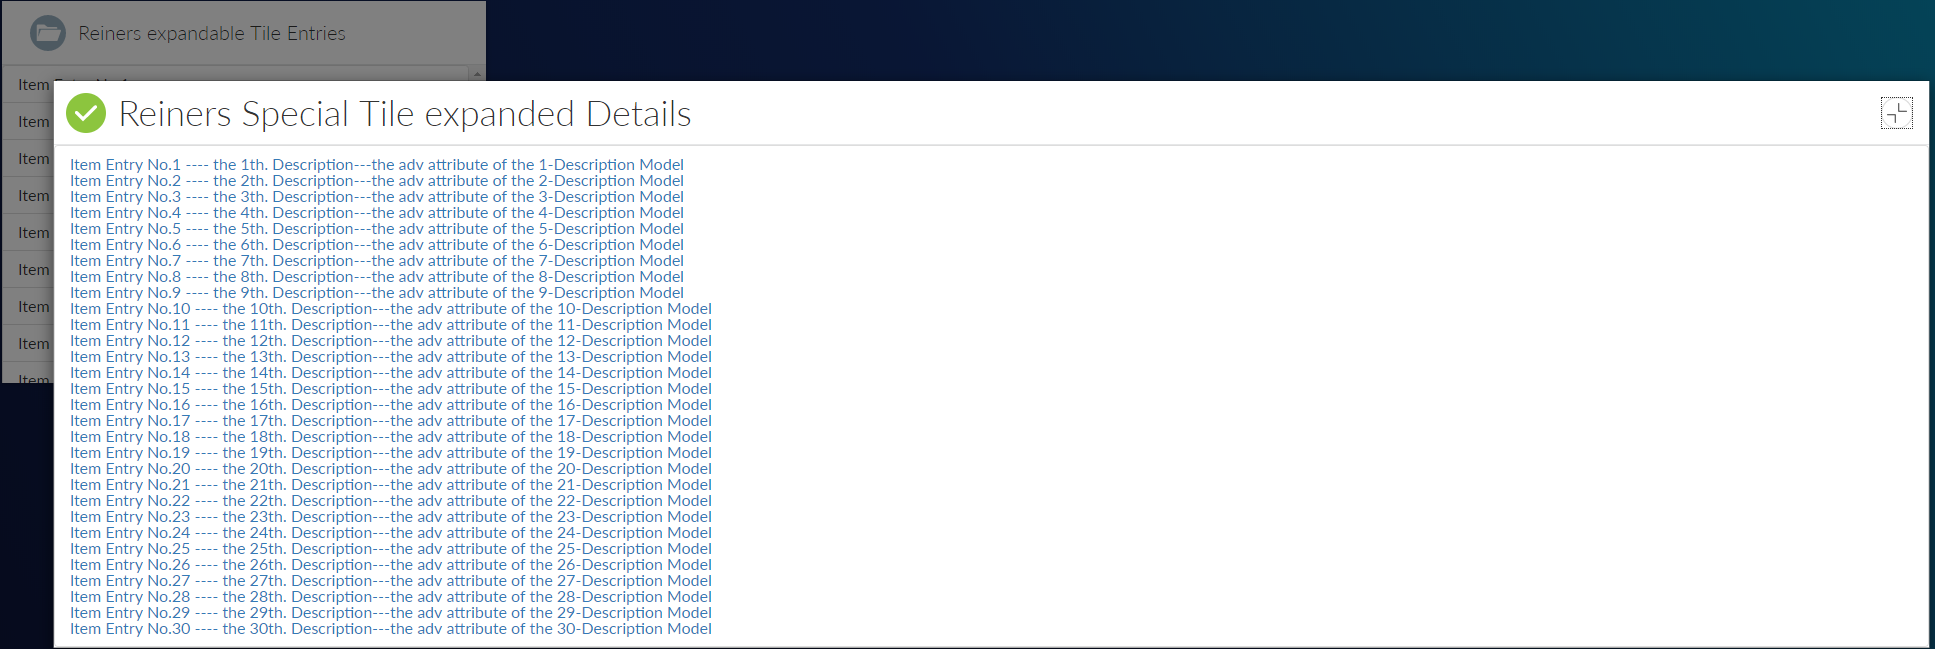
The serialize function is used to make the collection renderable with handlebars.js. This and item-template1 will render to this expanded view:
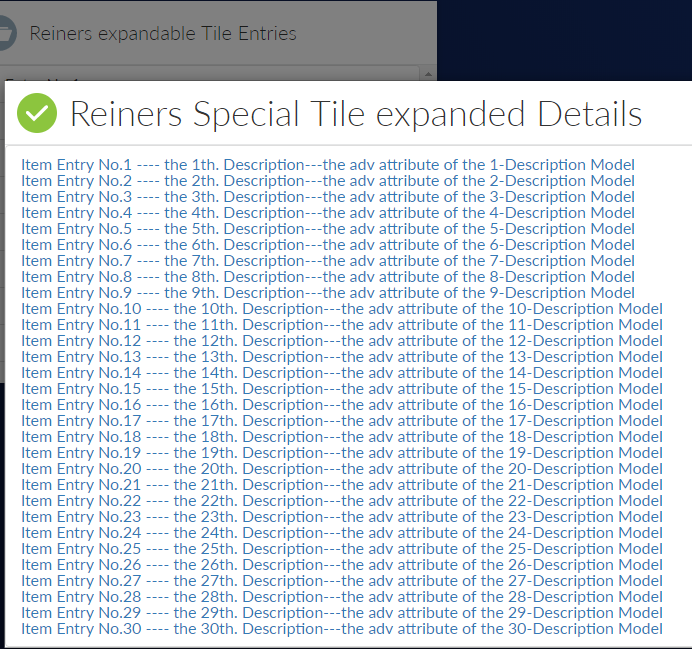
We also need one base view, referencing our two views, one as contentview and one as expandedView. We add the Behavior Expanding with the options with our collection set. And of course, with several title and icon options set.
     ListTileView = TileView.extend({
              icon: 'header-openfolder',
              title: 'Reiners expandable Tile Entries',
              contentView: ListView,
              contentViewOptions: function () {
                  return {
                      collection: this.items
                  };
              },
              childEvents: {
                  'click .items': 'onClickItem'
              },
              onClickItem: function (target) {
                  this.trigger('click:item');
                  this.triggerMethod('execute:defaultAction', target.model);
                  alert("Clicked on item '" + target.model.attributes.name + "'");
              },
              behaviors: {

                  Expanding: {
                      behaviorClass: ExpandingBehavior,
                      expandedView: ListFieldItemView,
                      expandedViewOptions: function () {
                          return {
                              collection: this.contentView.collection
                          };
                      },
                      titleBarIcon: 'title-assignments',
                      dialogTitle: 'Reiners Special Tile expanded Details',
                      expandIconTitle: 'Reiners Expand Button',
                      dialogTitleIconRight: "icon-tileCollapse"
                  }
              },
              constructor: function (options) {
                  ListTileView.__super__.constructor.apply(this, arguments);
                  this.items = new ItemCollection(undefined, {
                          top: 30
                      });
                     // options.items = this.items;
              },
              onShow: function () {
                  this.items.fetch();
              }
          });
Initialize it and show it at the el #tile. Then you are done
      var
      // Create instances of the views to show on the page
      tileView = new ListTileView(),

      // Create helpers to show the views on the page

      tileRegion = new Marionette.Region({
              el: "#tile"
          });

      tileRegion.show(tileView);
Easy, isn’t it?
The complete html file containing the javascript demo code can be downloaded here
Lets discuss the strategies on how to “widgedize” an existing legacy GUI based module to support smartUI.
As we are discussing smartUI, we do only discuss the client side, the things to do on the server side are only drawn.
Ok, let’s start:
To keep the example easy, we use the Barcode Module, which is part of the core Content Server and is providing a very easy service.
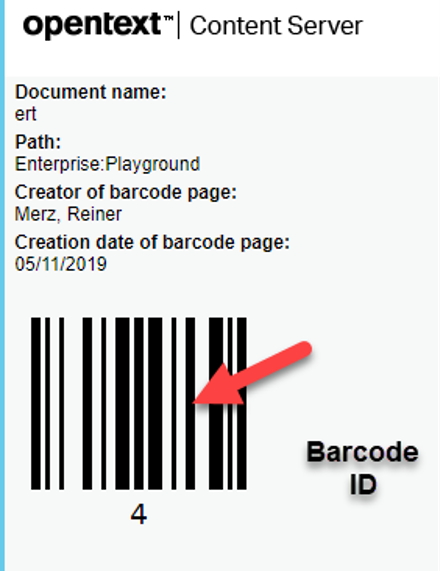
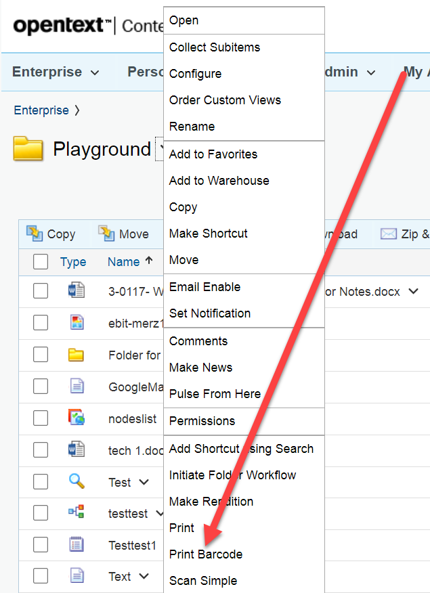
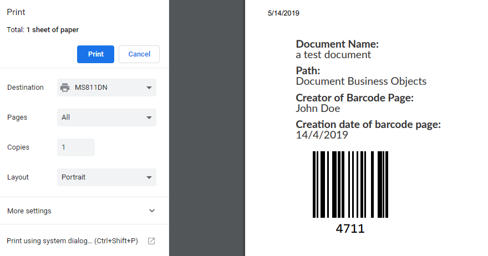
This gives a Barcode ID, the Document Name and the Content Server Path. This sheet can be prited and scanned using Enterprise Scan. Then the next scanned document will be stored in the Content Server with that name and that path.
First, we have to do some investigations.

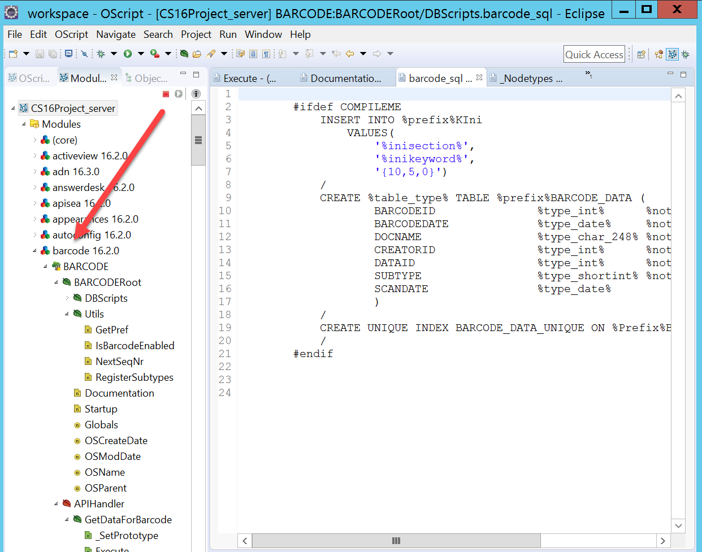
Obviously the module uses a table with this format
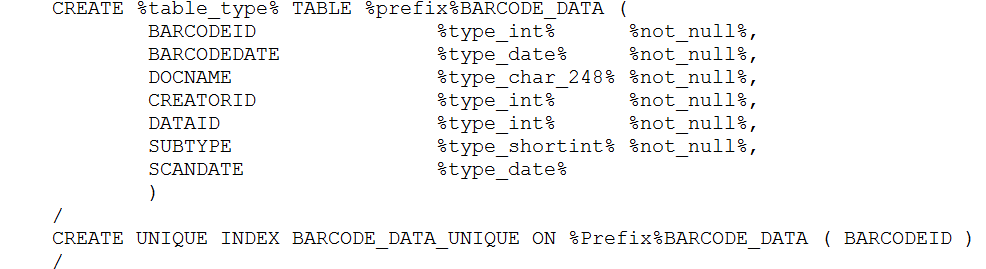
With a unique index on the barcodeid. This is the number which is printed as barcode.
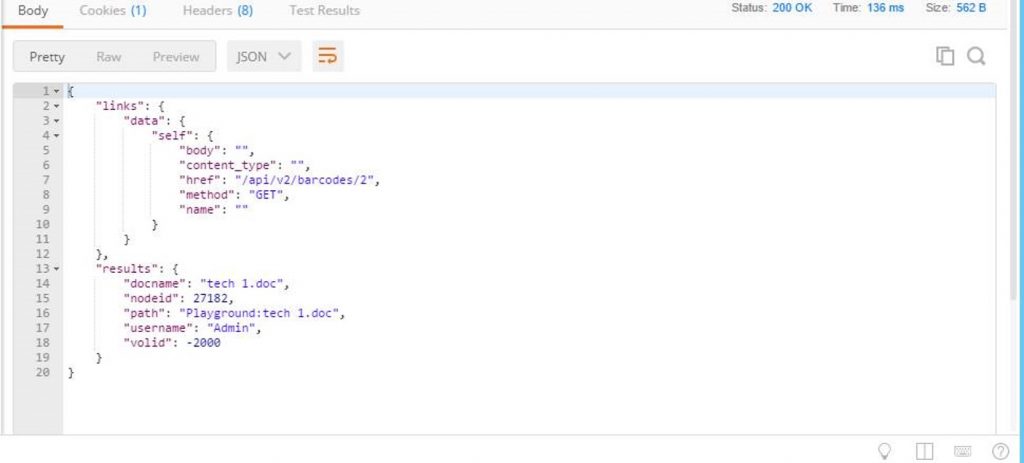
There is also one REST command existing. This REST command /api/v2/barcodes/{barcodeid} is obviously used by the Enterprise Scan to store the doc in the Content Server. It gives this JSON answers:
Client Side Development


Next, you can add a „Process Barcode“ button, because everything is gathered. The User Name is in the Context, the Date is today. Process Barcode should (not part of this exercise) report the next sequence number from the table, store all data in the table and render

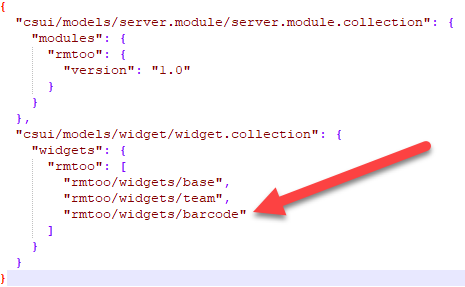
The complete widget would look like
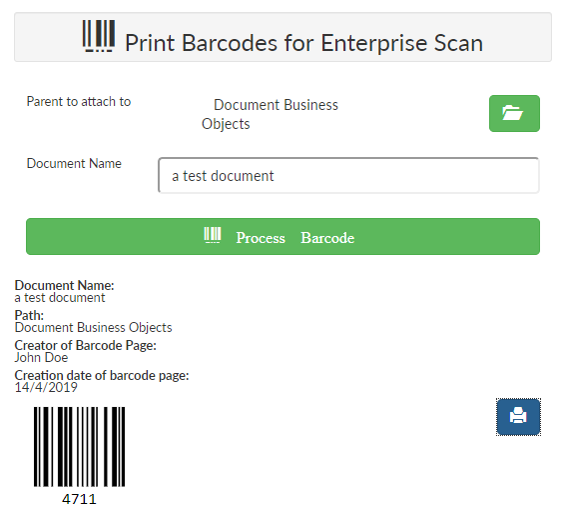
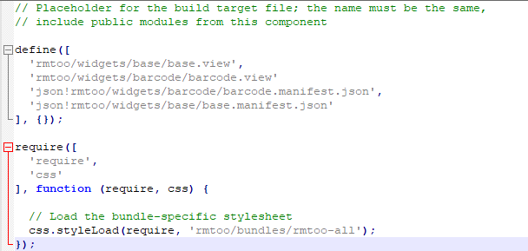
And you have added smartUI support to the barcode module and any Enterprise Scan workflows.
Easy, isn’t it?
•The simplest context in smartUI is the Page Context, which can include and fetch models and collections, but does not provide any other functionality. If you use it with widgets, which expect changes based on their context-changing models, you will have to handle these changes yourself.
You can use the page context like this
 require(['csui/lib/jquery', '../page.context', 'csui/utils/contexts/factories/connector',
       'csui/utils/contexts/factories/user', './page.context.mock'
     ], function ($, PageContext, ConnectorFactory, UserModelFactory, PageContextMock) {
       var contentElement = $('body'),
           context = new PageContext(),
           connector = context.getObject(ConnectorFactory),
           currentUser = context.getModel(UserModelFactory);
       $('<p>')
           .text('Connected to the server ' + connector.connection.url)
           .appendTo(contentElement);

       PageContextMock.enable();
       context.fetch()
           .done(function () {
             $('<p>')
                 .text('Current user is ' + currentUser.get('name'))
                 .appendTo(contentElement);
           });
     });
This results in

This is a control in smartUI. Basic infos are:
This control uses the command:
–lib\src\csui\utils\commands\zipanddownload.js
Requires:
“module”, “require”, “csui/lib/underscore”, “csui/lib/jquery”, “i18n!csui/utils/commands/nls/localized.strings”, “csui/utils/command.error”, “csui/utils/commandhelper”, “csui/models/command”, ” csui/utils/url ”
Triggered, when more than 1 file is selected. Action.ID = “zipanddownload«
Uses ‘csui/controls/globalmessage/globalmessage’, “csui/models/zipanddownload/zipanddownload.preflight”, “csui/models/zipanddownload/zipanddownload.stages”, “csui/dialogs/modal.alert/modal.alert” in local require.
Uses REST Calls. To use the command, these REST calls must exist on the Content Server side.
Simply put the command in a place where your menu options are. Typically in a toolbar config like
/* Example where to put the command
define([

        'module',

        "csui/controls/toolbar/toolitem.model",

        'csui/controls/toolbar/toolitems.factory',

        'i18n!conws/utils/commands/nls/commands.lang'

    ], function (module, ToolItemModel, ToolItemsFactory, lang) {
var toolbarItems = {
    otherToolbar: new ToolItemsFactory({

        first: [{
                signature: "AddParticipant",
                name: lang.CommandNameAddParticipant,
                icon: "binf-glyphicon binf-glyphicon-plus"
            },
            {
                signature: "YourCommand",
                name: "YourCommandname",
                icon: "Your Binf-Glyphicon"
            },
            {
                signature: "PrintParticipants",
                name: lang.CommandNamePrintParticipants,
                icon: "binf-glyphicon binf-glyphicon-print"
            }, {
                signature: "ExportParticipants",
                name: lang.CommandNameExportParticipants,
                icon: "binf-glyphicon binf-glyphicon-download"
            }, {
                signature: "ShowRoles",
                name: lang.CommandNameShowRoles
            }, {
                signature: "RemoveParticipant",
                name: lang.CommandNameRemoveParticipant
            }

        ],
        second: [
        ],
        third: [
        ]
    }, {
        maxItemsShown: 99,
        dropDownIcon: "icon icon-toolbar-more"
    })

};

return toolbarItems;
});
Zip&Download has arrived in smartUI. Finally.

Open up a nodelist and you’ll see the new Download command.
How to use it?

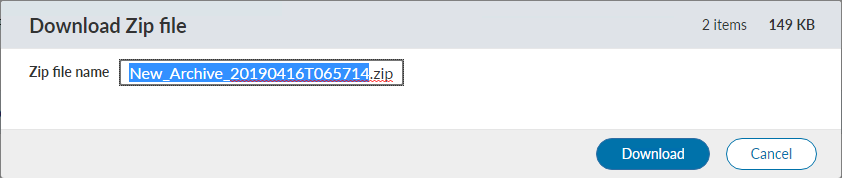
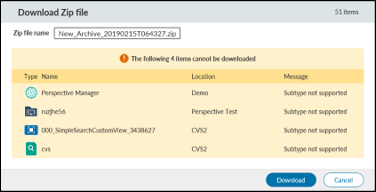
Then you get the summary of all files contained in this ZIP Archive
Click on Download and this archive will be downloaded to your machine.
Have you seen the new permissions explorer in smartUI? Open up the permissions on an object and you’ll see the new selection.
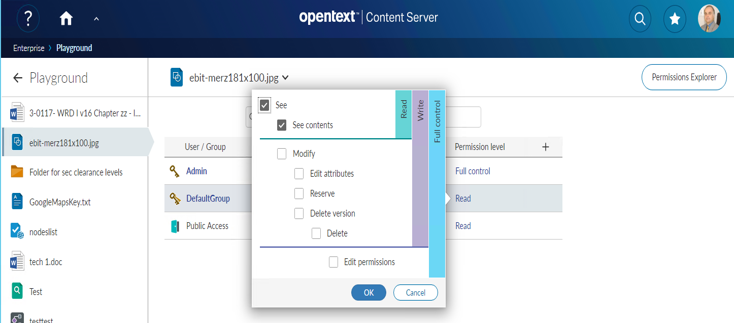
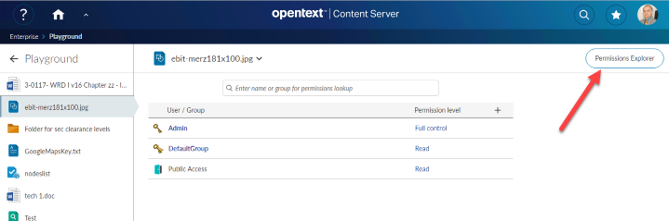
The permissions explorer is opened with a click on the “Permissions Explorer” Button on the upper right.
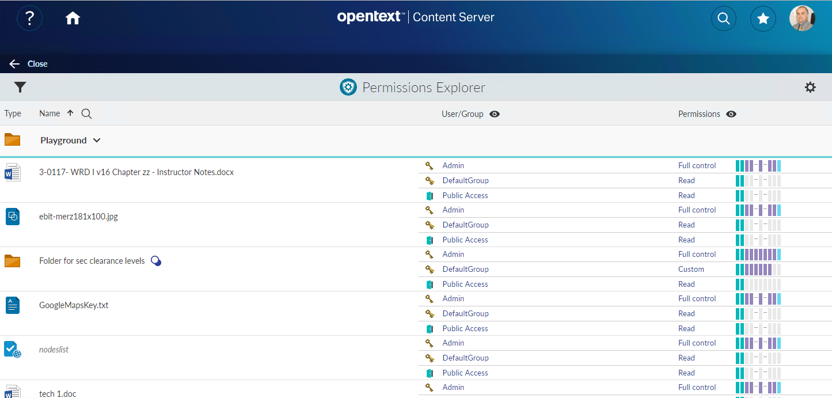
This will give you the option to edit all permissions of the objects in this folder at once.
Have you seen the new smartUI thumbnail mode? You can switch the normal nodelist to the thumbnail mode quite easy by clicking on the list/images icon in the upper right. Another click switches the display back to the list mode.
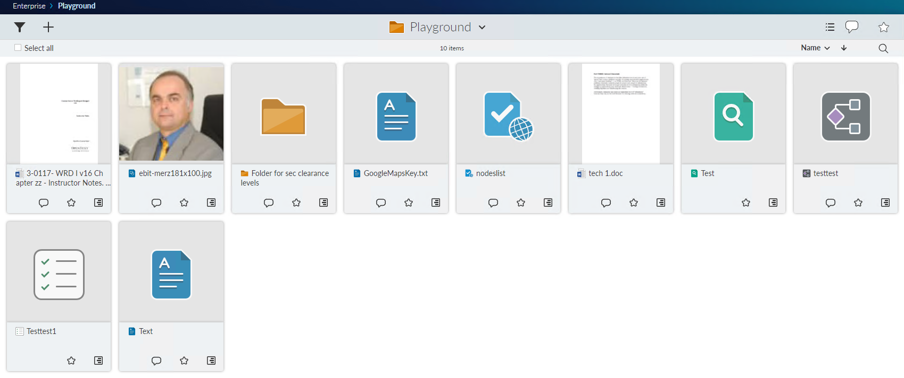
And, thumbnail mode does have also commands available