Day 1 (10:00-17:00)
Chapter 1
Agenda. A
short introduction to this agenda
Chapter 2 The different
GUIs.
The new smart GUI. How smartUI works. Setting up landing pages with the new GUI. Using Perspectives and build them with the Perspective Manager. Use Webreports to build custom widgets. The new perspective element and the difference 20.2 to previous versions.
Using
widgets on another portal w/o content server.
Exercises:
- Build a custom perspective
- Build a custom widget based on a web report
Content:
- Chapter 2.1: The different UI Possibilities
- Examples: Connected Workspaces
- Examples: Documentum D2 Smart View
- The Big Picture. See the GUI components in the Content Server Environment
- Functional Components of the smartUI SDK
- Chapter 2.2: smartUI Overview
- Chapter 2.3: Diving deeper in the smartUI
- Role-Based Content Server Pages
- Chapter 2.4: Perspectives Overview
- Scenario: Creating a new Perspective
- Chapter 2.6: The Perspective Manager
- Rules for Role-Based Perspectives
- Chapter 2.6: The Toolbox. An overview of the visual components in the SDK. The usage will be discussed later in the SDK
Day 2 (9:00-17:00)
Chapter 3 REST
REST. What
is REST? Overview of REST Services
Chapter 3.1 REST.
Consuming REST Services with Postman.
- Using REST Services.
- Test
a REST Operation in Postman
- Filtering
and Expanding Data in the request
Exercises:
- Use
POSTMAN to get used to REST, Authenticate in REST
- Try
several REST commands and get an overview over the various options
- Build
a REST based html page, which queries a node
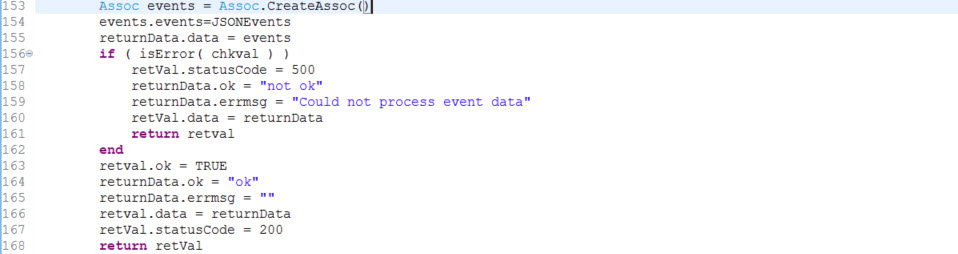
Chapter 3.2 Extending REST
Services.
How to
build a new REST Service in OSCRIPT.
Exercises:
- Build
a custom REST Service in a new Content Server Module. Later in Chapter 10, this
REST Service will be modified and be the server-side base of our first widget
Content:
- Handling Requests with REST API
- RESTful object
- Create a module for REST extension
- REST API module in Content Server 20.x
- Resources, actions and prototypes
- Adding parameters to the prototype
- Test a new REST resource
- Tips and Tricks for REST Services with smartUI
- Table Query inside a REST Service
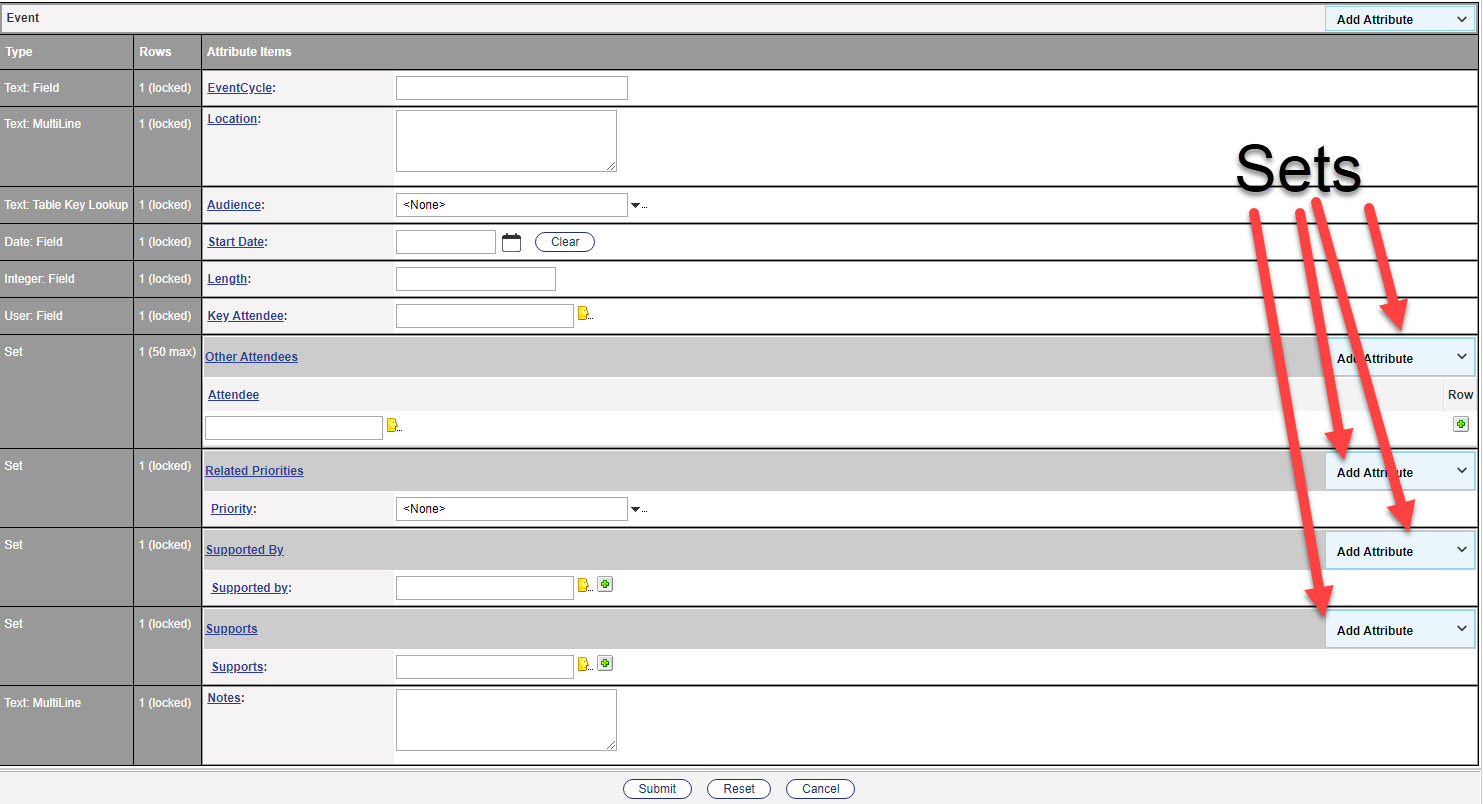
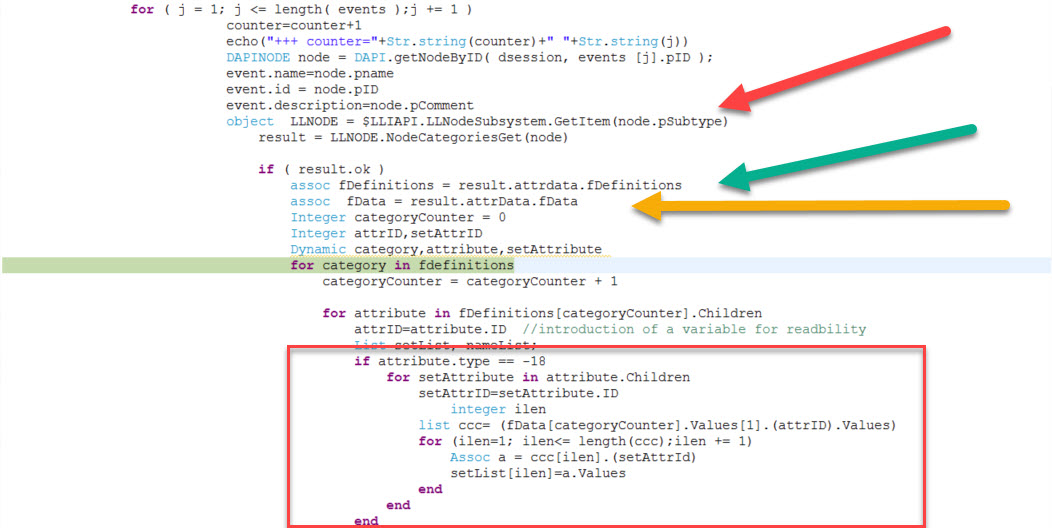
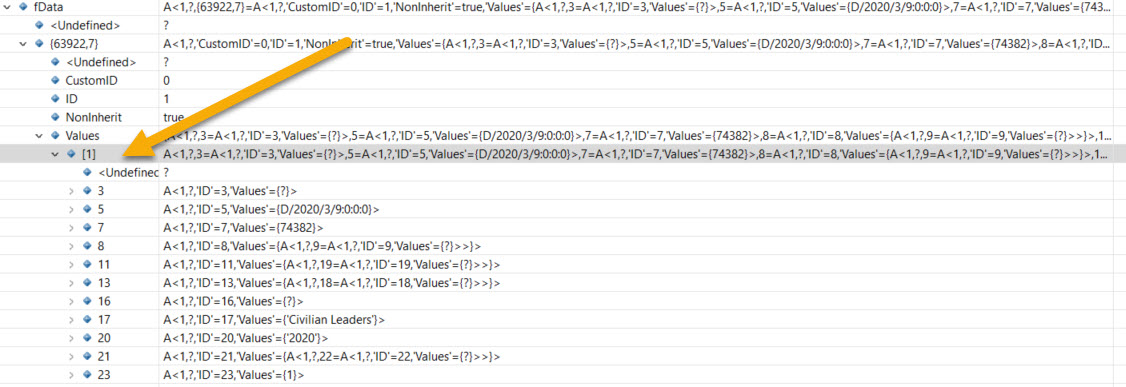
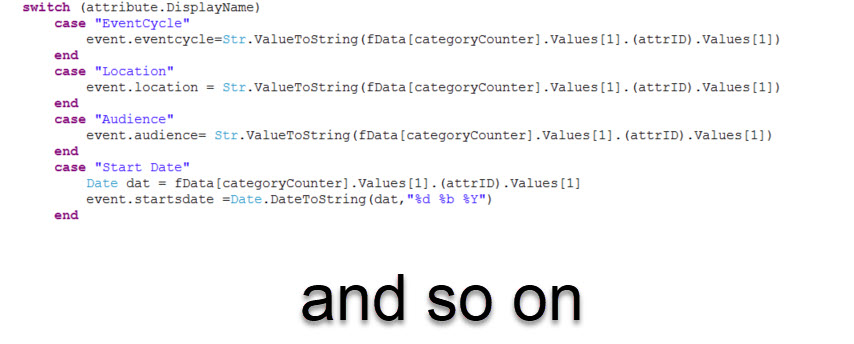
- Getting nodes with complex categories
- Handling complex Categories
Chapter 4 A very short
intro to JavaScript Patterns.
That’s what
any developer of the SDK sees inside the SDK. A short tour through the
JavaScript patterns required to understand the SDK and the underlying
frameworks. This is based on Stefanov “JavaScript Patterns” O’Reilly,
ISBN 978-0-596-80675-0, which is very recommended. Some new Aspects of ECMA6, Promises,
Deferrals are also discussed
Content:
- Introduction
and References
- ECMAScript
Versions
- Chapter
4.1 The Patterns
- Immediate
Object Initialization
- Function
Properties—A Memorization Pattern
- Function
Application (also with smartUI examples)
- Schönfinkelizing or currying a function
- Mix-In
Inheritance copy all properties to a child
- Chapter
4.2: Object Creation Patterns
- Chapter
4.3: Sugar methods
- Chapter
4.4: Object Design Patterns
- Object
Decorators (used quite often in the smartUI SDK)
- Chapter
4.5: DOM and Browser Patterns
- Web Workers (only in recent browsers) long running
scripts
Day 3 (9.00-17:00)
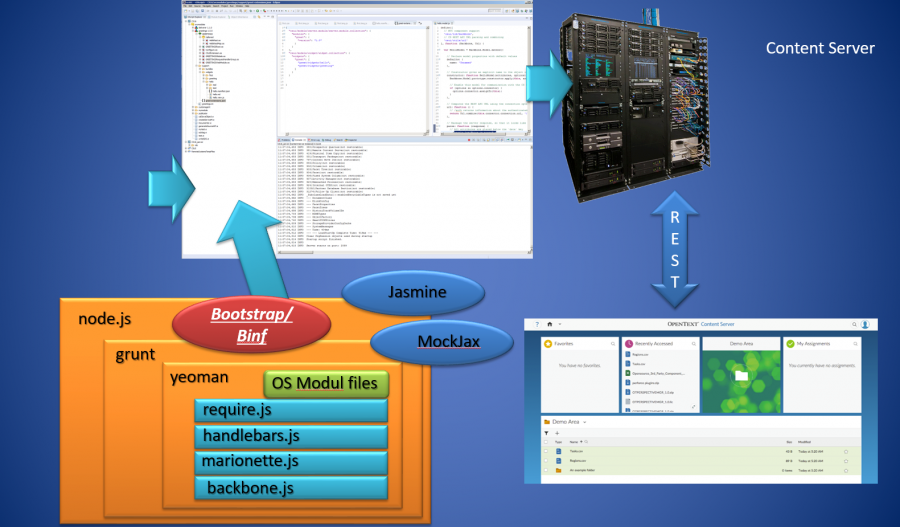
SDK
Infrastructure Intro
Chapter 5 SDK
Infrastructure Intro
Introduction to Infrastructure
needed for the SDK. All components and frameworks will be introduced. Introduction
to Backbone with a Tutorial, Marionette as the extension of Backbone is also
covered by a tutorial.
Exercises:
- Backbone
Tutorial. Building a browser-based TODO List
- Marionette
Tutorial. Extending the TODO List with Marionette
Content:
- Chapter
5.1: Bootstrap
- A
CSS and JS framework as the base of smartUI
- Chapter
5.2: Node.JS
- Chapter
5.3: Require.js
- Chapter
5.4: Backbone.js
- A
simple Backbone Tutorial
- Chapter
5.5: Marionette.js
- Marionette
Views – Layouts
- Marionette
Views – Regions
- Tutorial:
A simple Backbone-Marionette App
- Python
based client for mozilla-marionette
- Chapter
5.6: Handlebars.js (Overview, more in depth in the advanced training)
- A
html template framework
- Chapter
5.7: Yeoman
- Chapter
5.8 Grunt.js
- Some
examples of GRUNT tasks
- CSUI
sdk custom grunt tasks
-
Chapter 5.9
Additional Libraries. Here the libraries are quickly discussed. For a more in-depth
discussion, please refer to the Advanced Workshop.
- Short
Overview of D3, the interactive SVG Graphics package inside the SDK
- Short
Overview of Alpaca, the forms package inside der SDK
- Alpaca Support in the Content Server
- Chapter
5.10 Additional Infrastructure
- CORS
– Cross Origin Resource Sharing Chrome Plugin
Day 4 (9:00-17:00)
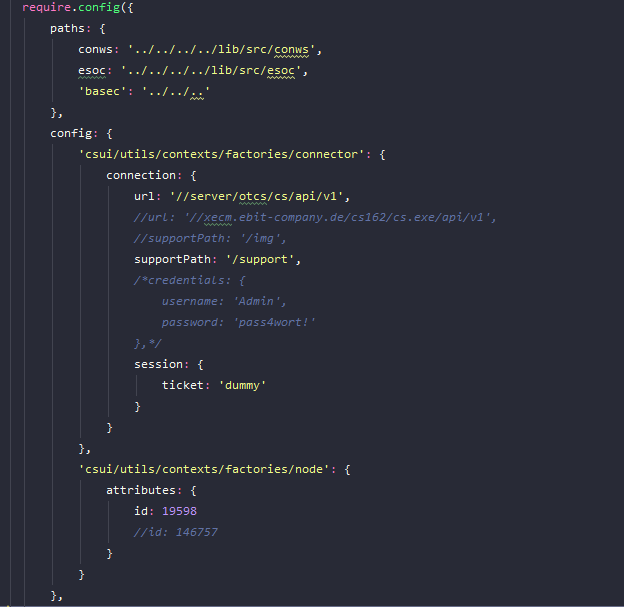
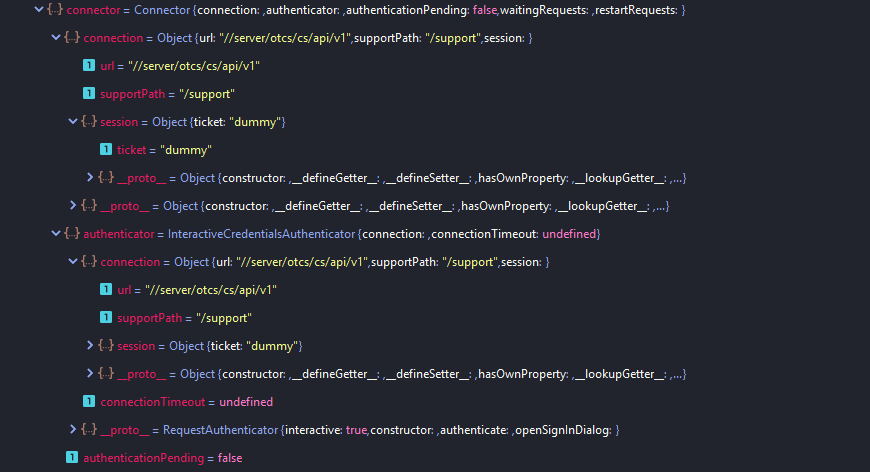
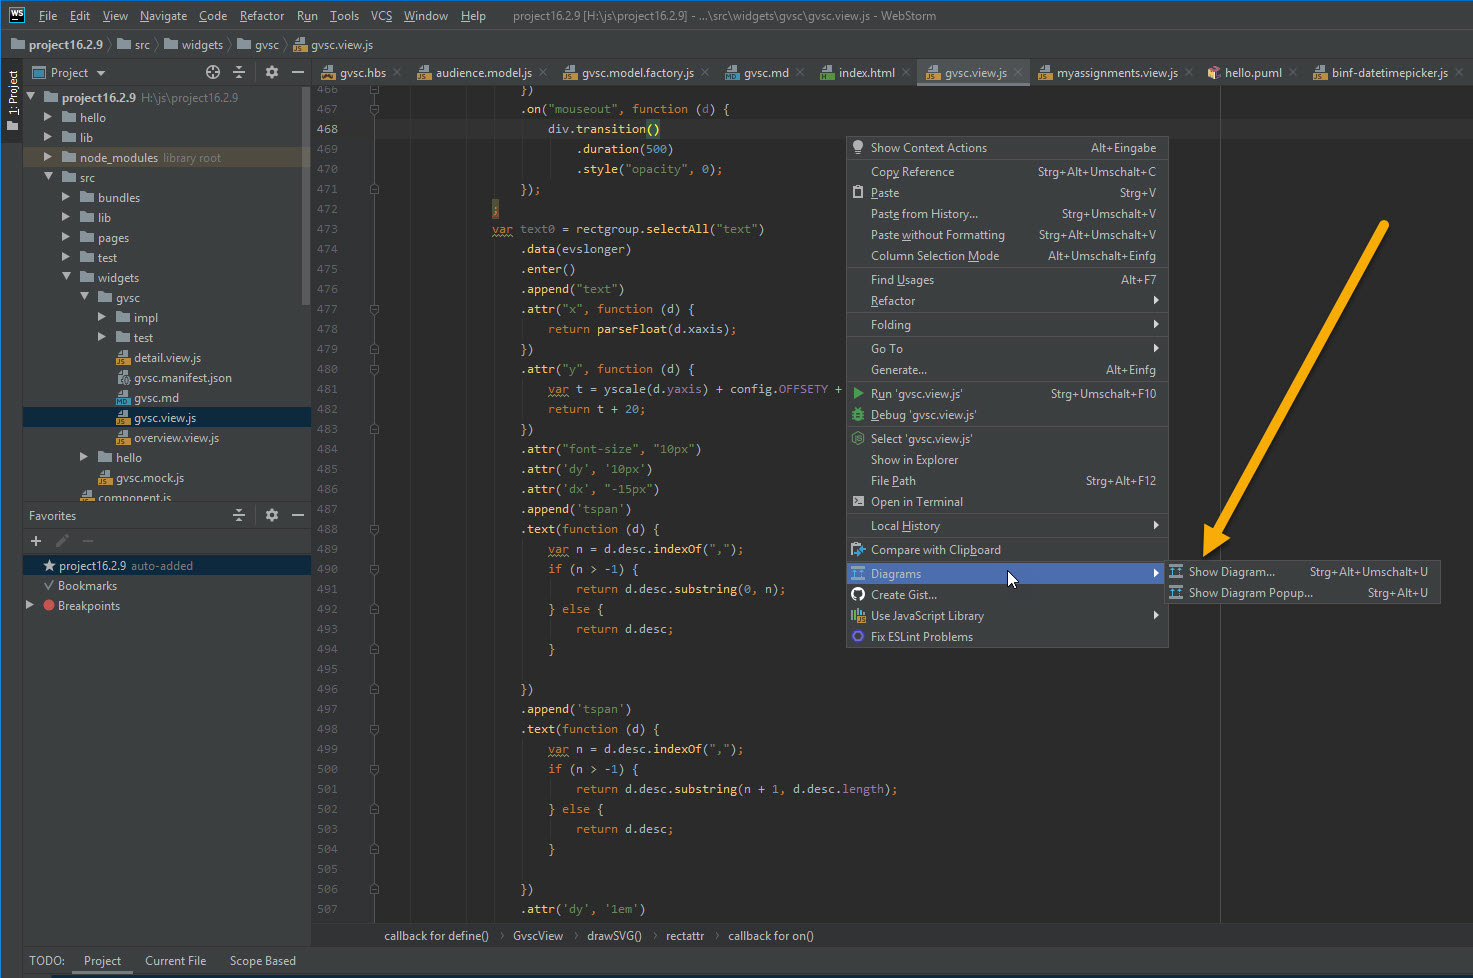
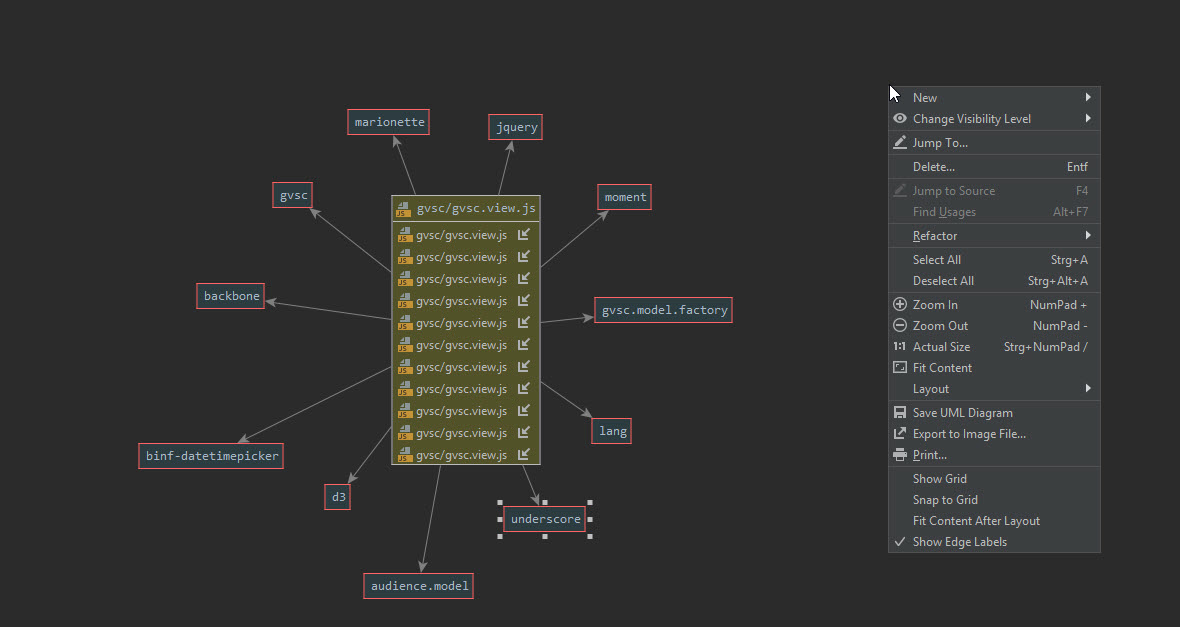
Chapter 6 smartUI Intro
BASIC
What is the
SDK, Prerequisites, documentation? Download and install the SDK. Examine the structure. Style Overrides, an
overview. We look at all framework homepages to find examples and
documentation. Using fiddler to examine underlying functionality. What’s
possible with the SDK. Discussion of how to add new node types, new commands.
Discussion of the controls and the widgets in the SDK (basic level).
Exercises:
- Find
the SDK and download the SDK
- Install
the SDK
- Build
a Project Directory
- Prepare
the Demo Widget “Hello”
- Install
this in the CSIDE Module from Chapter 4
- Test
this widget in the Perspective Manager
Content:
- 6.1 Introduction
- 6.2 Installing the SDK.
- 6.3 Building the Demo Widget
- 6.4 CSS Style Overrides Binf (OpenText Bootstrap Version)
- 6.5 General Overview
- Logging, Internationalization and Localization
- 6.6 Content of the SDK
- 6.7 Routing Preview (see adv. Training for a more detailed discussion)
- 6.8 New Command
- 6.9 Custom Column
- 6.10 Metadata
- 6.11 Define a new Nodetype
- 6.12 Create a Widget
- 6.13 Base Widgets. Detailed info’s on base widgets.
- Shortcut (depreciated in 16.2.10)
- Permissions and Permission Explorer
- 6.14 Controls and Contexts
- Controls
- Perspectives: Grid, Single, Left-Center-Right, Tabbed, Tabbed-Flow
- Integration Folder Browser
- Integration Target Picker
- 6.15 Models and Factories
Day 5 (9:00-16:00)
Rest of Chapter 6: SDK
The remaining parts of yesterdays SDK intoduction
Chapter 7 Mockup Data and Testing
MockJax is
used to mock up data (no need for a Content Server during development of a
widget) and the Jasmine Framework is used to for the testing of the widgets or
other JavaScript modules
Content:
- Mocking
Up Data
- MockJax
- Setup
and Usage
- Jasmine Usage
Chapter 8 The anatomy of
the example widget Hello.
A detailed
voyage in the source of the widget. (Explanation of all js files, the test
folder, css and language settings)
The Chapters 9-11 are exercises. Chapter 12 is a
Real-Life Demo/Exercise. Depending on the time left, these parts can be cut
down.
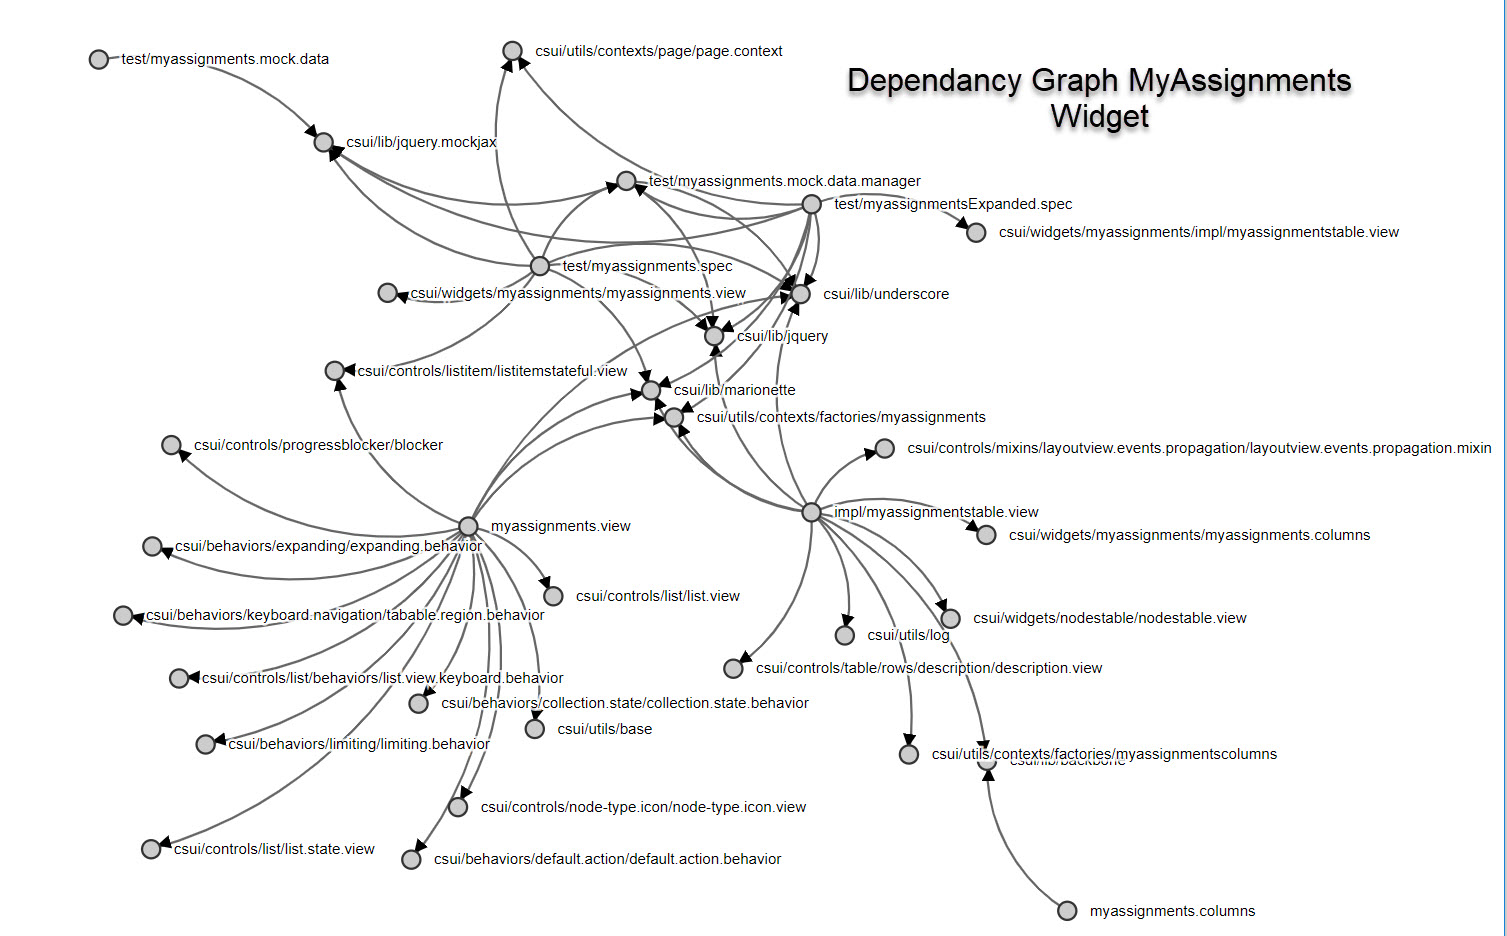
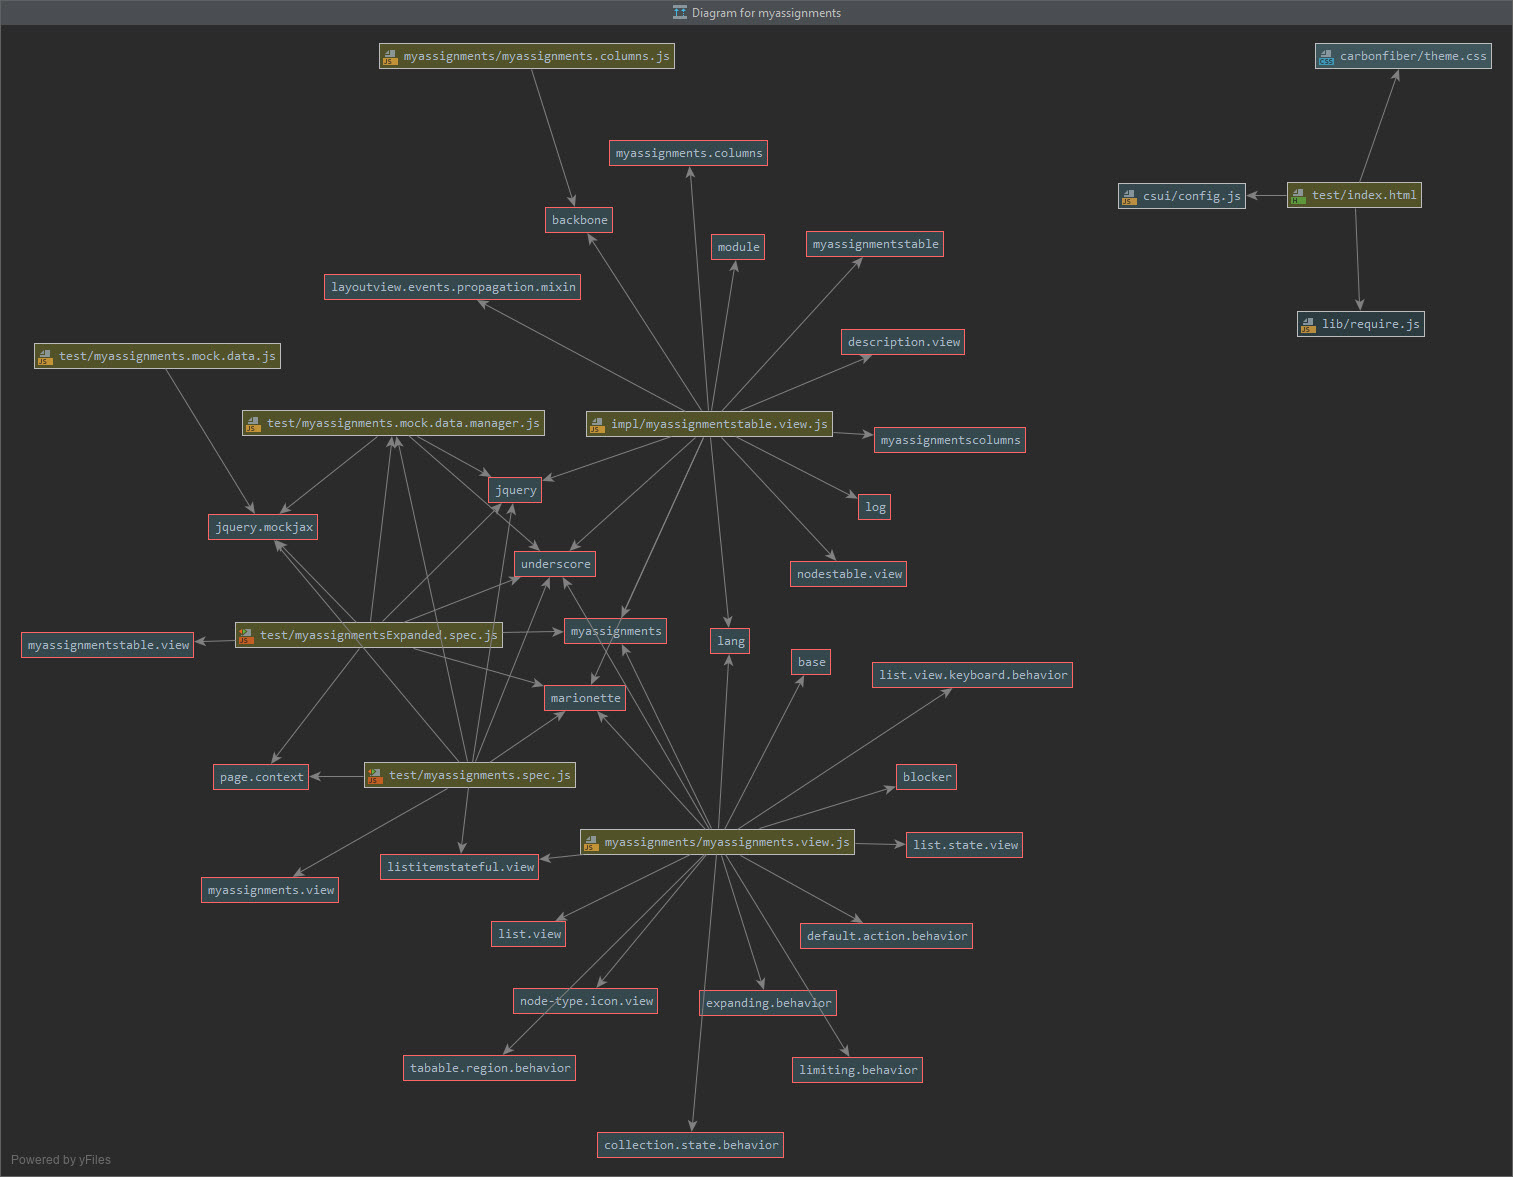
Chapter 9 The
anatomy of the myAssignment Widget.
A detailed
voyage in the source of the widget. (Explanation of all js files, the test
folder, css and language settings)
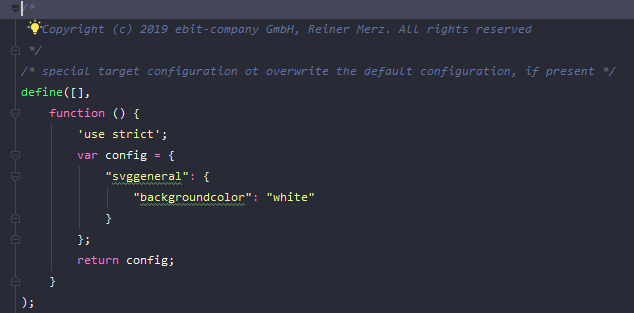
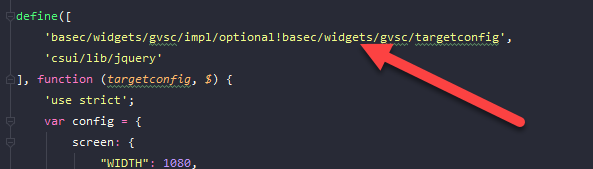
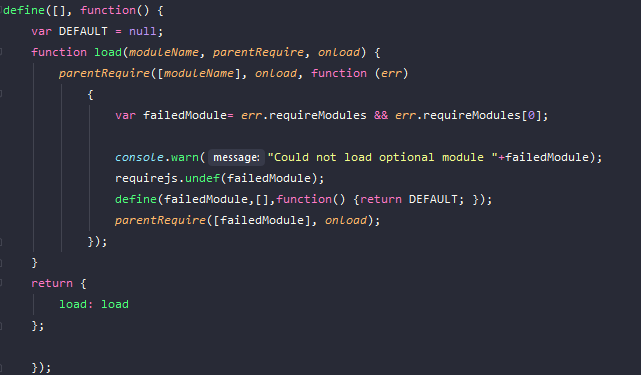
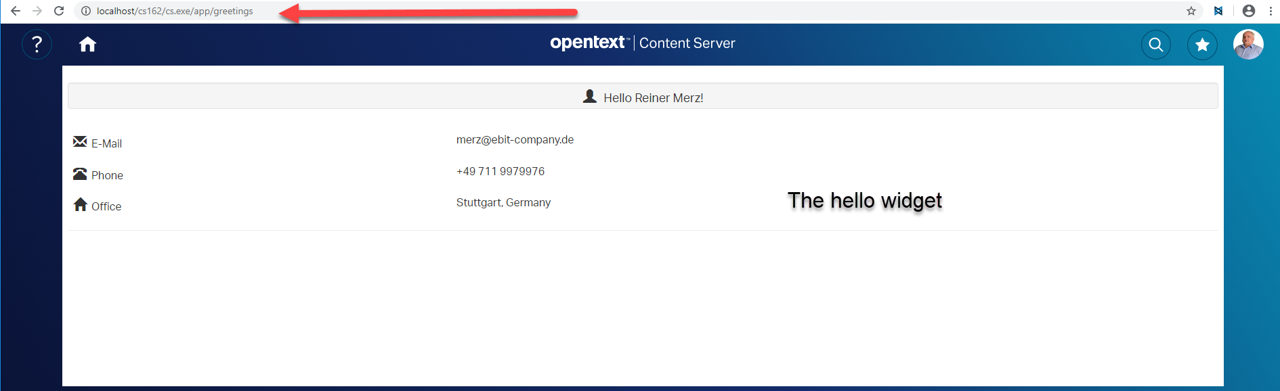
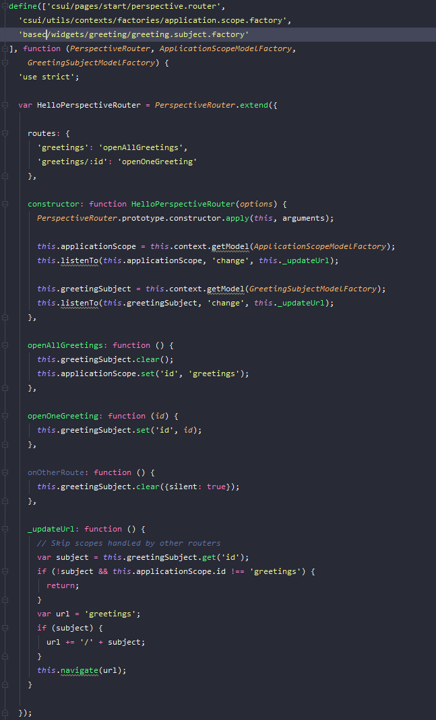
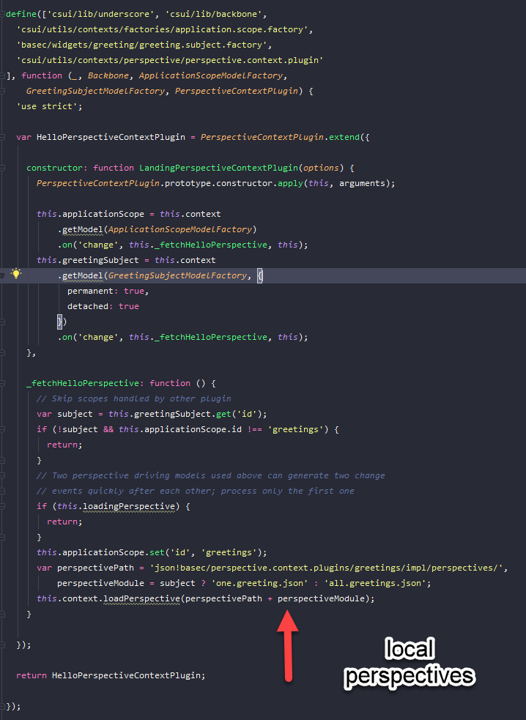
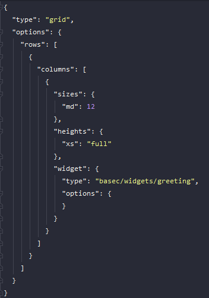
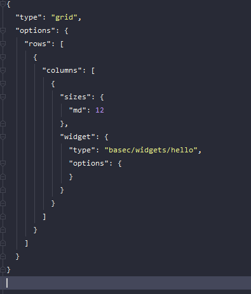
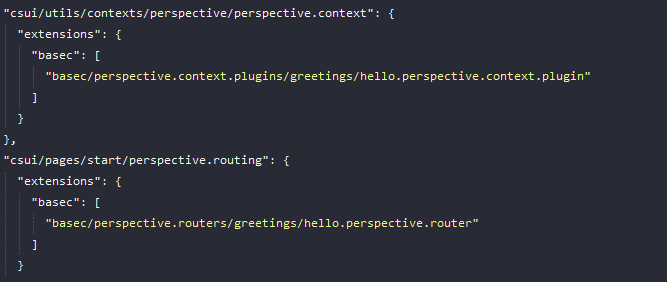
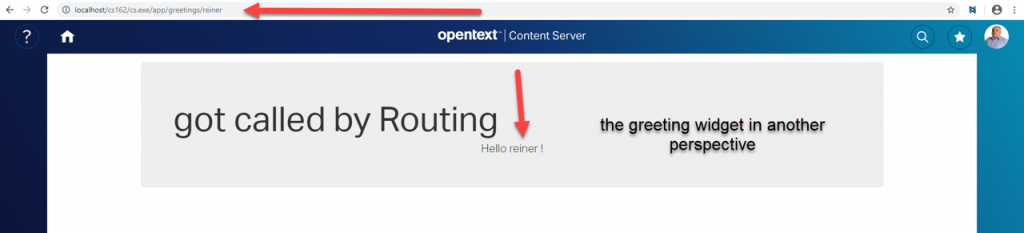
Chapter 10 Add another Widget to the one already loaded.
Recap the
complete workflow how to implement a widget from Unit7. Add the Greeting Widget
(another simple Widget from the samples) to the Greetings Widget.
Exercises:
- Add
the Greeting Widget to the Content Server
- Test
using the Perspective Manager
- Modify
the widget (by doing several things as implementing a control from the library)
Chapter 11: Build a custom
Widget (optional)
Our First Widget.
Use the
Hello Widget, modify it to call the REST Service we build in Unit 3.2. Modify
this REST Service to provide a better JSON Structure.
Exercises:
- Modify
the Hello-Widget. Add a model for our REST Service. Add a handlebar template to
output our greetings from the server. Add some css effects
Content:
- Subdirectory
Structure
- Some
Changes to our REST Service
- Files
to create
- Add
mockup support, once the answer is clear defined
- Test
with index.html
- Start
„npm start “the local server in the dev folder
- Compile
the new bundles file with
grunt
- Install
on Content-Server
- Open
the perspective manager
- Problem
with Chrome. Official Chrome BUG: (Issue 611328 https://bugs.chromium.org/p/chromium/issues/detail?id=611328)
Chapter 12: Strategies to “widgedize” an
existing legacy gui module and to add things to an existing module (optional)
The strange word “to widgedize”
stands for “Build a widget for a legacy module not already supporting widgets”.
The Strategies on amending a Module by adding a widget and on adding additional
functionality inside an existing widget are discussed. In the complete practical
workshop, these widgets are implemented also on the Server side, whereas here
no server implementations are made.
Content:
- Moving from a legacy gui module to a smartUI module
- Examine a legacy module and rebuild a smartUI widget
(here only on the client side)
- As an example, the barcode module
- Add a functionality in an existing widget
- Add an email functionality in the Connected
Workspaces Team Widget.
- Usable from inside the Widget
Handouts and Class
Material
A share
accessible for all attendees as source of this handouts is required.
Handouts
- Reiner’s
Cheat Sheet for CSUI Widgets
- Reiner’s
CSUI Workflow Cheat Sheet (advanced Session only)
- Backbone.js
Offline Manual (Offline Webpage)
- Bootstrap
4 Cheat Sheet (Offline Webpage)
- REST
Demo guides Memberinfo and Nodeinfo
- REST
Demo Guide Create a REST Service
Class
Material
- Backbone Tutorial TODO Application
- Marionette Tutorial TODO Application
- Our first homemade widget
- REST Exercises
- myfirstNode.js
- Material for Chapter 12 including the client side js apps
Training conditions
- The training is remote using Microsoft Teams in these Corona times.
- The training materials are in english, the trtaining lanbguage is english or german, depending on the geographical location.
- The customer needs to setup a stand alone training VM with a Content Server and Database. A copy of these machine must be provided as the Trainer Machine to us, on which the training is held.
New: We are offering custom widget development. Interested? Send an e-mail to merz at ebit-company.de stating the purpose of the widget and requesting a qoute