We just discussed a possible amendment in the OpenText smartUI Content Server Search Results. Whats about an addition of a thumbnail for each document found?
Tabular View with Thumbnails
It looks like this:

The wonderful World of Opentext Content Server
We just discussed a possible amendment in the OpenText smartUI Content Server Search Results. Whats about an addition of a thumbnail for each document found?
It looks like this:

Have you ever wondered about the yeoman and the genererator-csui-extension? And whats going up in the somewhat bumpy installation and generation of a project dir? This are the Yeoman & generator-csui-extension secrets.
First, recap the installation steps from scratch:
Ok, now the project folder project is operable. Lets take a close look on the generator.
(Remark: The versions mentioned are the working versions in my dev machines. Other, newer versions may work, but this is not guaranteed.)
When you do a npm link, a symbolic link is is build from the folder to [roaming dir]\npm\node_modules\generator-csui-extension.

So the extension folder is used as input for the yo execution.
Our Generator source folder looks like
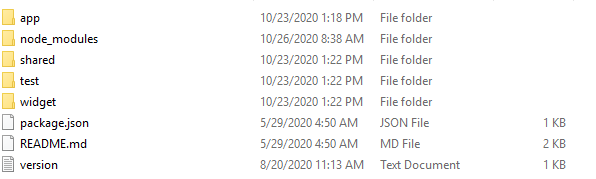
The app folder here is interesting

First lets take a look on the rest of the templates folder
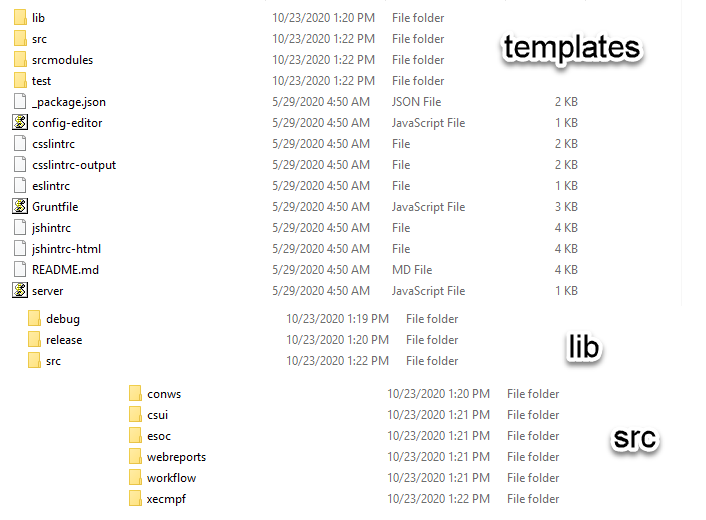
Here we see, we have the same structure as lib…. in the sdk. SO the complete SDK is copied fron the generator folder to the project dir unter lib. There is no need to use the sdk folder (except for docs and samples)
A closer look at index.js (Excerpt). This file is executed during “yo csui-extension”.

Here you see, the whole structure is copied directly from the templates folder to the destination project. All contents in this templates folder are later in the project folder.
A closer look at package.js
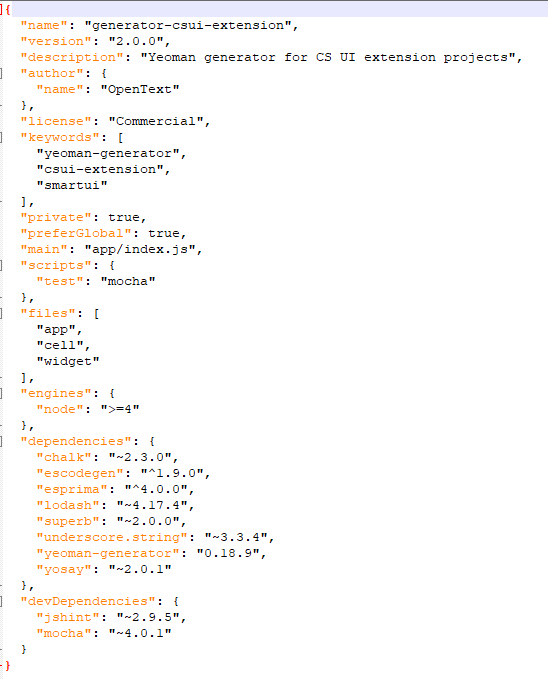
The package.json contains as always the definition of this generator extension like, name, description and depedencies of this extension.
Simply modify the generatot folder, add your customizations and modifications. You can save this folder as .zip to distribute internal standards.
Happy Customizing

A minor improvement in OpenText’s new Content Server 21.1 is the addition of a Search Box in the MyAssignments Widget in smartUI.
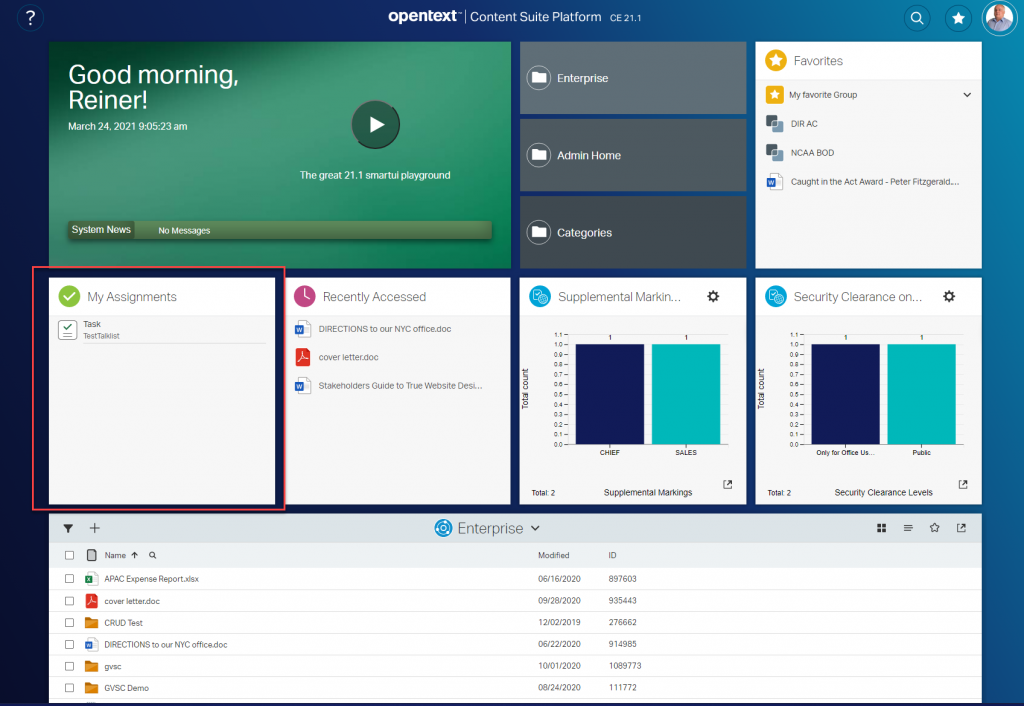
Here, the MyAssignments widget is marked. To marvel at the new Search Box, you need to expand the widget.

Then click on the loupe
Next, the Search Box is displayed.

Happy Searching

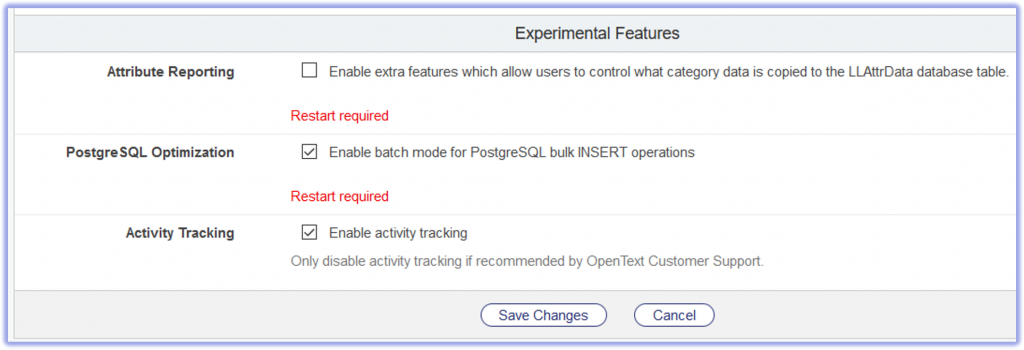
There is a new CAPI.ExecN command special for Postgres operations.
Oscript, the final frontier. We write the year 2021 and the OScript universe is going to expand. The newest member is CAPI.ExecN.
Bulk Postgres operations are slow. There is a new implementation of CAPI.ExecN, which fixes this. But there is no free beer in the universe. This new implementation exposes Postgres SQL weaknesses (throws SQL errors).
As for 21.1, this is an experimental feature. IN 21.2, it will be activated by default.
For all the explorers in the world, this feature has to be actiated manually in 21.1.
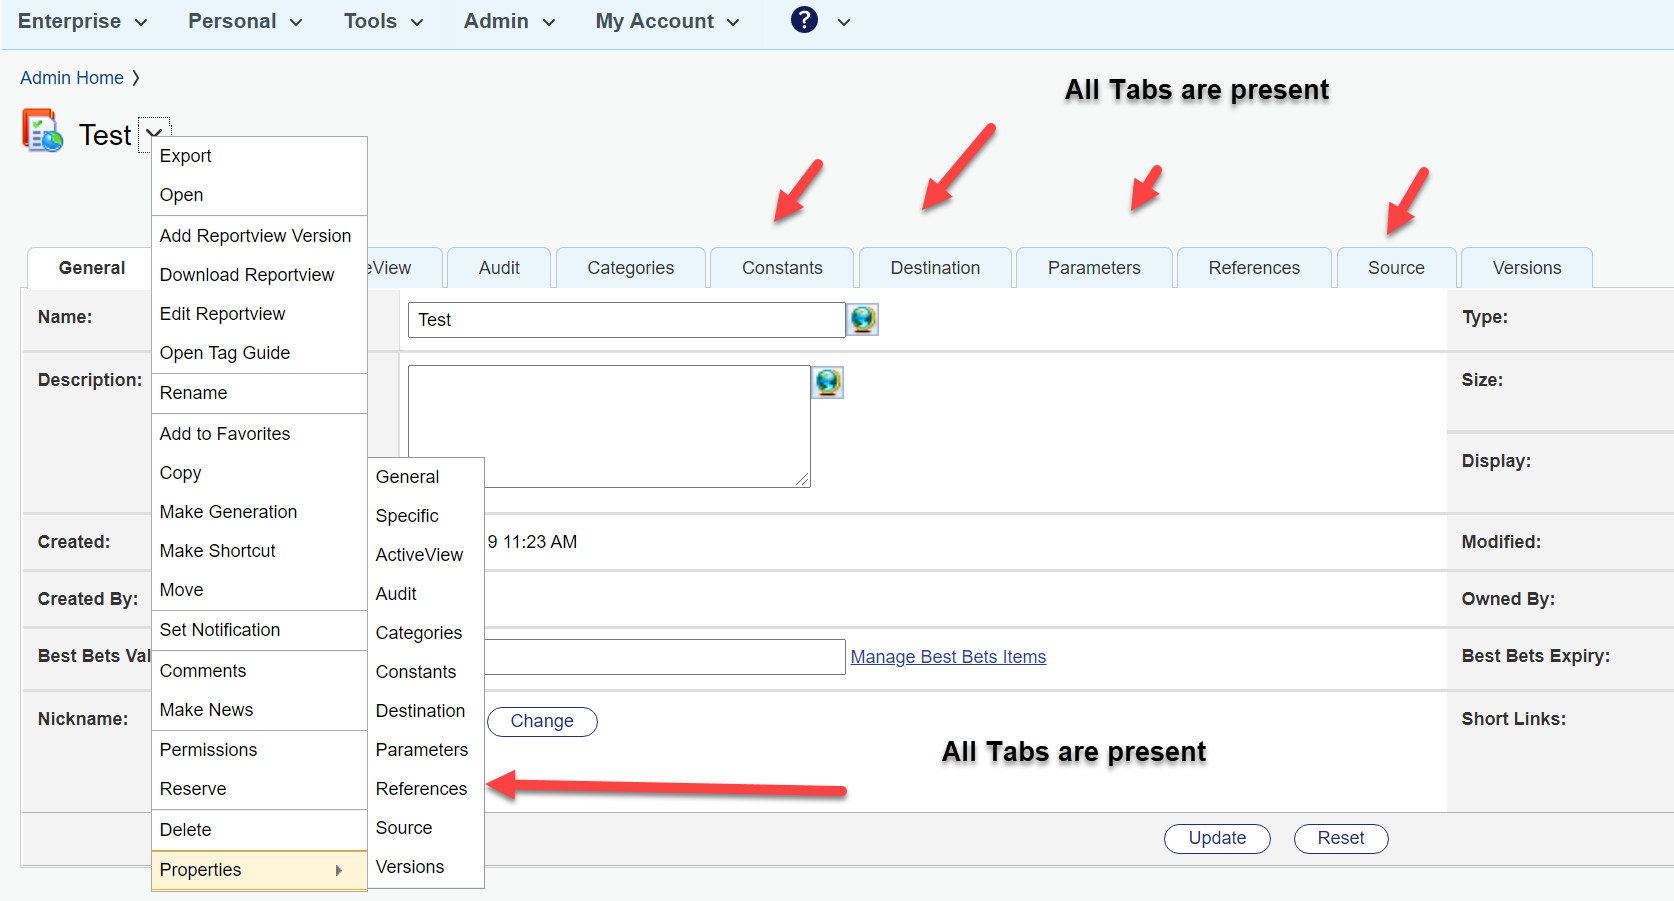
A short, but sometimes time consuming thing are the missing Webreport Tabs. Imagine, you have a Content Server with an jetty based internal Admin Server or an external Admin server on a fast machine.
Then, from time to time, you will see this on editing a webreport:
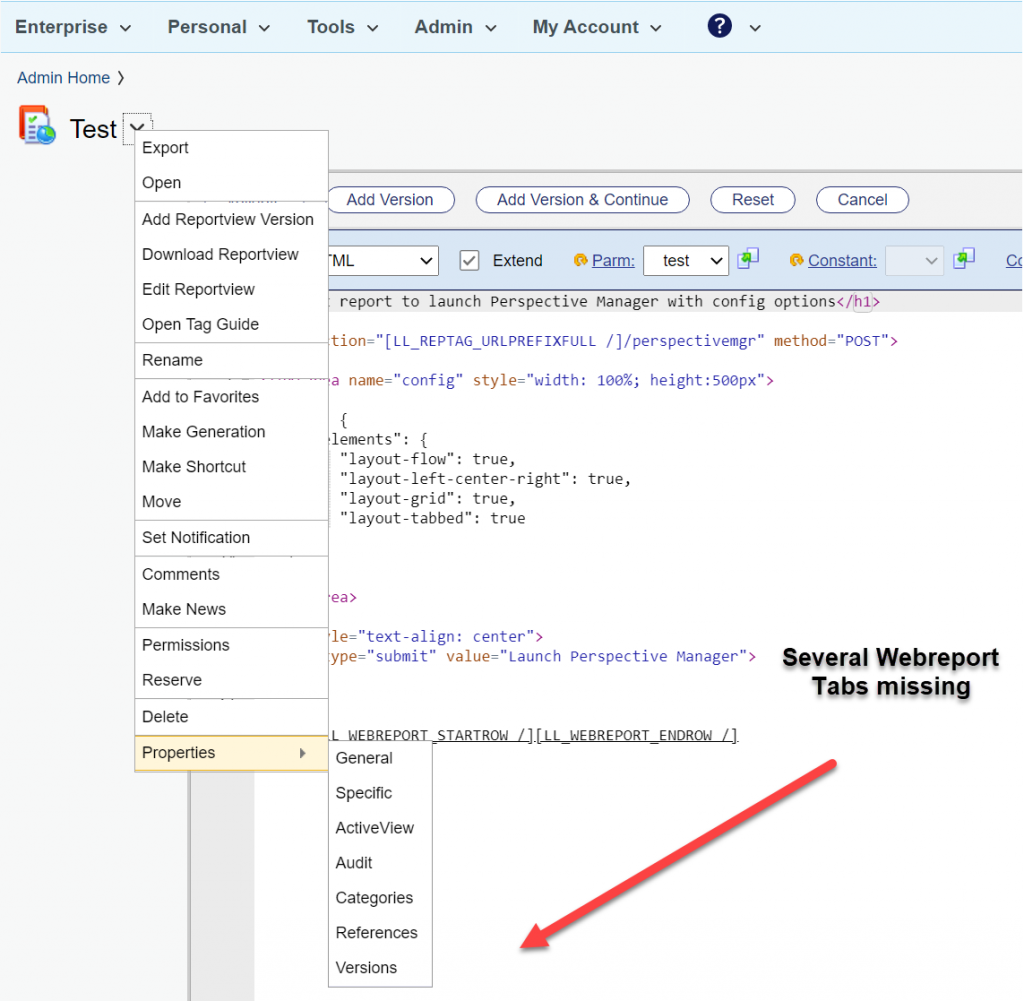
All Edit Tabs for the webreport are missing. Although you can start the missing functions within the URL, its annoying.
If this happens, use this Magic Trick N,12:
Simply stop Content Server and Admin Server. Start the Admin Server and wait at least 5 min before starting the Content Server.
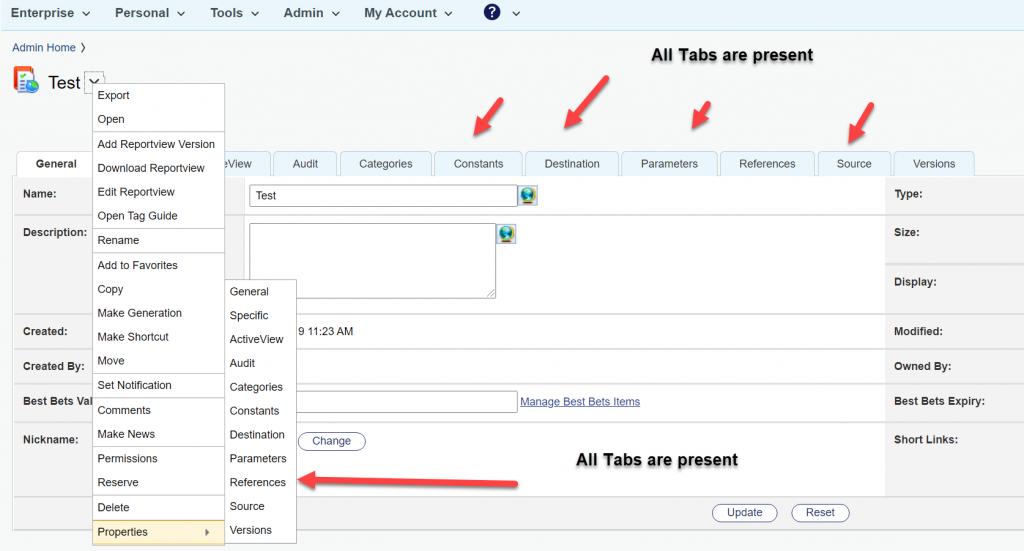
Then you’ll see everything is there.
Wow. You made it. You are a great wizard.
There is a timing problem in the Content/Admin Server. If the Content Server starts to fast, COntent Server thinks, there is no license for webreports at first. Later, it gets the license, but the GUI is drawn without the webreports tabs.
Wait for your Content Server to start up. Wait at least for 5 min. Then everything will be drawn in the GUI.
Happy webreporting.
The latest addition in OpenTexts Template technology are Folder-Templates.
Here is a couple of use cases:
Lets explain this in a step-by-step example:
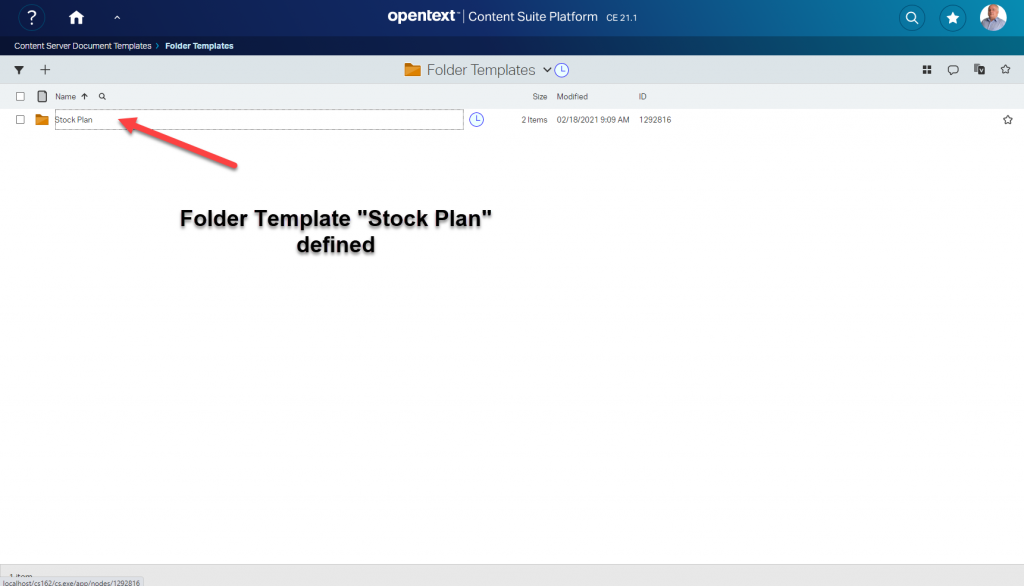
2. Create the folder structure as required.
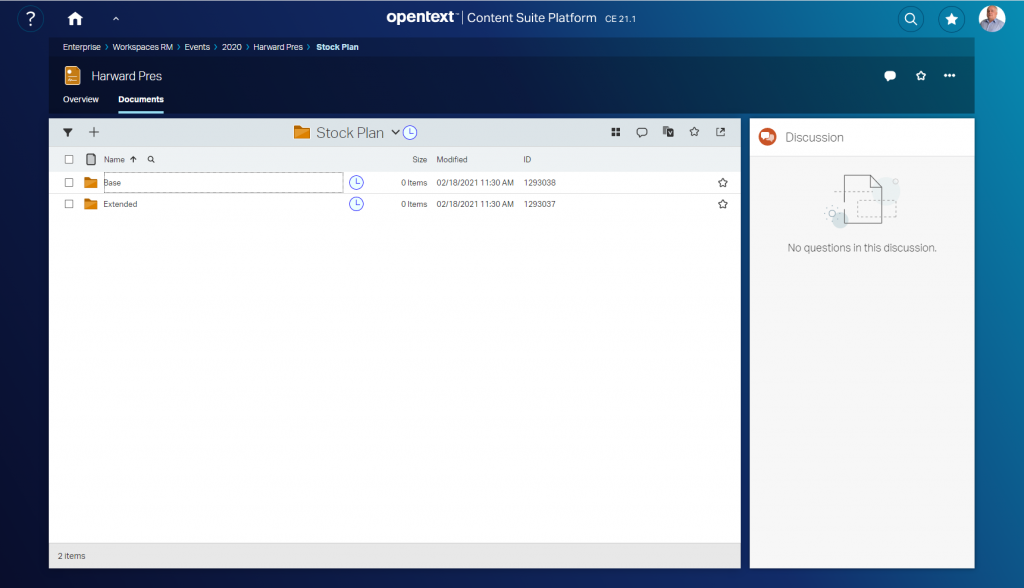
3. Add the folder structure at any connected workspace you like. Here a smartUI based workspace is displayed. At the “+”, you can add the Folder Structure “Stock Plan” by one simple click.

5. Then the folder structure is added. The clock icon is a smartUI indicator, that this structure is new. (See my posts on this topic)

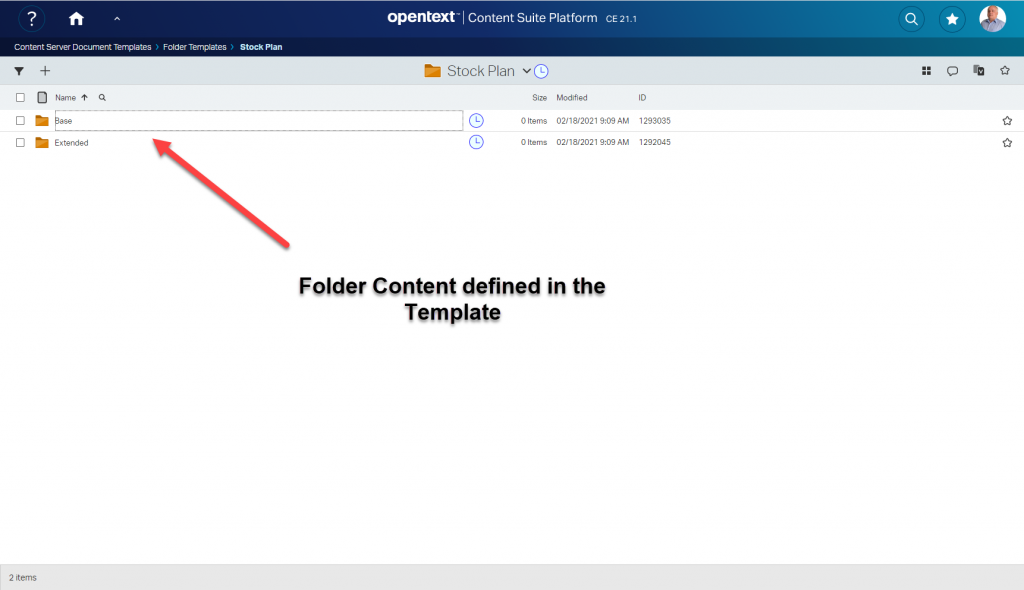
Annd there are all subfolders defined.
All Classifications, Categories etc applied to the template will also be present at this copy, like in any other template.
The Sky is the Limit!
Happy Templating.
Next week we’ll discuss the Improvements in Content Intelligence (3 new Widgets) and the Modifications in the Webreports in the amazing new Version 21.1 of Content Server.
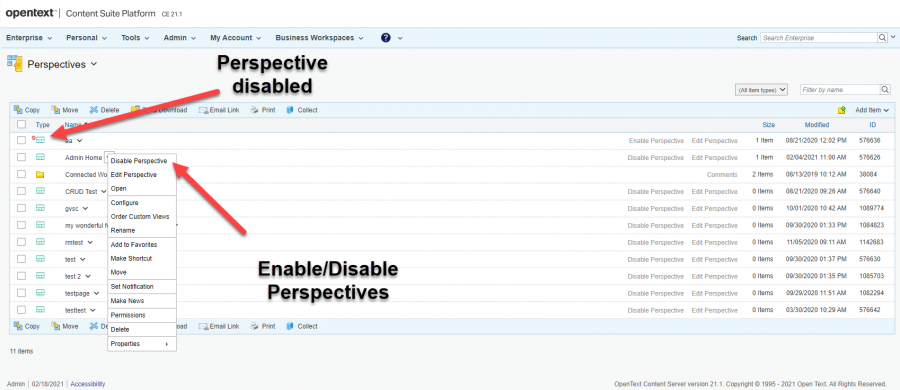
A minor addition in 21.1 is, Perspectives can be enabled and disabled. This is mande via the Classic View functions menu.
An icon will indicate Perspectives which are disabled. Once disabled, Perspectives can still be edited and enabled.
An example is the screenshot on top of this post.
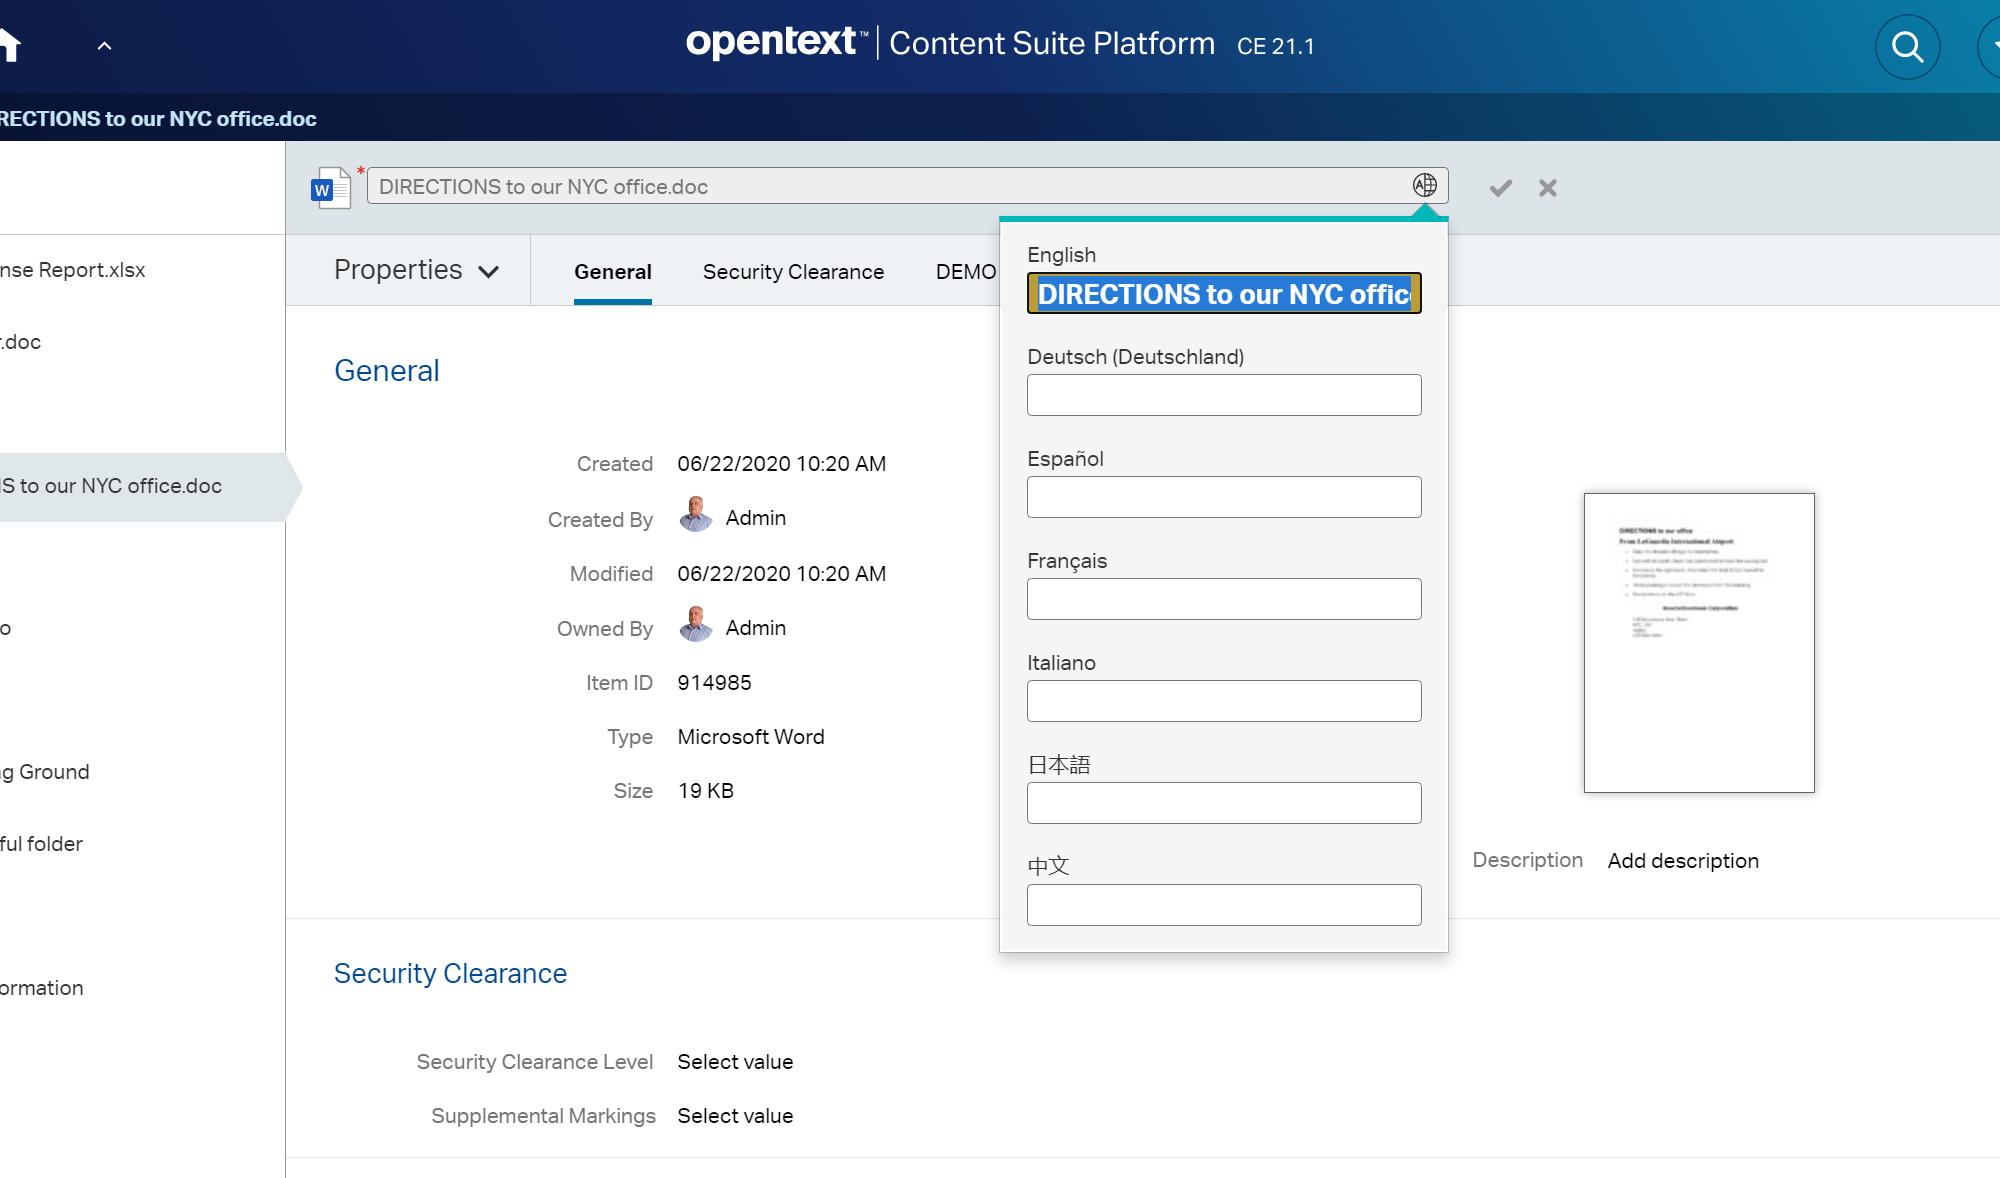
Finally, Multilingual Metadata Support is implemented in Content Server 21.1. Before that version there was only Support available here.
Multilingual Metadata can be added/edited at the Property Panel of a document. The first screenshot gives the entry of the name, the second gives the entry of the Description field.


Only Names and Descriptions are supported for Multilingual Metadata. For more fields or even Category Attributes in multiple languages, refer to an OpenText Partner like CASSIA.
The Name and Description fields show at least two multilingual text pickers. These are found in the SDK in /lib/csui/controls/multilingual.text.picker and in /lib/csui/dialogs/multilingual.text.picker. Unfortunately there is no Documentation and no index.html. Lets take a look on that control:
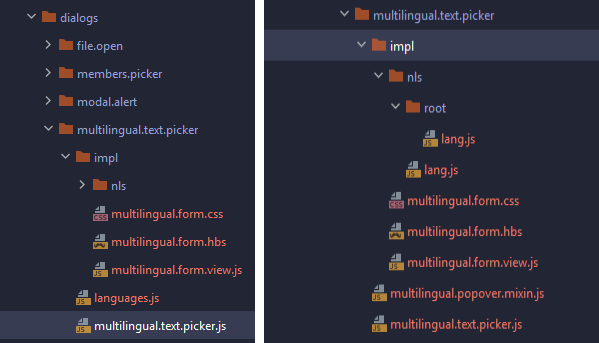
The left screenshot is from dialogs, the right is from controls.
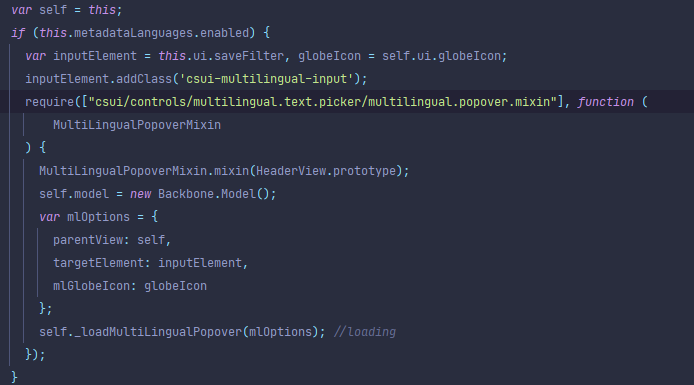
This is embedded in the header.view.js from the dialogs/node.picker and will only be activated, if Metadata Languages are enabled. The mixin allows the form to be displayed as a Bootstrap Popover.
Changes in that area require the changed multilingu<al text picker and also the changed paths to be followed for that changes. Therefore require a spawn of the whole nodestable widget to reflect that changes. This is acually not recommended.
Happy MLM

In the new Content Server Version 21.1 there are two new Report Widgets for Security Clearances and Supplemental Markings.
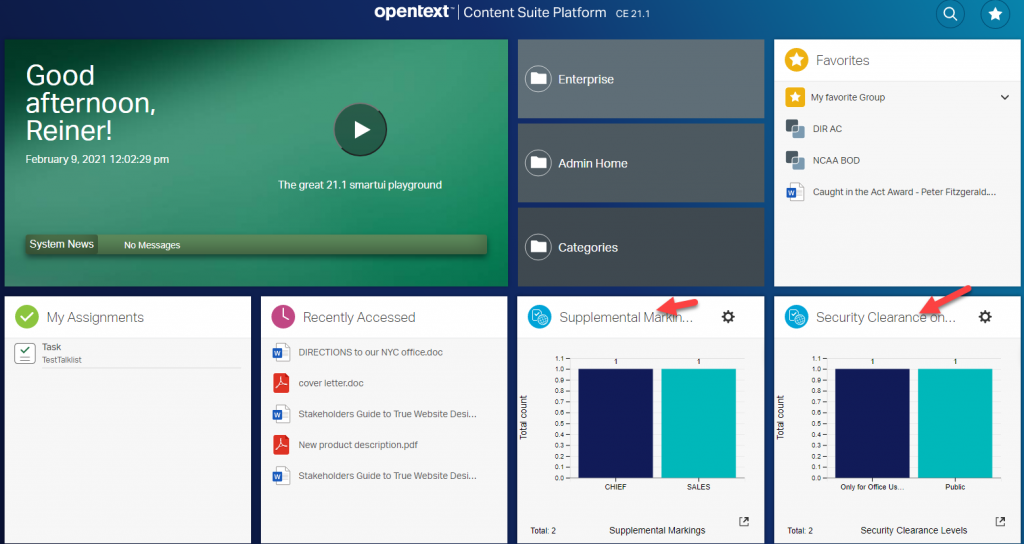
Here, both are shown on a landing page. This Widgets can be expanded by clicking on thy symbol on the lower right.
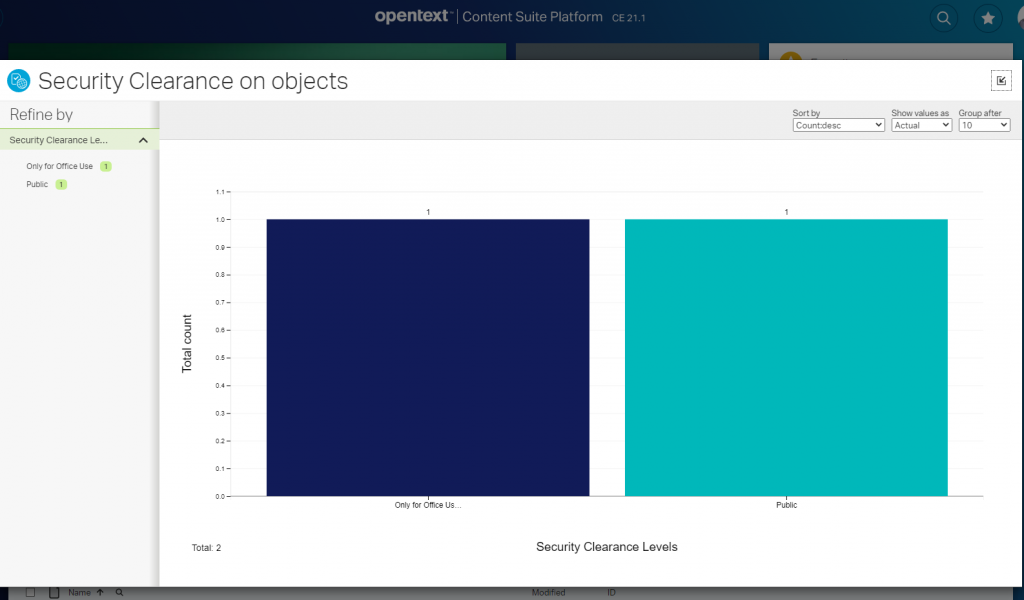
Then the full page widget view will be drawn. The report can be refined by selecting several columns.
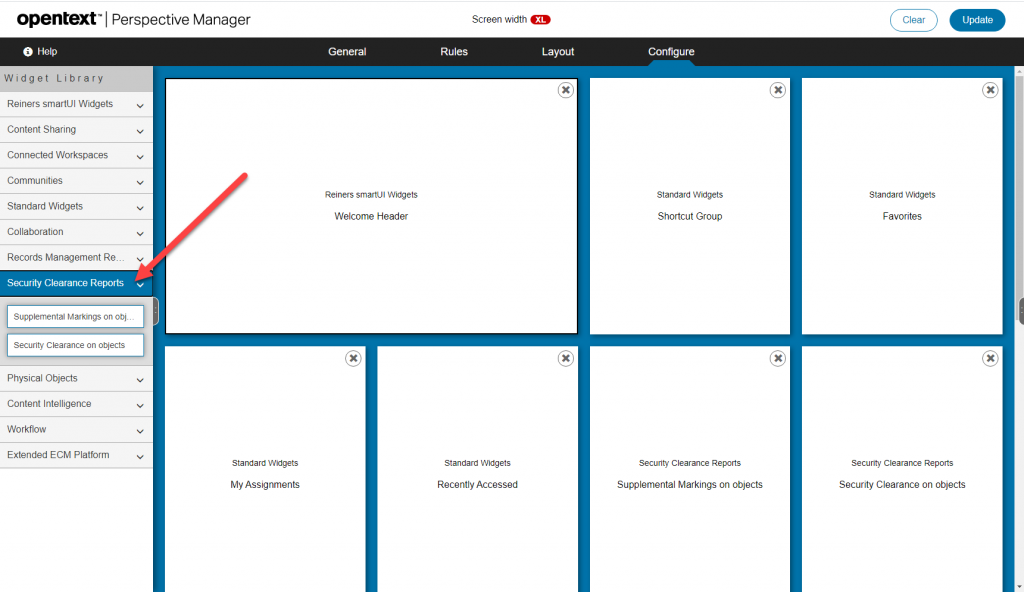
Simply add this widgets on the perspectives you want by dragging and dropping the widgets from the new group “Security Clearance Reports” to the widget area.
The widgets must be installed. They are based on several webreports and livereports. These reports are bundled in an Content Server App called OTRMSecReports. Open the “Applications Management” and install the application along with OTRMReports.
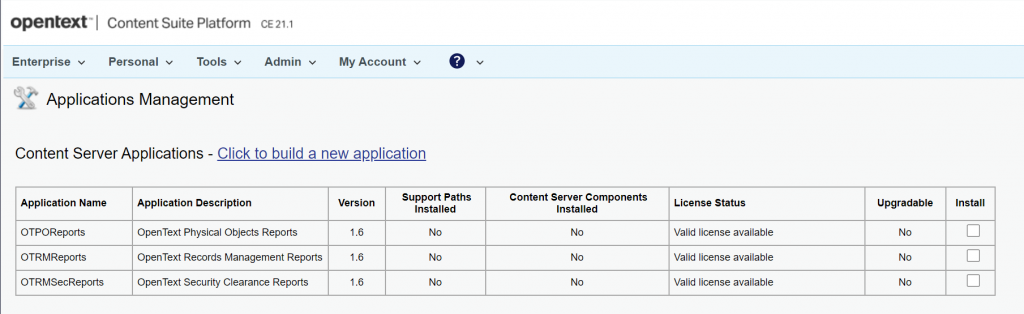
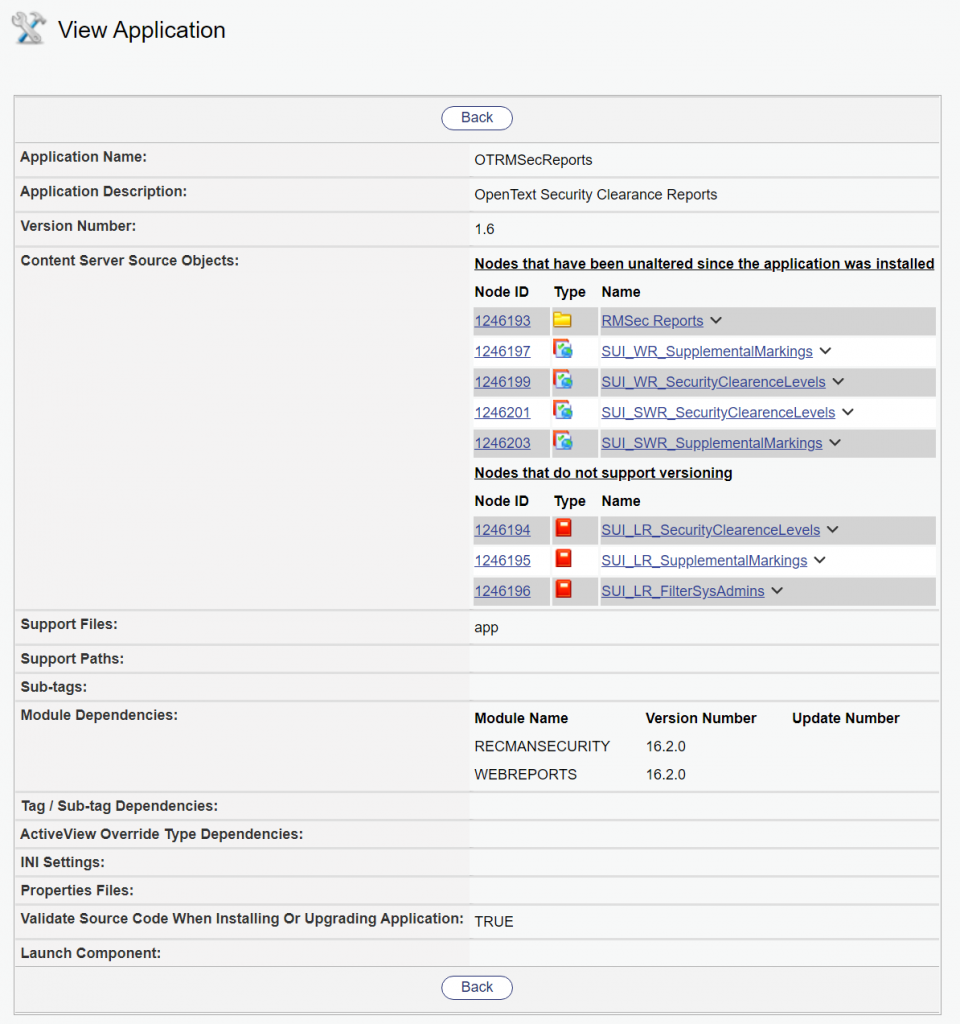
If its installed, you can check the components in “View Application”.
Ensure, that the version number is correct or correct the appropiate zip file.
Happy Security Clearance and Supplemental Markings Listing!
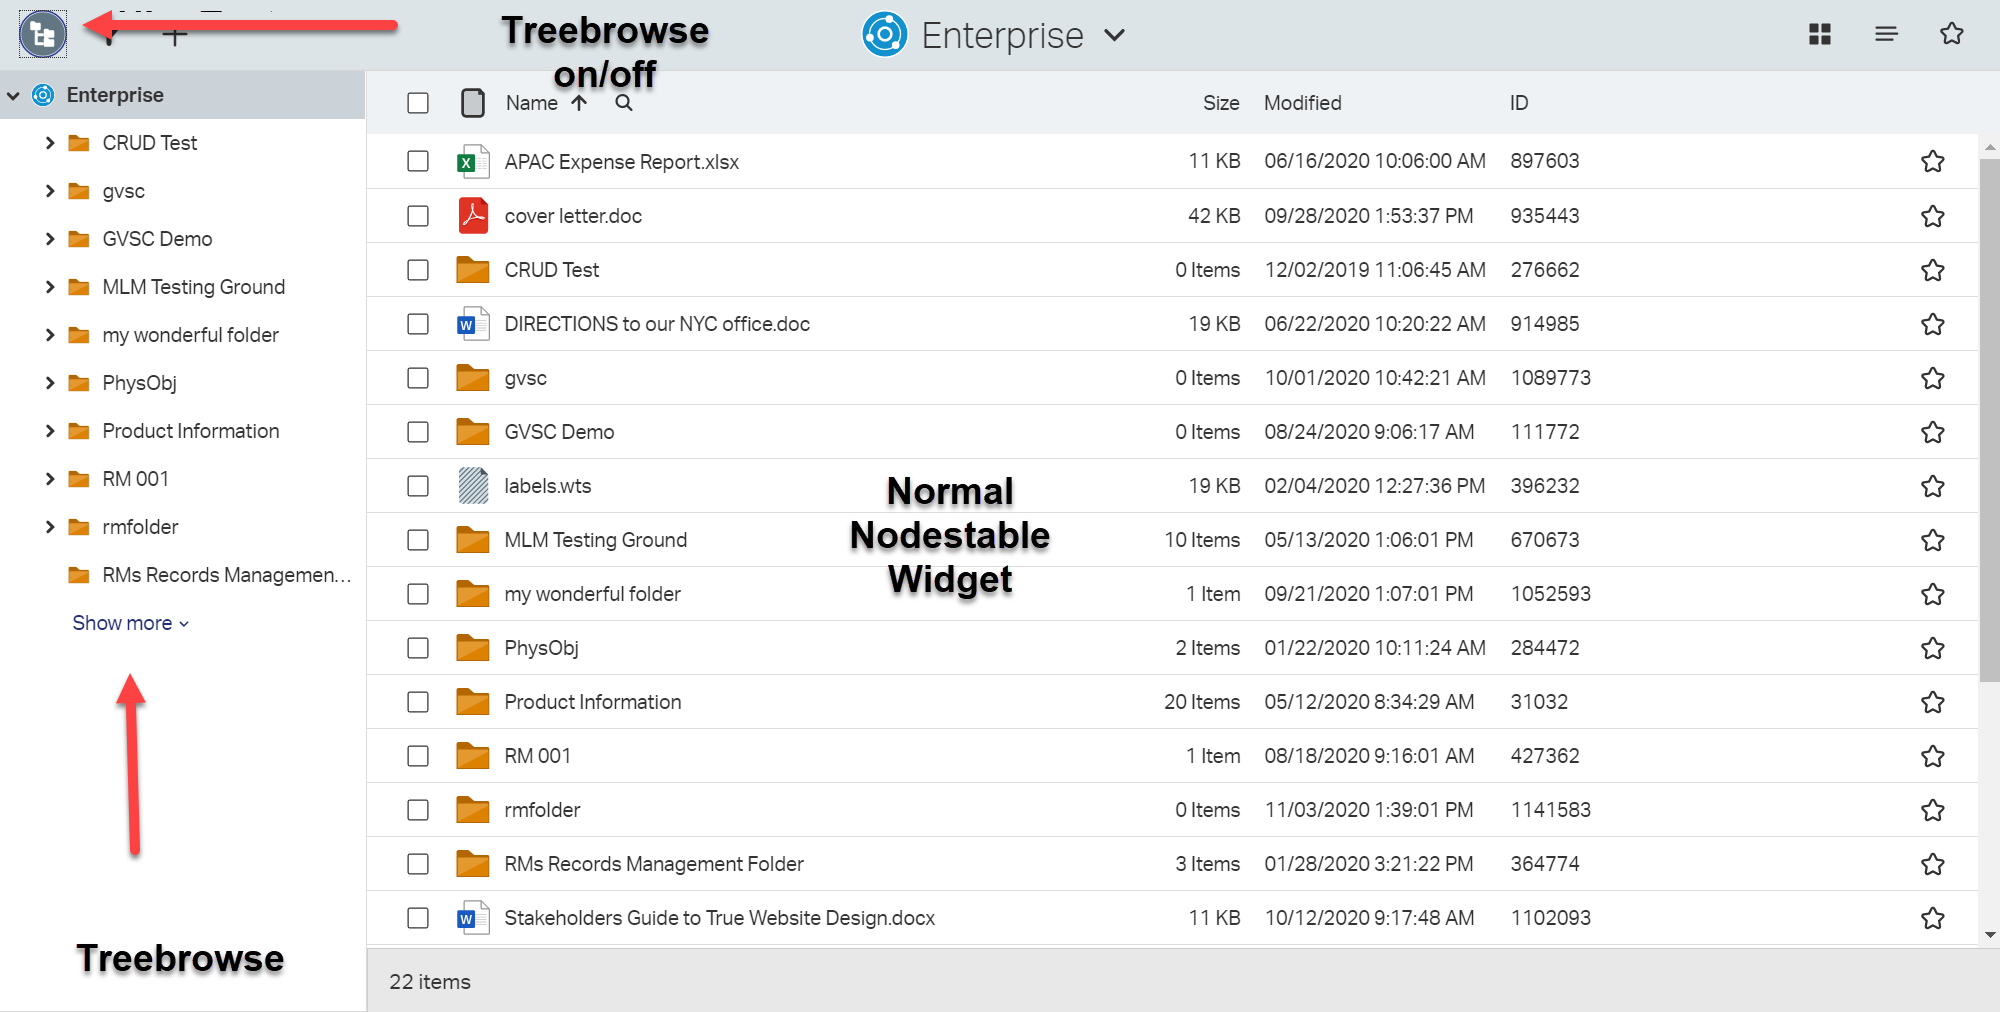
The Treebrowse Component is a new in Content Server 21.1. What’s a Treebrowse?
Let’s take a look at the index.html at csui/controls/treebrowse/test

This is an additional Window with the tree based display of all folders in a Content Server. It can be configured that a click on the top left icon will switch it on and off. This Treebrowse Control will then change the display of a Nodestable according to the folder pressed.
Lazy loading and prefetch options for performance. There are a couple of options to configure the loading of the nodes for performance. A “Show More” button can be configured
Tree Navigation is in sync with Table View in Nodestable view. The Nodestable is displays the children of the selected folder.
Multiple root nodes can be configured.
This Treebrowse is always there, but it must be enabled.
define(['module',
'csui/lib/backbone', "csui-ext!csui/controls/treebrowse/navigation.tree"
], function (module, Backbone, moduleConfigs) {
'use strict';
var config = module.config(),
enableSystemLevel = !!config.enable;
moduleConfigs = moduleConfigs || [];
var configModel = Backbone.Model.extend({
defaults: {
sequence: 100,
enabled: function (status, options) {
return false;
},
data: function (status, options) {
return {};
}
}
}),
configCollection = Backbone.Collection.extend({
model: configModel,
comparator: 'sequence'
});
The var enableSystemLevel is interesting.
var NavigationTree = {
enabled: function (status, options) {
  if (!!enableSystemLevel) {
    return true;
  }
  var enabled                = false,
      moduleConfigCollection = new configCollection(moduleConfigs);
  moduleConfigCollection.some(function (mConfig) {
    enabled = mConfig.get('enabled')(status, options);
    if (enabled) {
      status.originatingView.treeData = mConfig.get('data')(status, options);
    }
    enabled = enabled ? true : enabled;
    return enabled;
  });
  return enabled;
}
};
return NavigationTree;
});
As you can see, the Enablement on a system level can be done in OScript. Refer to this post, if you want so figure out how.
If you want to configure this control only for certain folders, you should do:
"csui/controls/treebrowse/navigation.tree": {
    "extensions": {
      "RMExtensions": ["RMExtensions/controls/treebrowse/RMExtensions.treebrowse.tree"]
    }
  }
define([], function () {
  'use strict';
  var RMTreeView= {
    enabled: function (status, options) {
       var supportMaximizeWidget = $("body").hasClass("csui-support-maximize-widget");               return (supportMaximizeWidget && $("body").hasClass("csui-maximized-widget-mode") === false);
    },
    data: function () {
      return {
        "lazyTree": true;
      };
    },
    sequence: 50
  };
  return RMTreeView;
});
A more complex enabled function (like in the index.html) is
enabled: function (status, options) {
var parent_id = status && status.container && status.container.get('parent_id');
return !!parent_id;
}
Happy Tree Browsing!