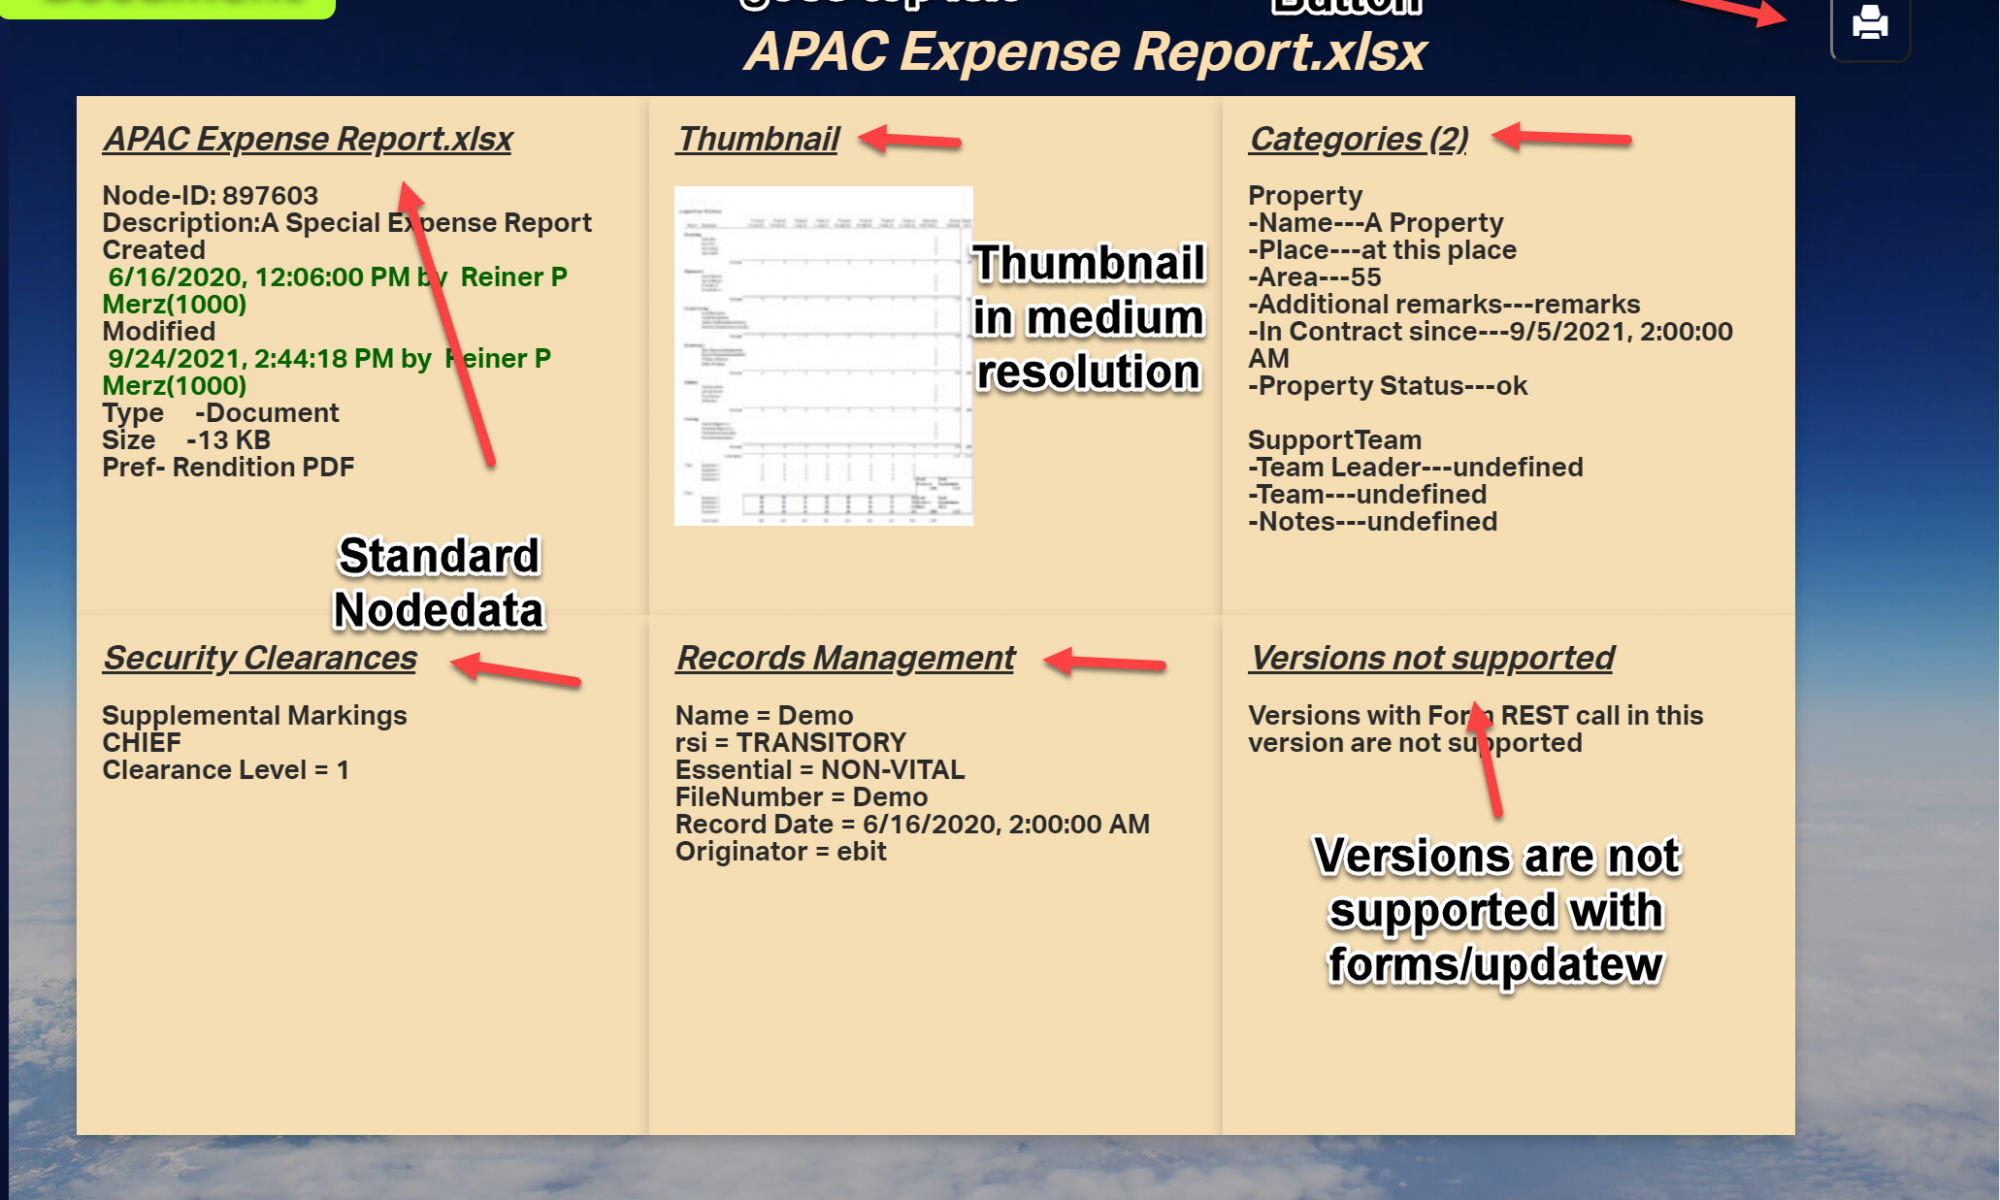
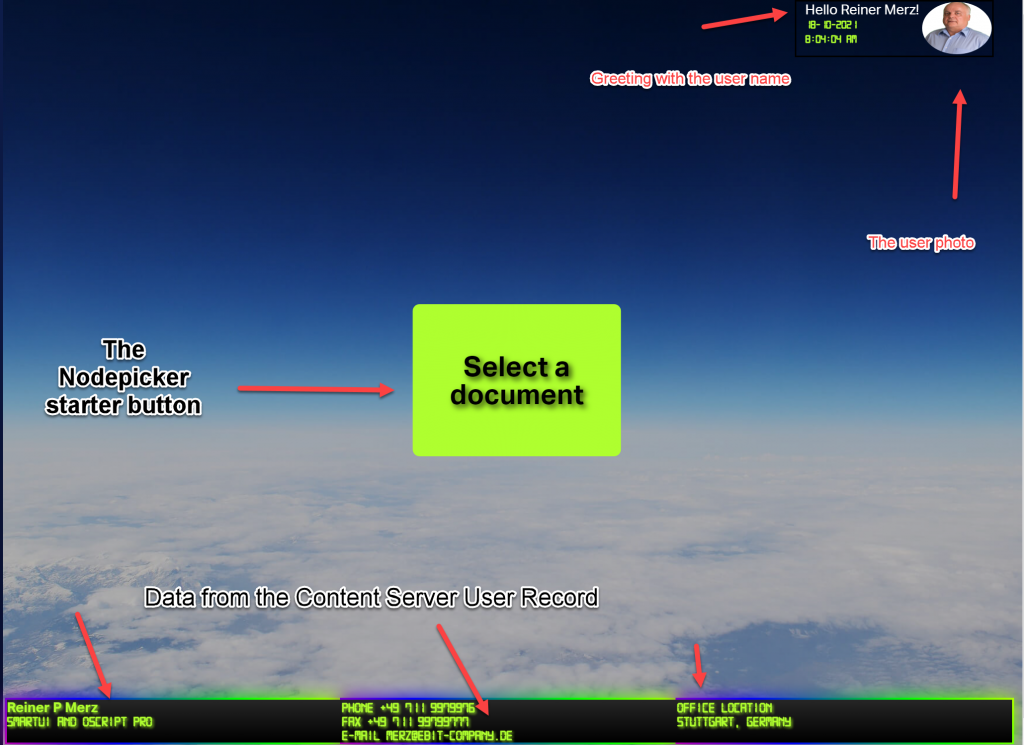
Three weeks ago I published a new video on Rethinking smartUI on Youtube. Now we have Rethinking smartUI Part 4-A discussing Javascript. If you havn’t it seen yet, here is the short video. In this posts, we’ll go though the technical aspects of this new kind of approach to smartUI. This demo is a Document Pad (or short DocPad), displaying all document properties in a SCIFI GUI arrangement.
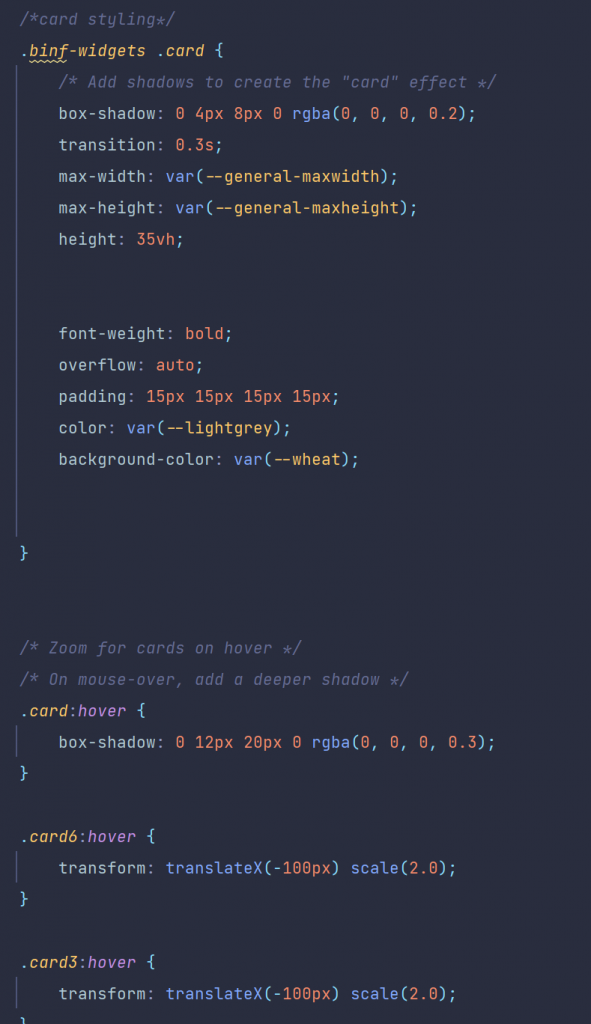
This is Part 4-A of a multipart post covering Javascript of DocPad. For the css refer to part 3 of Rethinking smartUI.
Warning: This is a lot of js code, so I subdivided this Part 4 into Part 4-A and 4-B (getting all documents infos with 1 Rest call). Part 4-B will be published next week.
We offer a one day remote training to understand the javascript code. If you are already a sophisticated Javascript Developer, you can get the Sources also from https://github.com/ReinerMerz/reinerdemo (a public repository on Github).
Warning: This is only the sourcetree of the project, so you have to insert this in your own project file.
The post parts until now
Part 4-A The Javascript Part 1
Part 3 The Infrastructure and the CSS
But first to Rethinking smartUI Part 4-A.
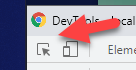
The Javascript auxiliary files
Using the model factory
The idea of a model factory is to combine several functions in one.
a. Create a model and return it.
b. Load server data into this model for use in the main constructor function
A typical factory looks like this:
// the factory for the model
define([
‘csui/utils/contexts/factories/factory’, // Factory base to inherit from
‘csui/utils/contexts/factories/connector’, // Factory for the server connector
‘ademo/widgets/docpad/impl/docpad.model’ // Model to create the factory for
], function (ModelFactory, ConnectorFactory, DocpadModel) {
‘use strict’;
var DocpadModelFactory = ModelFactory.extend({
propertyPrefix: ‘docpad’,
constructor: function DocpadModelFactory(context, options) {
ModelFactory.prototype.constructor.apply(this, arguments);
var connector = context.getObject(ConnectorFactory, options);
// Expose the model instance in the property key on this factory instance to be // used by the context
this.property = new DocpadModel(undefined, {connector: connector});
},
fetch: function (options) {
return this.property.fetch(options);
}
});
return DocpadModelFactory;
});
The main Javascript files
The lang.js file(s)
The language system consists of those strings which are pupposed to change per language.
define({
helloMessage: ‘Hello {0} {1}!’,
waitMessage: ‘Please wait’,
seldoc: ‘Select a Document’,
printdoc: ‘Print the selected Document’,
pickerTitle: ‘Select a Document’,
selectPickerButtonLabel: ‘Select’,
descNodeID: ‘Node-ID’,
desDescription: ‘Description’,
desCreated: ‘Created’,
desModified: ‘Modified’,
……more …..
});
The standard model from Backbone.js
define([
‘csui/lib/backbone’,
‘csui/utils/url’
], function (Backbone, Url) {
‘use strict’;
let DocpadModel = Backbone.Model.extend({
defaults: {
name: ‘Unnamed’
},
constructor: function DocpadModel(attributes, options) {
Backbone.Model.prototype.constructor.apply(this, arguments);
// Enable this model for communication with the CS REST API
if (options && options.connector) {
options.connector.assignTo(this);
}
},
// Computes the REST API URL using the connection options
// /auth returns information about the authenticated user
// usage of => not possible because of “this” is used for urls
url: function () {
return Url.combine(this.connector.connection.url, ‘/auth’);
} ,
parse: (response) => response.data
}];
return DocpadModel;
}];
Remark: The Arrow Function at parse is pure js6. But let me quote developer.mozilla.com here
An arrow function expression is a compact alternative to a traditional function expression, but is limited and can’t be used in all situations.
Differences & Limitations:
- Does not have its own bindings to
thisorsuper, and should not be used asmethods. - Does not have
new.targetkeyword. - Not suitable for
call,applyandbindmethods, which generally rely on establishing a scope. - Can not be used as constructors.
- Can not use
yield, within its body.
(Endquote)
This means, its not possibe to use when any limitation will take place, like in the constructor.
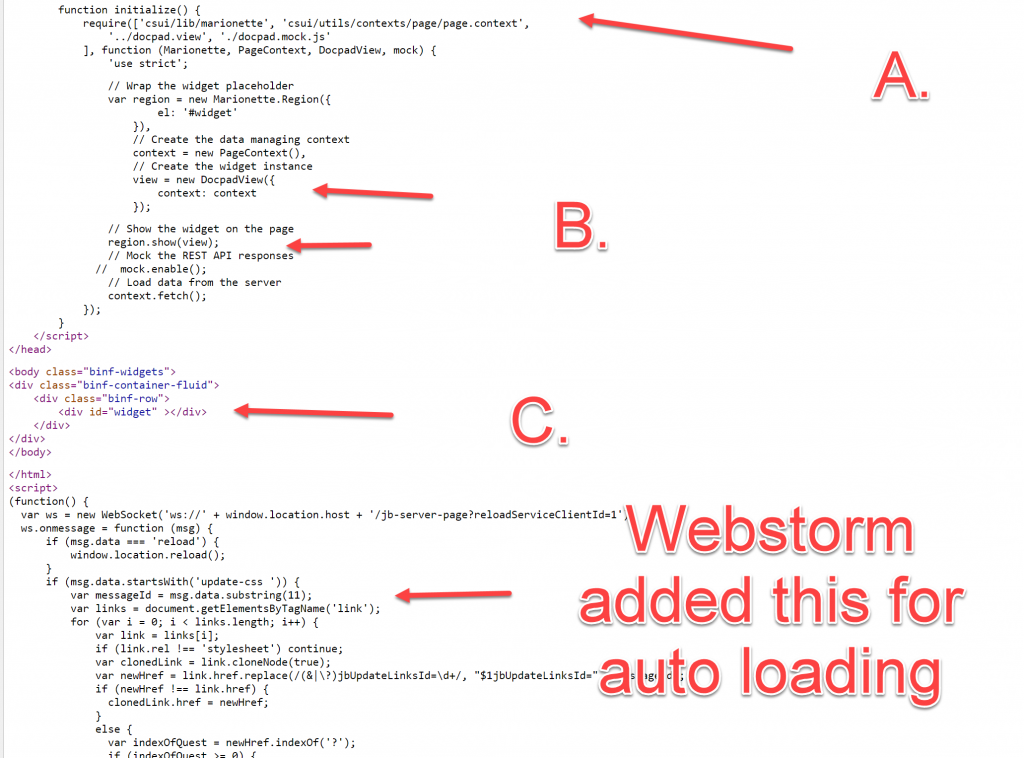
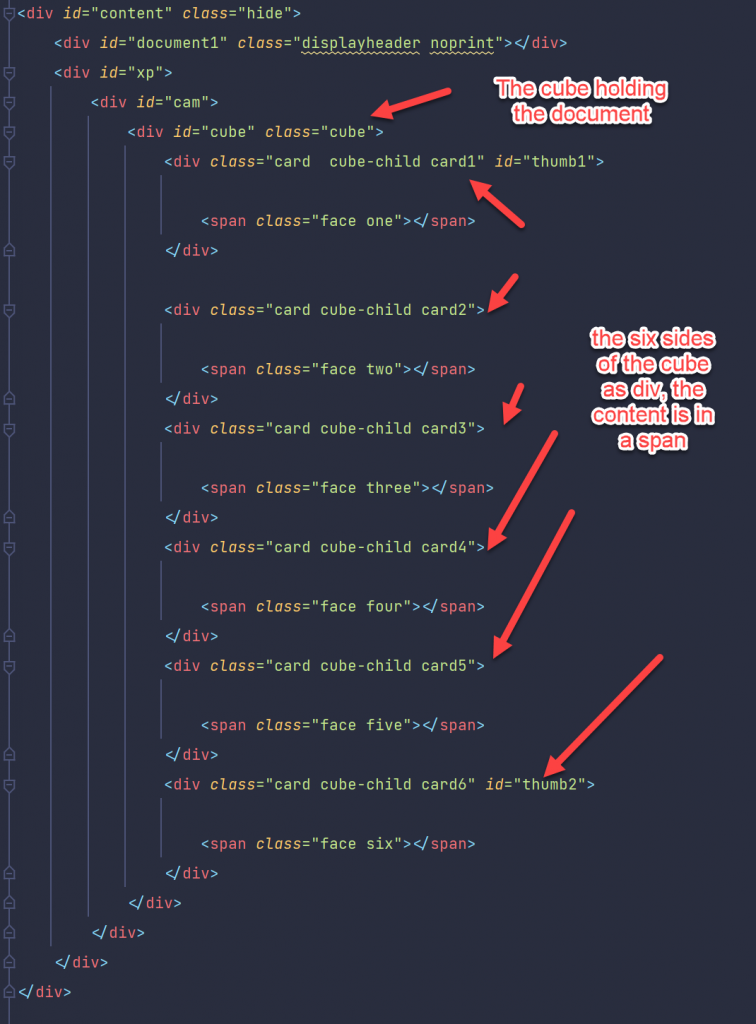
The docpad.view.js
The stages of docpad.view.js
Get infos via the Bootstrap model
constructor: function DocpadView(options) {
options.model = options.context.getModel(DocpadModelFactory);
Marionette.ItemView.prototype.constructor.call(this, options);
this.listenTo(this.model, ‘change’, this.render);
}
First, we initiate the model (and read the data) via a standard model using the model factory. Then we call the constructor in the prototype with the cs options. Lastly we listen to a change of the data and (in case) we rerender the widget.
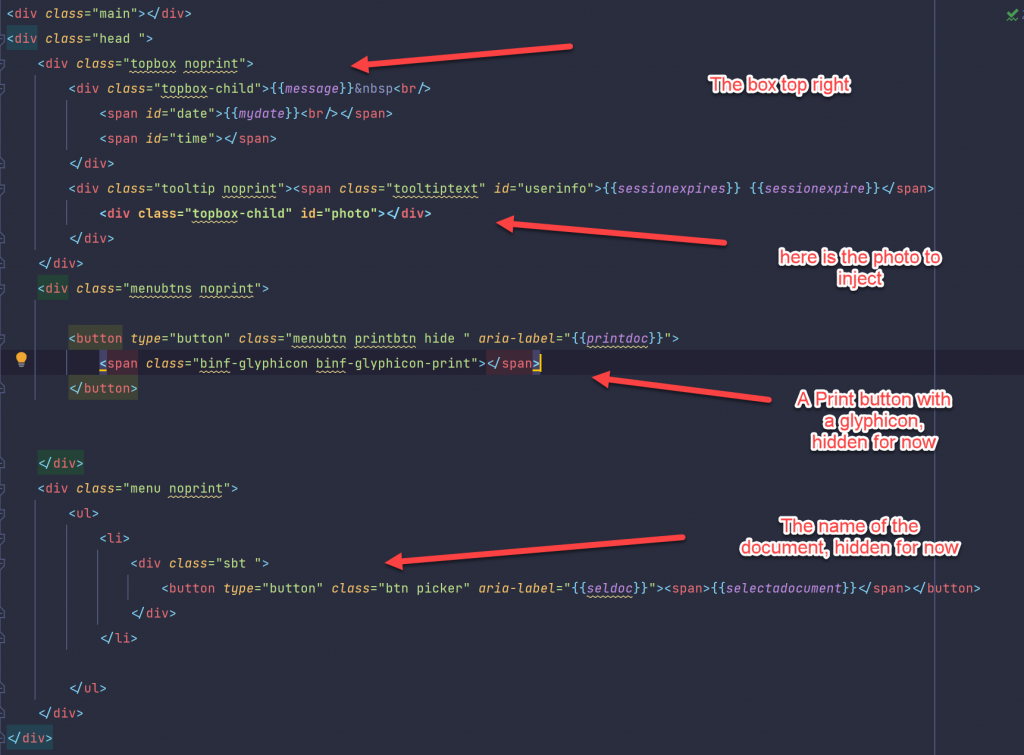
Load the photo
The user data contains (eventually) a photo of the user. This is loaded and inserted in the DOM with the function loadPhoto. Here the js6+ fetch function is exposed to get the photo and insert it into after the element woth the .photo class in the dom.
loadPhoto: function () {
let server = this.model.connector.connection.url;
server = server.substr(0, server.search(“api/v1”));
let url = server + this.photo_url;
let ticket = this.model.connector.connection.session.ticket;
fetch(url, {method: ‘GET’, headers: {“OTCSTicket”: ticket}})
.then(response => response.blob())
.then(function (myBlob) {
const URL = window.URL || window.webkitURL;
let photo = URL.createObjectURL(myBlob);
let img = document.createElement(“img”);
img.classList.add(“photo”);
img.src = photo;
document.querySelector(“#photo”).appendChild(img);
setTimeout(() => {
URL.revokeObjectURL(photo);
}, 100); // cleanup
}
);
},
Using the Node-Picker
The Node-Picker is a standard function in the sdk, so we use it.
The file ‘csui/dialogs/node.picker/node.picker’, // the csui node picker
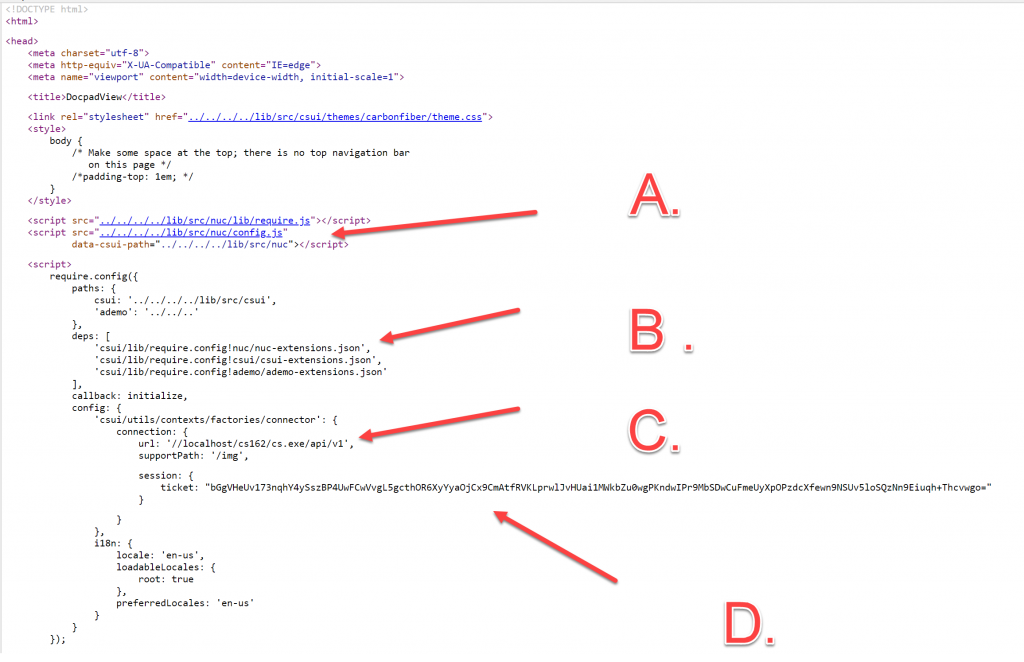
is required at the beginning of the docpad.view.js file under the local name of NodePicker like this:
define([
‘csui/lib/underscore’, // Cross-browser utility belt
‘csui/lib/marionette’, // Marionetter
‘csui/lib/moment’, // the date/time lib in csui
‘ademo/widgets/docpad/impl/docpad.model.factory’, // Factory for the data model
‘csui/dialogs/node.picker/node.picker’, // the csui node picker
‘i18n!ademo/widgets/docpad/impl/nls/lang’, // Use localizable texts
‘hbs!ademo/widgets/docpad/impl/docpad’, // Template to render the HTML
‘css!ademo/widgets/docpad/impl/base’, // base Stylesheet needed for this view
‘css!ademo/widgets/docpad/impl/adv’, // adv stylesheet for this app
‘css!ademo/widgets/docpad/impl/print’ // print style sheet
], function ( _, Marionette, Moment, DocpadModelFactory, NodePicker, lang, template)
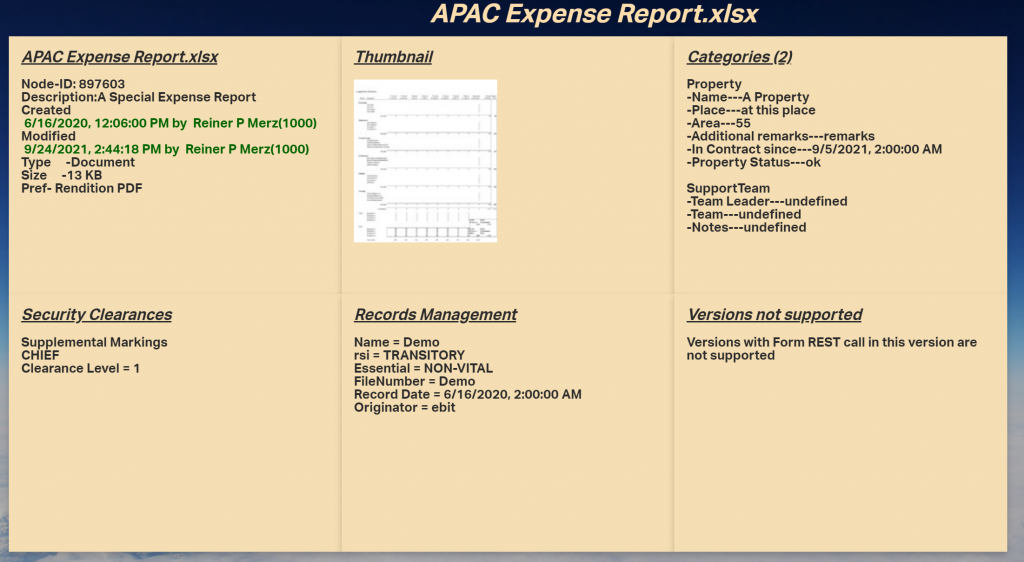
The picker is started by pressing the big button, this actually calls showThePicker. Types of 144 (only Documents) and on the enterprise volume are among the start conditions.
The title and other strings are extacted from the appropriate lang.js language file(s). The command nodePicker.show() at the beginn of the chain displays the nodePicker
showThePicker: function () {
if (undefined === this) {
return;
}
let btn = document.querySelector(“.btn”);
btn.classList.remove(“animate-large”);
btn.classList.add(“animate-large-backward”);
let nodePicker = new NodePicker({
connector: this.model.connector,
selectableTypes: [144],
dialogTitle: lang.pickerTitle,
selectButtonLabel: lang.selectPickerButtonLabel,
startLocation: ‘enterprise.volume’
});
nodePicker.s how()
.fail(function () {
console.error(“Picker fails to show”);
})
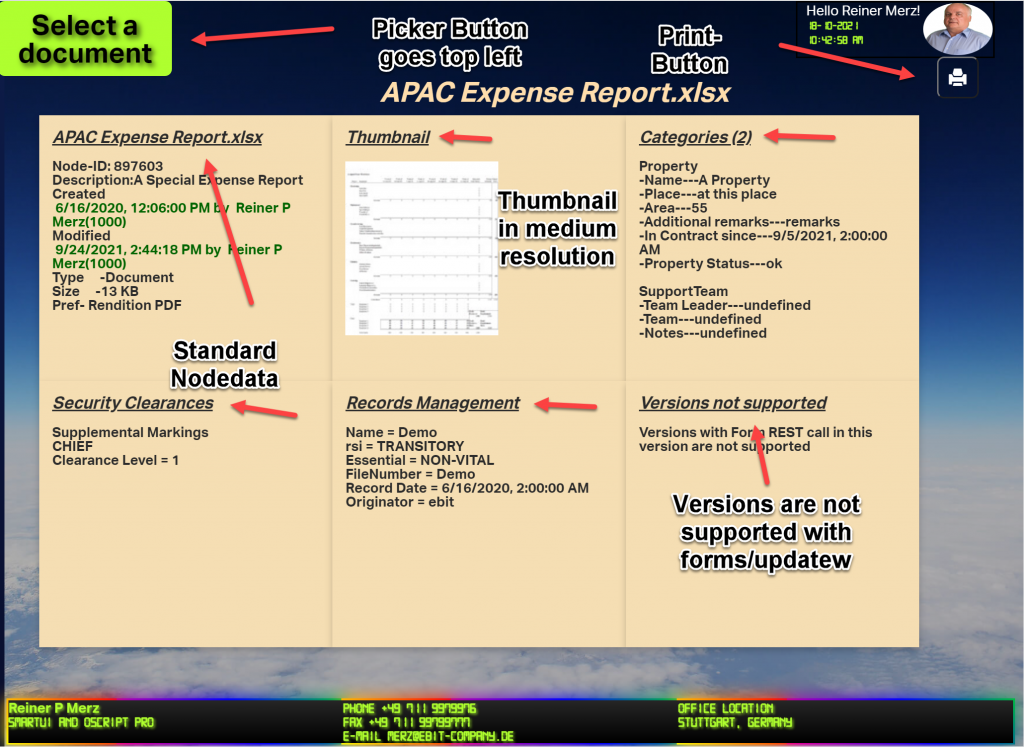
.done(_.bind(function (args) {
document.querySelector(“.printbtn”).classList.remove(“hide”);
document.querySelector(“#content”).classList
.replace(“hide”, “display”);
let node = args.nodes[0];
let id = node.attributes.id;
this.docname = node.attributes.name;
document.querySelector(“#document1”).innerHTML = this.docname;
this.loadDocumentThumbnail(id); // load the thumbnail and display it
this.loadDescriptions(node); // load node data and display it
this.loadNodeData(id); // inquire form update data and display it
}, this)
);
},
The callback in the .done clause simply extracts the node id and the name from the results and stores them in the docpad “this”.
In the next week part “Rethinking smartUI Part 4-B” we’ll discuss the REST Commad how to get all document data (nearly) at once.