A new SDK in Town: Content Server SmartUI SDK – First glimpse

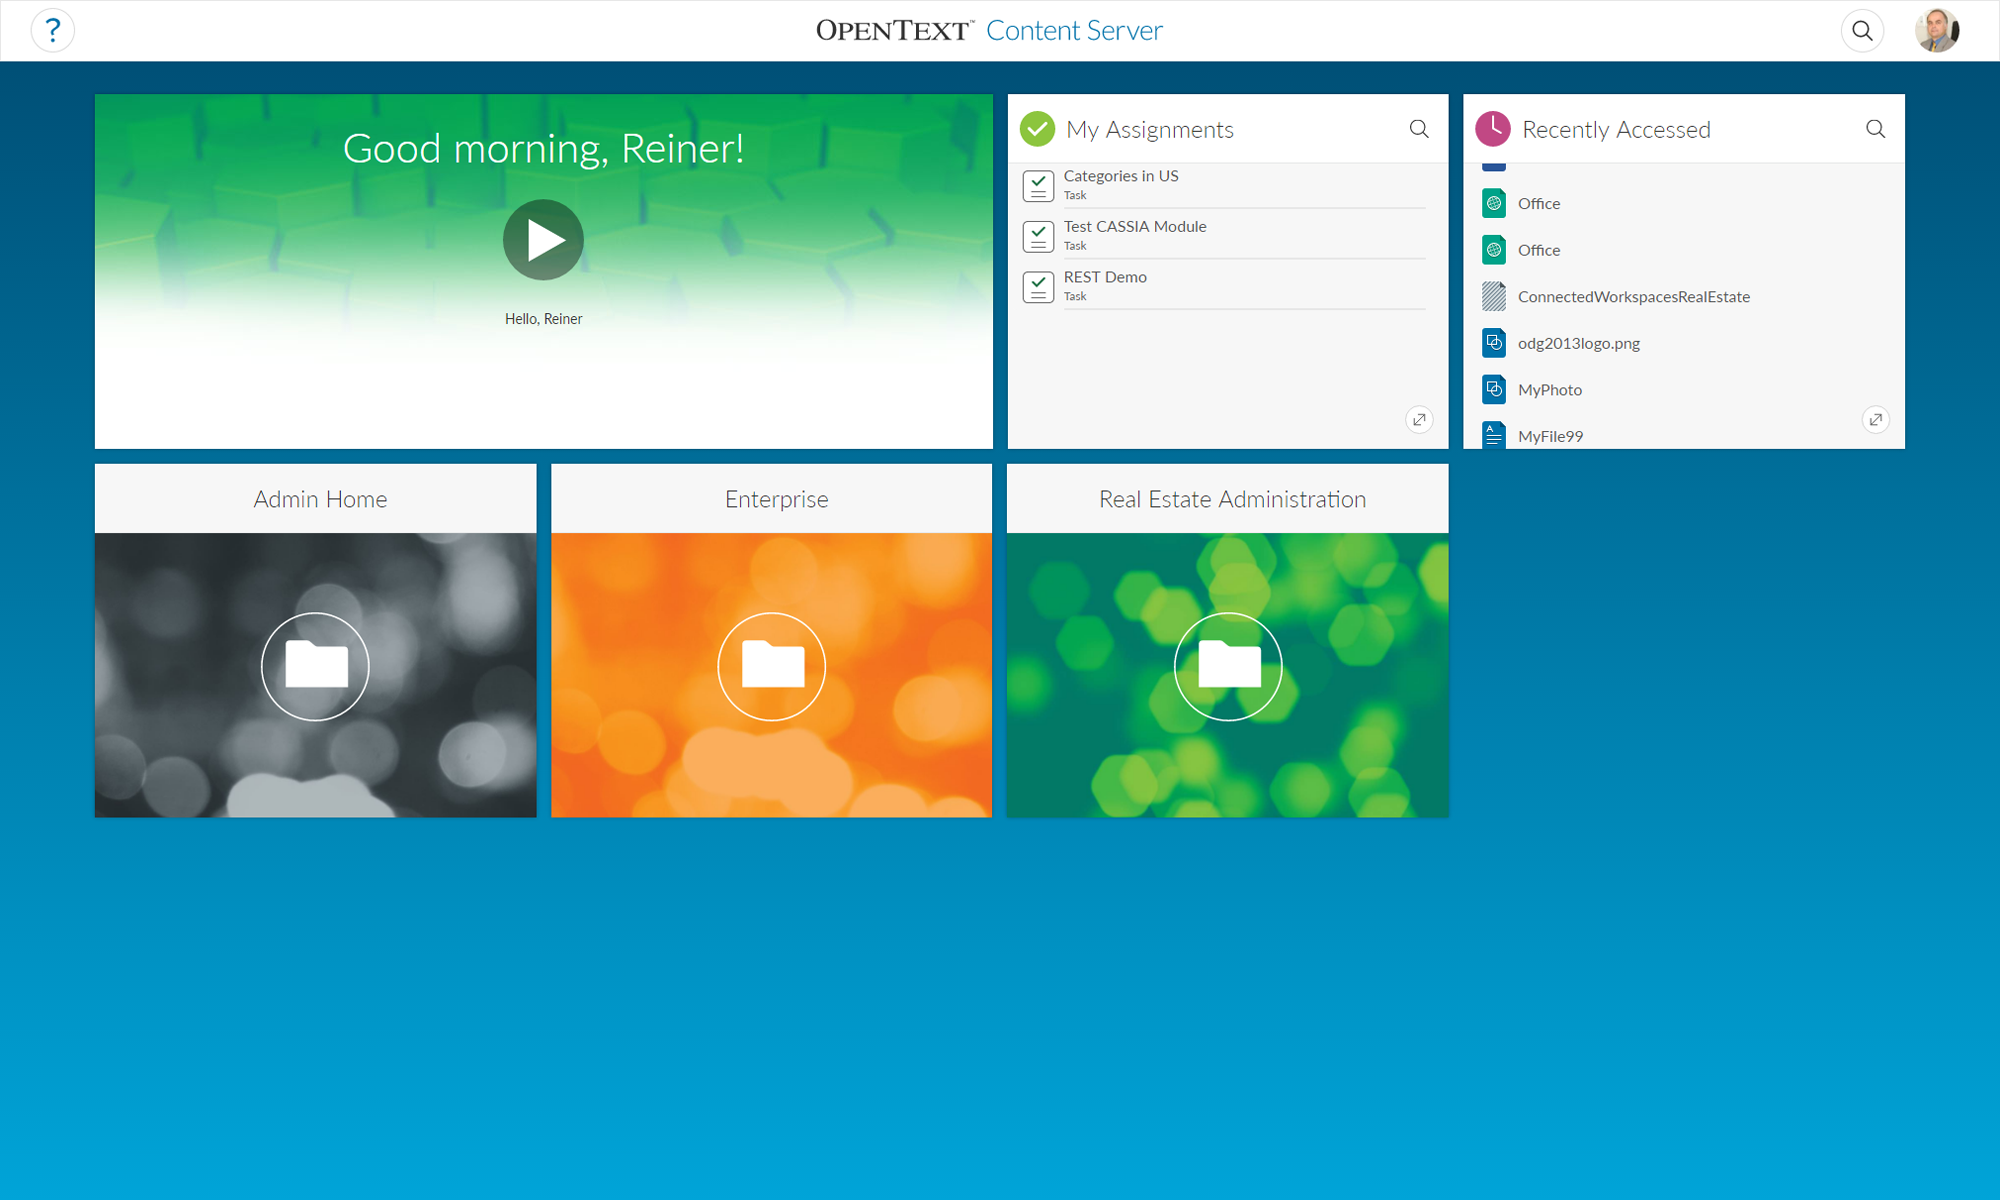
Did you ever wonder, how to create new widgets or forms for the new SmartUI of the content server? The new SmartUI is responsive and can be used on mobile devices.

smartui

If you want to add new widgets or modify things, there is a new SDK on the knowledge center, which can be found here:

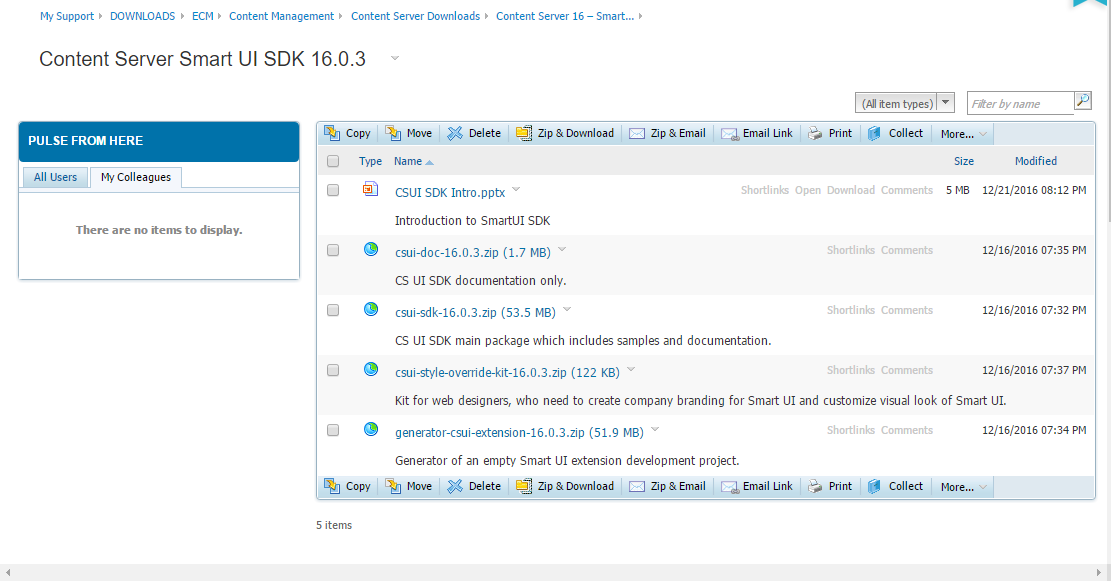
This are the components:

  • CSUI SDK Intro.pptx
    this is a powerpoint presentation on the SDK.
  • csui-doc-16.0.3.zip (1.7MB)
    this is the documentation as stand alone.
  • csui-sdk-16.0.3.zip (53.5 MB)
    this is the sdk itself. It contains a copy of the documentation.
  • csui-style-override-kit-16.0.3.zip (122 kb)
    this is a kit to provide branded css files, which will be used instead of the original ones.
  • generator-csui-extension-16.0.3.zip(51.9 MB)
    this is a generator, which will be used to setup an empty development project.


The basic requirement is the installation of node.js at your CSIDE machine.  You should be familiar with the REST API and Grunt to use the SDK.

The workflow is

  1. Generate an empty project on the harddisc
  2. Install all prerequisites in node.js (npm, grunt-cli)
  3. Modify the example according to your needs
  4. Import the module in out-module of your project into CSIDE
  5. Copy the widgets etc into your support folder
  6. Create the module in CSIDE and install it
The installed new Widget

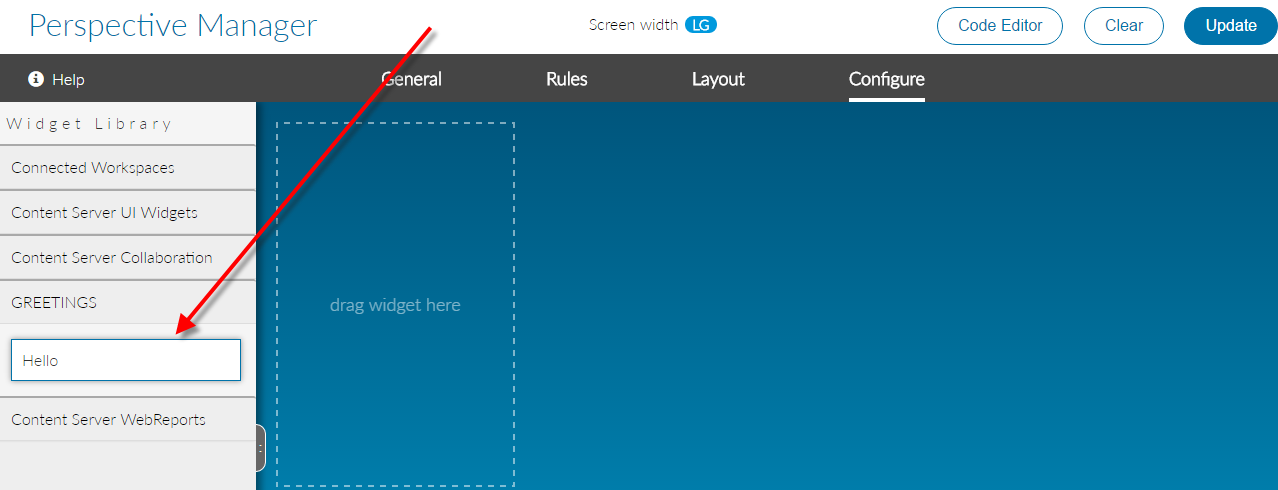
Then you should see the example widget under the name of your module in the perspective manager.

Watch for upcoming posts on this exciting new Content Server technology.

Using the CSIDE Code Generation Wizard (1) – Create WebNode Action automatically

In the newer versions of CSIDE, you’ll find a code generation wizard, which writes code snipets for standard tasks automatically.

You can call this Code Generation wizard by clicking on the right mouse button.

Call of the Code Generation Wizard

Next, the Code Generation Wizard gives you a list of all templates, which can be used for the code generation. The amount of templates can vary from CSIDE version to CSIDE version.

List of all Templates to be used for the code generation

When you click on a template, you’ll get further info’s on the template. The amount of info’s can vary from template to template.

Infos on the template

Here in this post, we are using the “Create WebNodeAction” Command. Refer to future posts on examples of the other templates.

A WebNodeAction is a command, which is executed against a node by issuing a WebNodeCommand (in Contenxt/Node or other menus). For example, the “Open” command in a node menu is a WebNodeCommand, which issues the action for opening the node content.

After selecting “Create WebNodeAction”, we must provide two additional definitions.

Additional Infos to provide

First, we must select the package to put this command in. We simply select DELIVERER (the name of our module), but in practical situations, you should select a proper package.

And the name of the command has to be provided. After clicking “Finish”, a file with the name “MyTestCommand.os” will appear in the first level of our OSPACE.

The Command is generated as .os file

When you open the newly created file, you’ll see a complete command definition.

Command Definition Part 1

The fEnabled is set to true. The fWebScript has the default name of “mytestcommand.html” and there is an empty list of fPrototype.

Change the name of the fWebScript to the name you want. Add the Webingo parts of the commands output in this fWebScript.

If you use special parameters in the request, setup the proper fPrototype list.

The _Nodetypes() returns an undefined List, which should be changed immediately to reflect the node subtypes for which the command should be valid.

Command Definition Part 2

There is even a _SubclassExecute stub generated automatically. Add the action code to be executed in this _SubclassExecute stub.

Optional: Connect this WebNodeAction with a WebNodeCommand in a context or node menu or somewhere in the GUI to make it accessible for the end-user.


Calling OScript from Java Code (2)

In December 2016, we discussed how to call Java code from OScript . Now, we’ll discuss the other way round, how to call OScript from Java. This can be quite useful, if you want to use your business logic implemented in java against the content server.

The Java code must be put in the ojlib directory (see the previous post on this topic).

As always, if you want to deploy your java code within a module, do this

  • Build your code into jar files.
  • Add the jar files in OTHOME/ojlib/ or OTHOME/module/yourmodule_yourversions/ojlib/ directory (and their subdirectories) to be recognized by Content Serverk JVM’s application classloader.

The base thing is, you call OScript built-in functions through the OScriptObject.runScript method from a java coding.

For example, the java code

OScriptObject.runScript("echo","System.ThreadID()");

will display the unique integer for the current thread ID at the console (or in the logs, if you do not use CSIDE)

You can call all OScript functions and scripts. This example will list all nodes in the enterprise workspace

     // List nodes in the Enterprise workspace.
            result = (Map<String,Object>) OScriptObject.runScript( "$LLIAPI.NodeUtil.ListNodes",
				prgCtx,
				"(ParentID=:A1)",
				args );

prgCtx is the standard rogram Context, args is the ArrayList containing the arguments and A1 points to the first entry in the args array to be used as ParentID.

The next example can be used to get the current user from java coding, extract its userID and then derives the user name from ths user id. A standard logger is used to log the output, replace this with the logger of your preference.

    public static String getUserName( OScriptObject prgCtx )
    throws Exception
    {
        String retval = " user not found";
        
        try
        {        
            // get the user session object
            OScriptObject uSession = (OScriptObject) prgCtx.invokeScript( "USession" );
            // get the userID from the User Session
            Integer userID = (Integer) uSession.getFeature( "fUserId" );
            // display it
            logger.log( Level.INFO, "UserID is " + userID );
            
            retval = "The current login User: " + userID;
            
            // Get the Users name from the User ID
            Map<String,Object> status = (Map<String,Object>)
			OScriptObject.runScript( "$LLIAPI.UsersPkg.NameGetByID", uSession, 1000 );
			
            logger.log( Level.INFO, String.valueOf( status ) );
            logger.log( Level.INFO, (String) status.get( "Name" ) );
        }
        catch( Exception e )
        {
            logger.log( Level.SEVERE, "Caught Exception", e );
            throw e;
        }
        
        return retval;
    }


In the next posting on this topic, we’ll discuss the Mappings from JAVA to OScript and vice versa.


Execute a Livereport from OScript and get the results

From time to time, you may want to execute a livereport from an OScript function and get the results for further processing. This can be done quite easy.

First, you should have the node id of the report to execute.

In this scriptlet, the node id of this livereport to execute is nodeid

Second, you should setup a list with all input parameters. For each input parameter, create an assoc with inputType, label, prompt, textvalue and value of the parameter.

Add this assoc to the list of input parameters.

Store this list in the pExtendedData field of report node.

Object llnode = $LLiApi.LLNodeSubsystem.GetItem( $TypeReport )
Assoc data = llnode.ExecuteReport( prgCtx.fDBConnect, extdata )

Get the llnode of the report by calling the LLNodeSubSystem.GetItem. Execute the report by using llnode.ExecuteReport

The result of the livereport is in data.contents.

The whole call can look like this:

 node = DAPI.GetNodeById(prgCtx.DapiSess(),nodeid)
 if node.pSubType == $TypeReport // Is node a livereport?
     Assoc extdata = node.pExtendedData
     Assoc inp
    //Create input parameters assoc
     Assoc inp
     inp.inputType = "String"
     inp.label = "inputlabel1"
     inp.prompt = "DataID"
     inp.textValue = Str.String ( DataID )
     inp.value = Str.String ( DataID )
 
     //Attach inputs parameters list to extendeddata
     List inputs = {inp}
     extdata.inputs = inputs
     llnode = $LLiApi.LLNodeSubSystem.GetItem($TypeReport)
     Assoc data = llnode.ExecuteReport(prgCtx.fDBConnect, extdata)
     result.OK=true
     result.data = data.contents
     return result
end


Calling Java Code from OScript (1)

Sometimes it would be nice to use existing Java coding from a module instead of recoding this in OScript.

There is a facility in the content server which does exactly this bridging from OScript to Java, the so called JavaObject class. You’ll find the exact documentation in the “OScript API/Build-In Package Index”

In this first post of the series we’ll discuss the  basic calls from OScript.

First, you need some Java Code, compiled and in the form of a jar. Put this jar either in OTHOME/ojlib or (much better) in a ojlib directory in your module structure. After installing the module, the jar(s) are copied automatically to the OTHOME/ojlib. Then, the jvm classloader will find your jar(s).

From OScript it is possible to access static classes and instances.

Static
Dynamic InvokeStaticMethod(String classname, String methodName, List parameters)

Dynamic GetStaticField( String classname, String fieldName)

Dynamic SetStaticField( String className, String  fieldName, Dynamic value)

The return values are either Error or Dynamic if the call is successful.

Dynamic
JavaObject New (String className, List parameters)
Instance
Dynamic GetField(String fieldname)

Dynamic SetField(String fieldname, Dynamic value)

Dynamic InvokeMethod(String methodName, List parameter)

The return values are either Error or Dynamic if the call is successful.

An example
function void javaTest()

   JavaObject myObject

   myObject = JavaObject.new("my.own.package.class")
 
   Dynamic res = myObject.InvokeMethod("myMethod",{"aa","bb})

   if (isError(res))

     echo ("Init failed")

     return

   end

   Dynamic res1 = myObject.GetField("myResult")

   if (IsError(res)) 

     echo("Calculation failed")

     return

   end

   echo("The result is "+res1)

end

In the next post we’ll discuss how to get the JNI exceptions and the error stack from the jvm.


Checking for the membership in a Group (OScript)

From time to time you have to check, if your user is member of a defined group. The UAPI.RightsListByID returns a list of all groups, in which the specified user is a member (directly or indirectly through membership in another group).

You can use something like this snipped in your function.

object uSession = request.prgCtx.fUSession 

dynamic uGroups 

if isDefined(uSession) && !isError(uSession)

 uGroups = UAPI.RightsListByID(uSession.fSession, uSession.fUserId)

 if isError(uGroups) 

   dynamic check = error.ErrorToString(uGroups) 

  end 

 end 

The Dynamic check contains the RecArray of groups, in which the current user is a member.  This snipped is intended to be run from a request handler.


Making Configuration Values Cluster Safe

Normally, there is a file called “opentext.ini” in the config directory of your Content Server instance. This file contains a lot of configuration values.

A content server reads this file at boot time.

But, if you use a cluster of Content Servers, its a problem changing all “opentext.ini” files for a configuration value. And rebooting them will use a lot of down-time.

In a cluster, there is another option to store configuation values, the “KIni Table” in the database. This values are read immediately from the content server(s) and do not require a reboot.

From OScript, use the database storage like this

Retrieve a value (from the “MySoftware” Section)- Default Value 50, if this is not existing)

result = CAPI.IniGet(dbConnect.fLogin, ‘MySoftware’,‘StartJob’, 50)

Set a value ( sets StartJob value of MySoftware to 50)

result = CAPI.IniPut(dbConnect.fLogin, ‘NySoftware’,‘StartJob’, 50)

List all configuration values registered under MySoftware

result = CAPI.IniList(dbConnect.fLogin, ‘MySoftware’)

Delete a configuration value (deletes StartJob value from MySoftware)

result = CAPI.IniDelete(dbConnect.fLogin, ‘MySoftware’, ‘StartJob’)


The dbConnect.fLogin is the CAPICONNECT(the login object) to the database.

Upload a File to Content Server using REST and Javascript

This is an example how to upload a file using JavaScript and REST.

This example uploads the file c:\test.txt with the name of “MyFile123” under the folder with the node id 485336. This snipped relies on a previous login. The subtype of the file to be uploaded is “document” (144). The authorization token is saved under the variable name of “otcsticket”.

This example does not consider any categories (mantadory or not). We’ll discuss this in a later post.

6 Steps:

  1. Declare all variables needed. This is done by defining the array bodyData. At least there must be the subtpe, the parent_id, the name and the local file name.
  2. Fire an AJAX request to the URL, where your content server is, Use “api/v1/nodes” as REST command.
  3. Put the authorization ticket in the header field
  4. Put the bodyData in the data field
  5. Set the Mime Type to “application/x-www-form-urlencoded”
  6. If the request is done, process the “success” or the “failure” clauses

Put some nice HTML around it, add the authorization code and then you are done.

(At least for this example. Normally, you should provide some name check for the node name)

function upload() {
  var bodyData = {
        type: 144,
        parent_id: 485336,
        name: "Myfile123",
        file: "c:\\test.txt"
        }
      formData = new FormData();
  formData.append( "body", JSON.stringify( bodyData ) );

  formData.append( "file", "c:\\test.txt" );
  return $.ajax( {
    type: "POST",
    url: "http://[yourserver/yourcs/cs.exe/api/v1/nodes",
    data: bodyData,
    headers: { otcsticket: otcsticket },
    beforeSend: function( xhr ) {    
    xhr.overrideMimeType( "application/x-www-form-urlencoded" )
    }
  } ).then( function ( response ) {
    alert("Success")
  }, function ( jqxhr ) {
    alert("failure")
  } );
}


CSIDE Command Add Documentation Comments

There is an interesting command in the newer CSIDE versions.

Add Documentation Comments

This can be found in the menu “Source”

Here is the Documentation Commands Entry

This works like the similar commands in java IDEs or in Visual Studio.

Imagine, you have a source code like this

Source Code without documentation comments

and if you use this new command, you’ll see, your source code is amended with the documentation comments like this

Source Code with documentation comments

This basic documentation comments are only a framework and they should be extended to declare the purpose of the function, the variables and the return values.

Remove Unused Variables in CSIDE

A very interesting function is “Remove Unused Variables” in CSIDE:

Where fo find the command

This command will remove all unused variables from the functions in the edit window.

The command at work

At left, you see the declaration “integer s=1”, which is not used in the function. At right, you see, this declaration is deleted after the execution of the “Remove Unused Variables” command