

Disclaimer: This requires a modification of app.html. Doing that will put you in the club of villains who intentionally change internal weblingo files.
OK, you’ve been warned.
Just kidding.
Permanent modifications
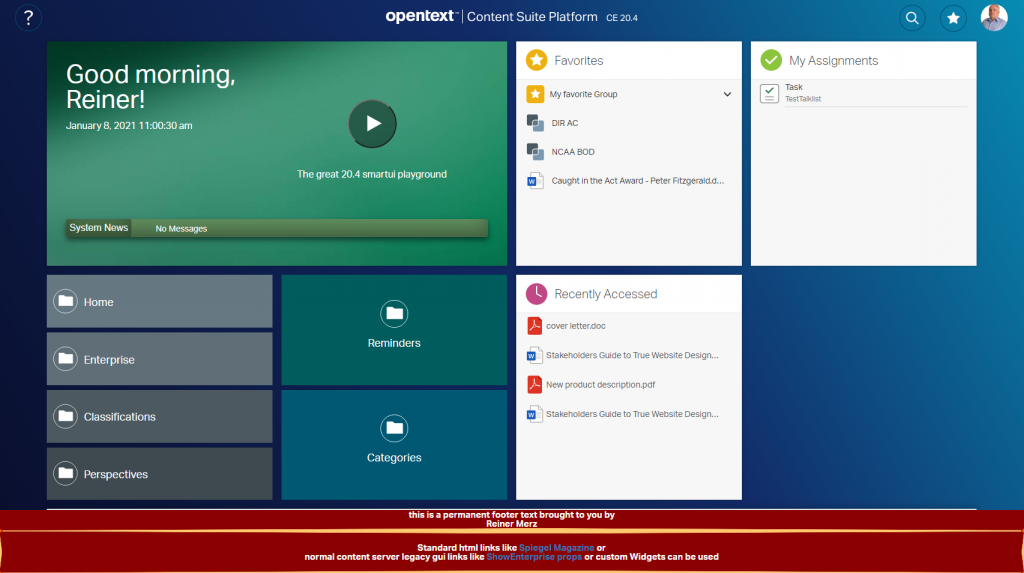
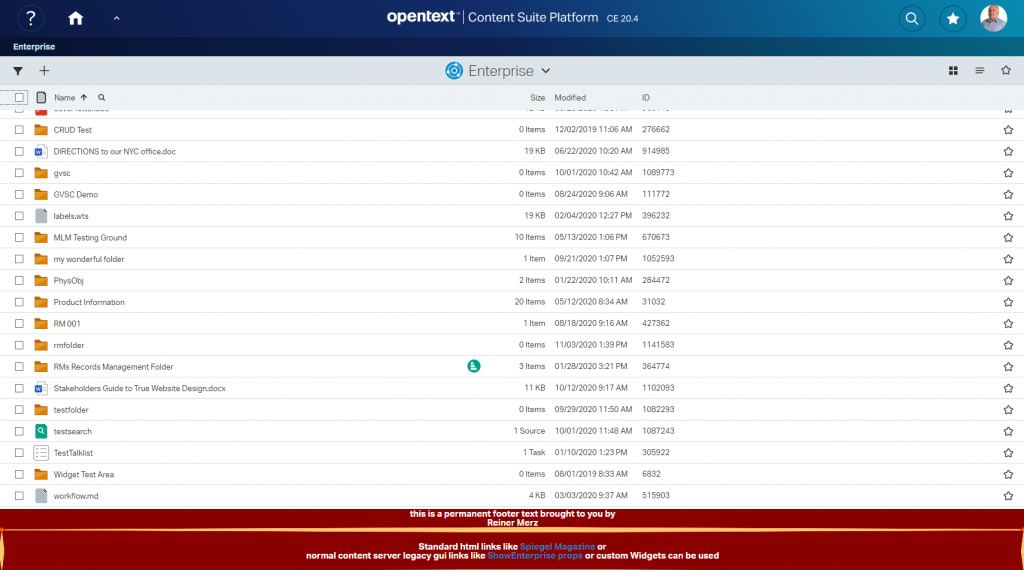
Lets take a look on the result. Maybe you need such a thing to comply with federal rules, to setup any “Impressum” or any links with GPDR of other infos. Then this example is for you:
This is not a thing you can do with perspectives. So the easiest way is to change the app.html which starts smartUI. This time, a serious disclaimer:
As always, the app.html can be changed by patches or with new versions of Content Server without a notice. You should test these things after applying patches/new versions to check, if the modifications are still inside this html file.
But this is normal. At least on 20.4 this is running.
So how to do this?
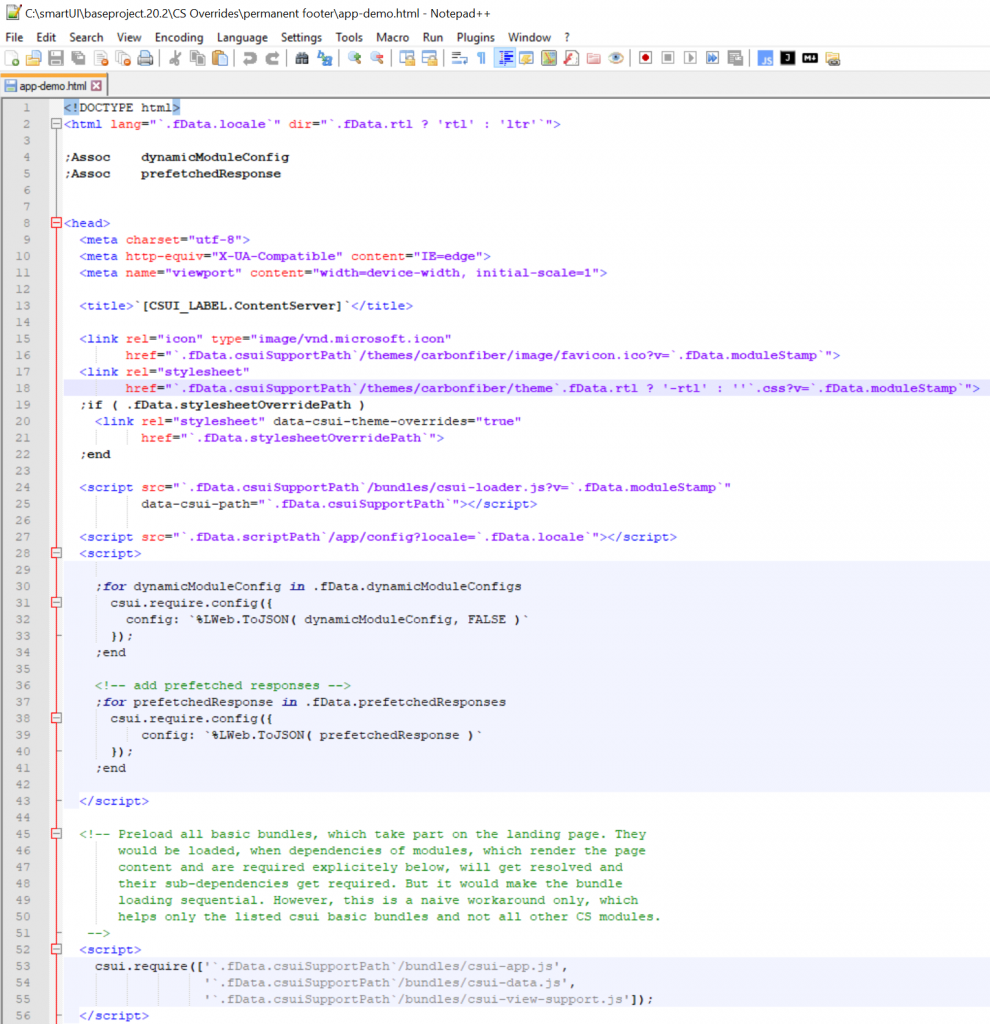
Lets take a look on app.html (hier its named app-demo.html, I can switch between footer version and normal version by simply copying the appropriate html files).
First half is quite standard. The page adds the theme stylesheet and, if the CSS-Override is switched on, loads the custom stylesheet at last.
Then the Oscript based configuration of dynamic JS module parameters is loaded and the csui modules on the client side are configurated with that parameters by sending JSON arrays to csui.config.
Then all bundles are required for csui.
As mentioned, straitforward and not very complex.
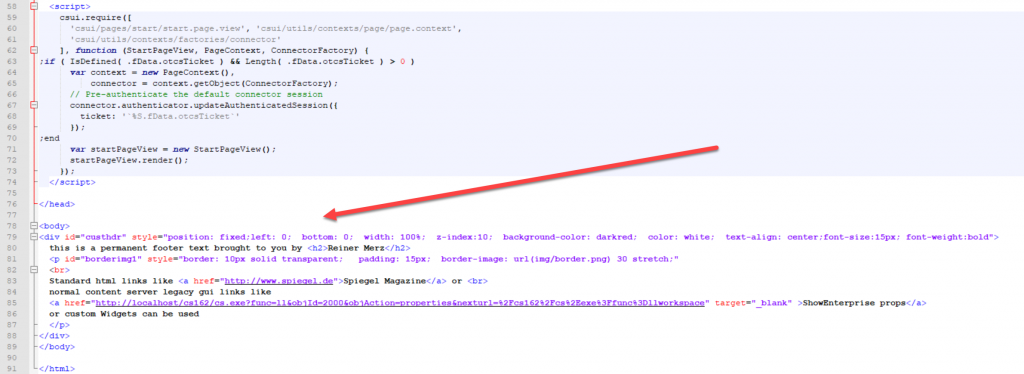
The second part is simply an empty body. csui is using JQuery to add the perspective contents in the main body.
So you can simply add permanent things in that main body.
Csui will append the content after your content.
The content to make the red footer (see above) is
<body>
<div id="custhdr"
   style="position: fixed;
   left: 0;  bottom: 0;  width: 100%;  z-index:10;
   background-color: darkred;  color: white;
   text-align: center;font-size:15px; font-weight:bold">
       <p id="borderimg1" style="border: 10px solid transparent;   padding: 15px;  border-image:          url(img/border.png) 30 stretch;">
        Standard html links like <a href="www.spiegel.de">Spiegel Magazine</a>  or
        normal content server legacy gui links like
<a href="http://localhost/cs162/cs.exe?func=ll&objId=2000&objAction=properties&nexturl=%2Fcs162%2Fcs%2Eexe%3Ffunc%3Dllworkspace" target="_blank" >Enterprise Workspace</a> of custom widgets can be used
</p>

</div>
</body>
First, lets define a div with our custom extension. The positioning is done via an internal style and serves as an example. The position can be set to any direction, I put it down as footer.
Then inside a p element is the content. First, to make things more nicely, a border image is put around the p element. Then standard text, standard html links or links to the content server content can be used as content.
You can even add a widget here, but this follows no perspective conventions. It will be fixed on the screen.
The smartUI will follow later after the closing </div>.
Nice, isn’t it?