In the versions prior to 21.4 the module version numbers tented to be confusing. To fix this, there is a changed “Install Modules” page.
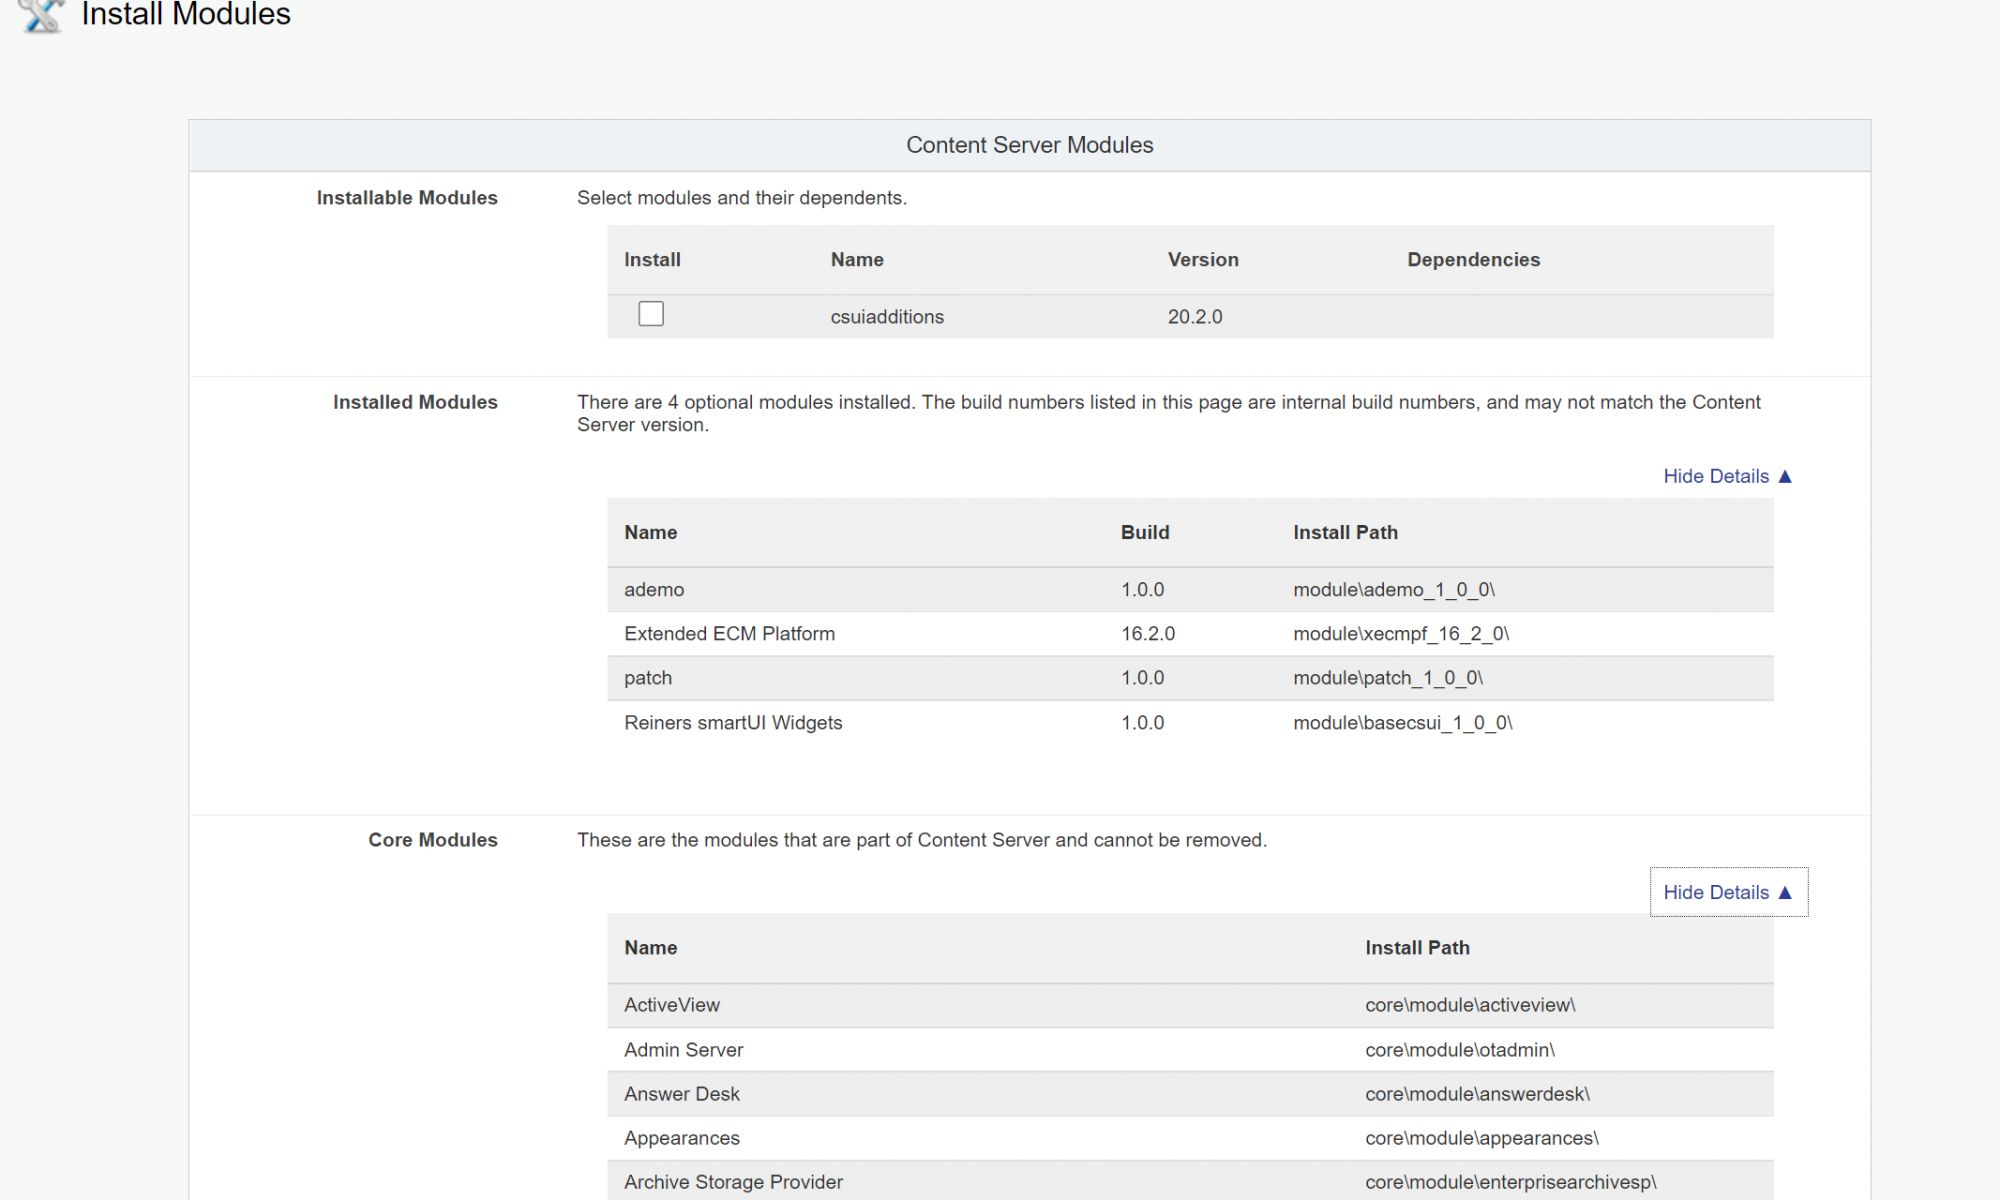
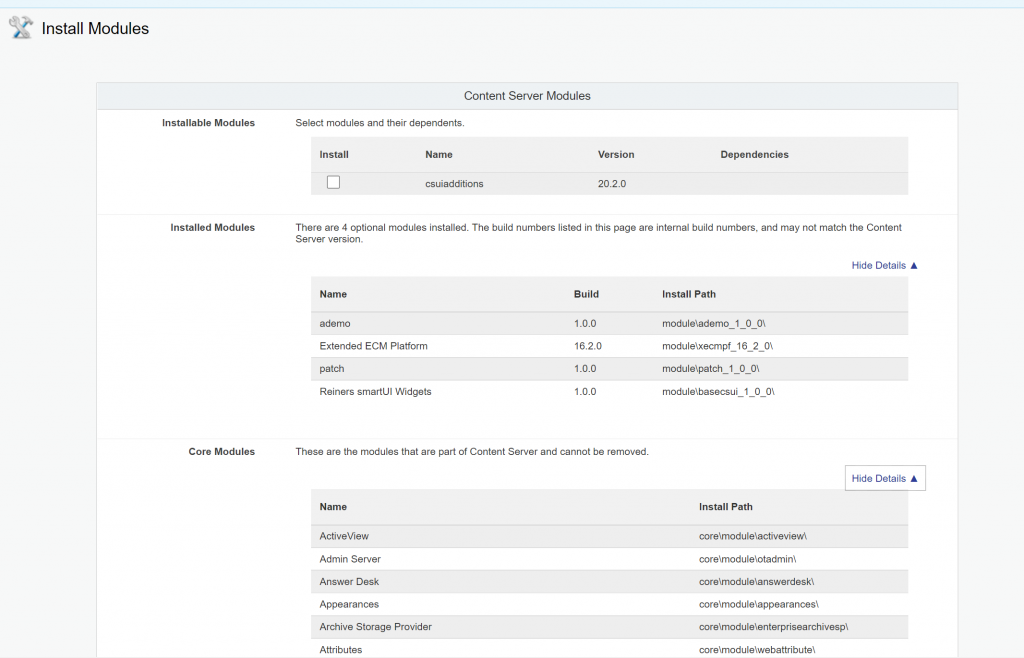
This page has been redesigned to avoid confusion.
The standard modules appear in a separate secsion without version numbers. And the somewhat long names (like “Content Server Comments” are simplified to “Comments”.
The optional modules are listed in the “Installed Modules” section. They now feature “Build” instead of “Version” to clarify the meaning.
Have much fun with the new “Install Modules” page.
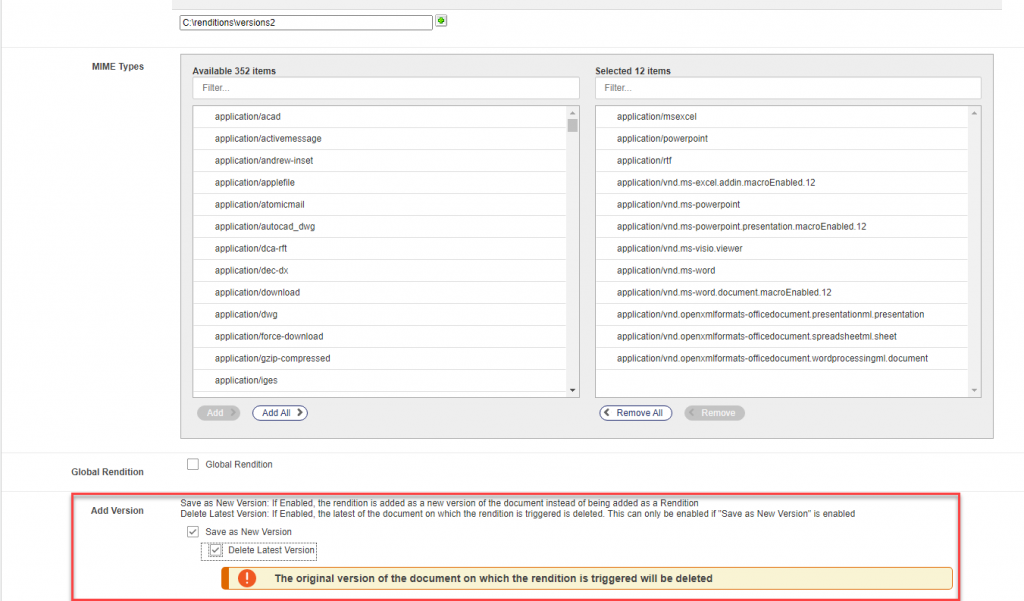
The new Rendition Administration option allows the Delete or Overwrite of the latest version. This is a configuration to be made under the Admin pages (Renditions/Configure Versions Folder/Edit Versions Folder)
If “Save as new Version” is marked on, the rendition will be saved as new version instead of beeing saved as Rendition.
If “Delete latest Version” is marked on then the document which triggered the rendition will be deleted.
This improves the workflow if processing and the retention of the original document is no longer required,
The world is bad and bad boys are amongst us. They will not even change app.html, they even can steal real documents or do other things with their sessions. As a precaution, there is a new User Session Management – Expiration
?func=admin.securityvars
This new management allows to exploit the Cookie Authentication Infos. User sessions can be terminated in much more advanced way then the usual Security Tokens. The rules are:
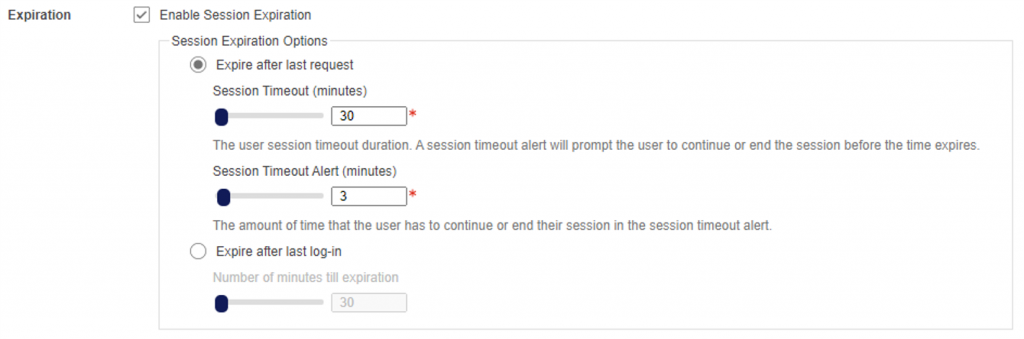
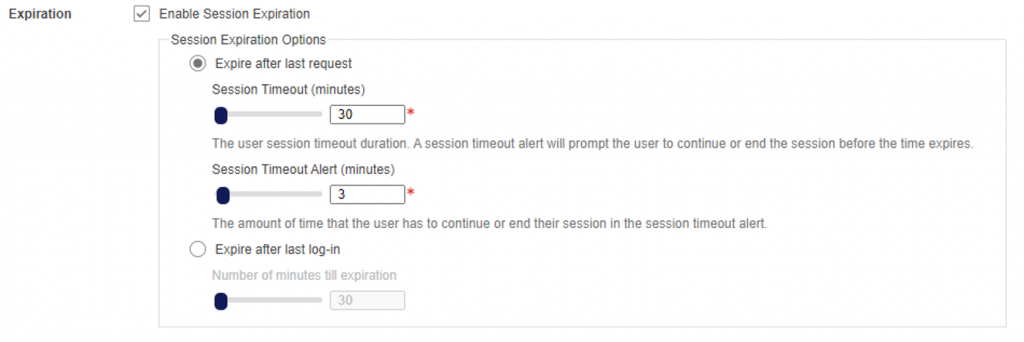
By default, the session is set to expire 30 minutes after the last action is performed.
The Session Timeout minutes ranges from 1 to 10080 (7 Days)
Session Timeout Alert minutes ranges from 0 to 120
Also: Session Timeout Alert cannot be higher than the Session Timeout
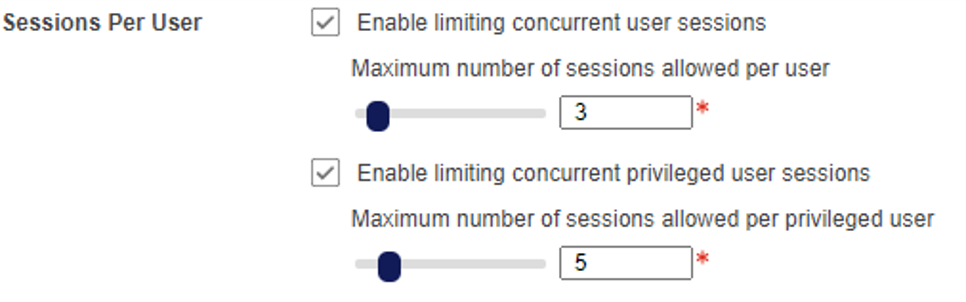
But: A session limit is not enabled by default
Example
If the user is not active, then the session will expire after 30 minutes from the last request made to the server.
3 minutes before the session expiration (on the 27th minute) an alert will be displayed to the user that their session is about to expire
Note: A session is not equal a session, the system admin must cosider these rules:
• If the Content Server is active on multiple tabs of the same browser is considered as one session
• A Content Server active on multiple browsers is a separate session on its own
• If the Content Server is active on CS Mobile or Enterprise Connect is is considered as a separate session
•And when the Content Server is active on other integrations like SAP, Salesforce, SuccessFactors etc. this is considered to be a separate session
Warnings
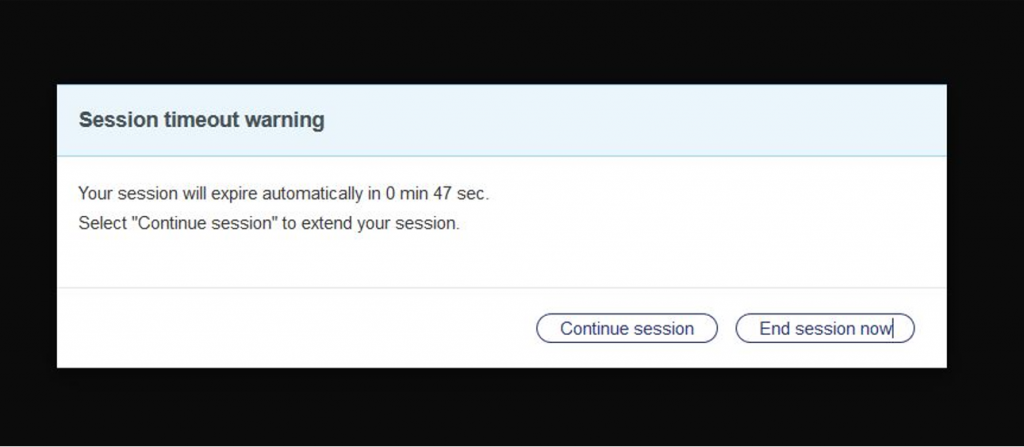
User session terminations are proceceeded by some warnings. If the sesssion is still active but will be disconnected soon, the user gets his warning:
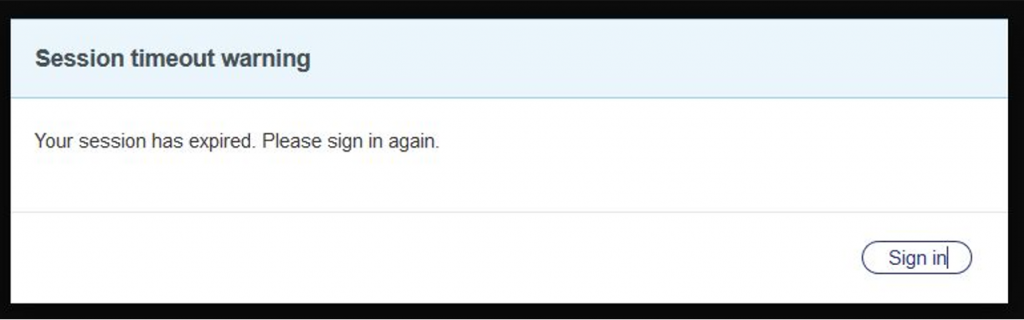
To keep the surprise as small as possible, the user can push the “Continue Session” button and extend his session. But if the session is expired the user gets this panel
The “Sign in” button redirects to OTDS and the user has to re-authenticate his session.
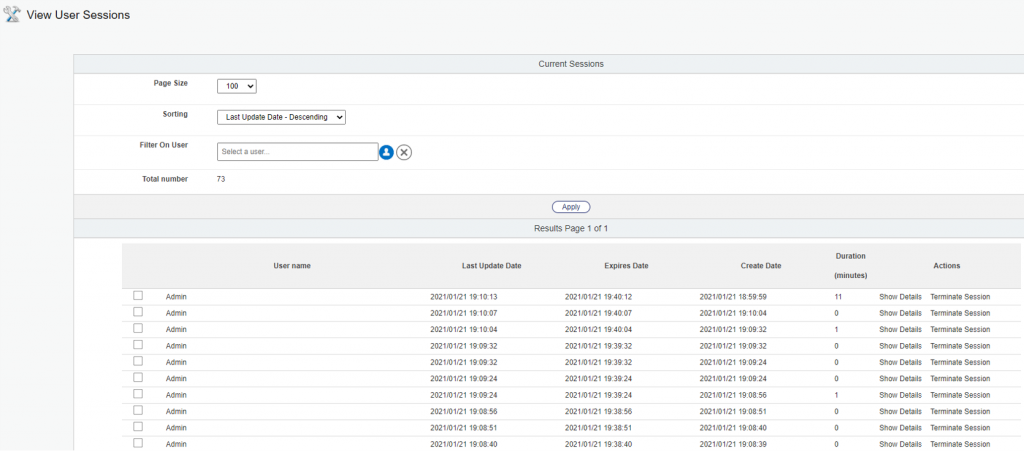
The other side: View Sessions
This will be the tool for the admin to view sessions.
And, for different reasons, there is a button ‘Terminate Session’ ends the user session, and the user will be forced to re-authenticate again.
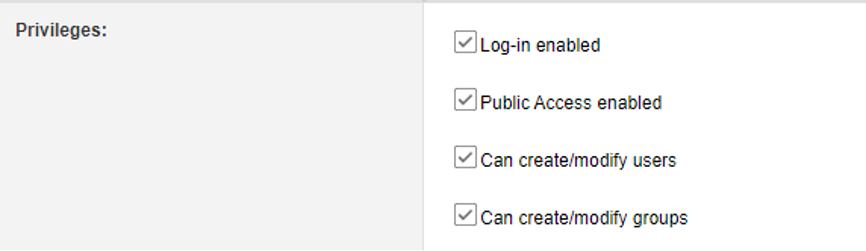
User Sessions will also be terminated by any “Logout” button and on removing the “Log-in enabled” privilege at the user profile edit page
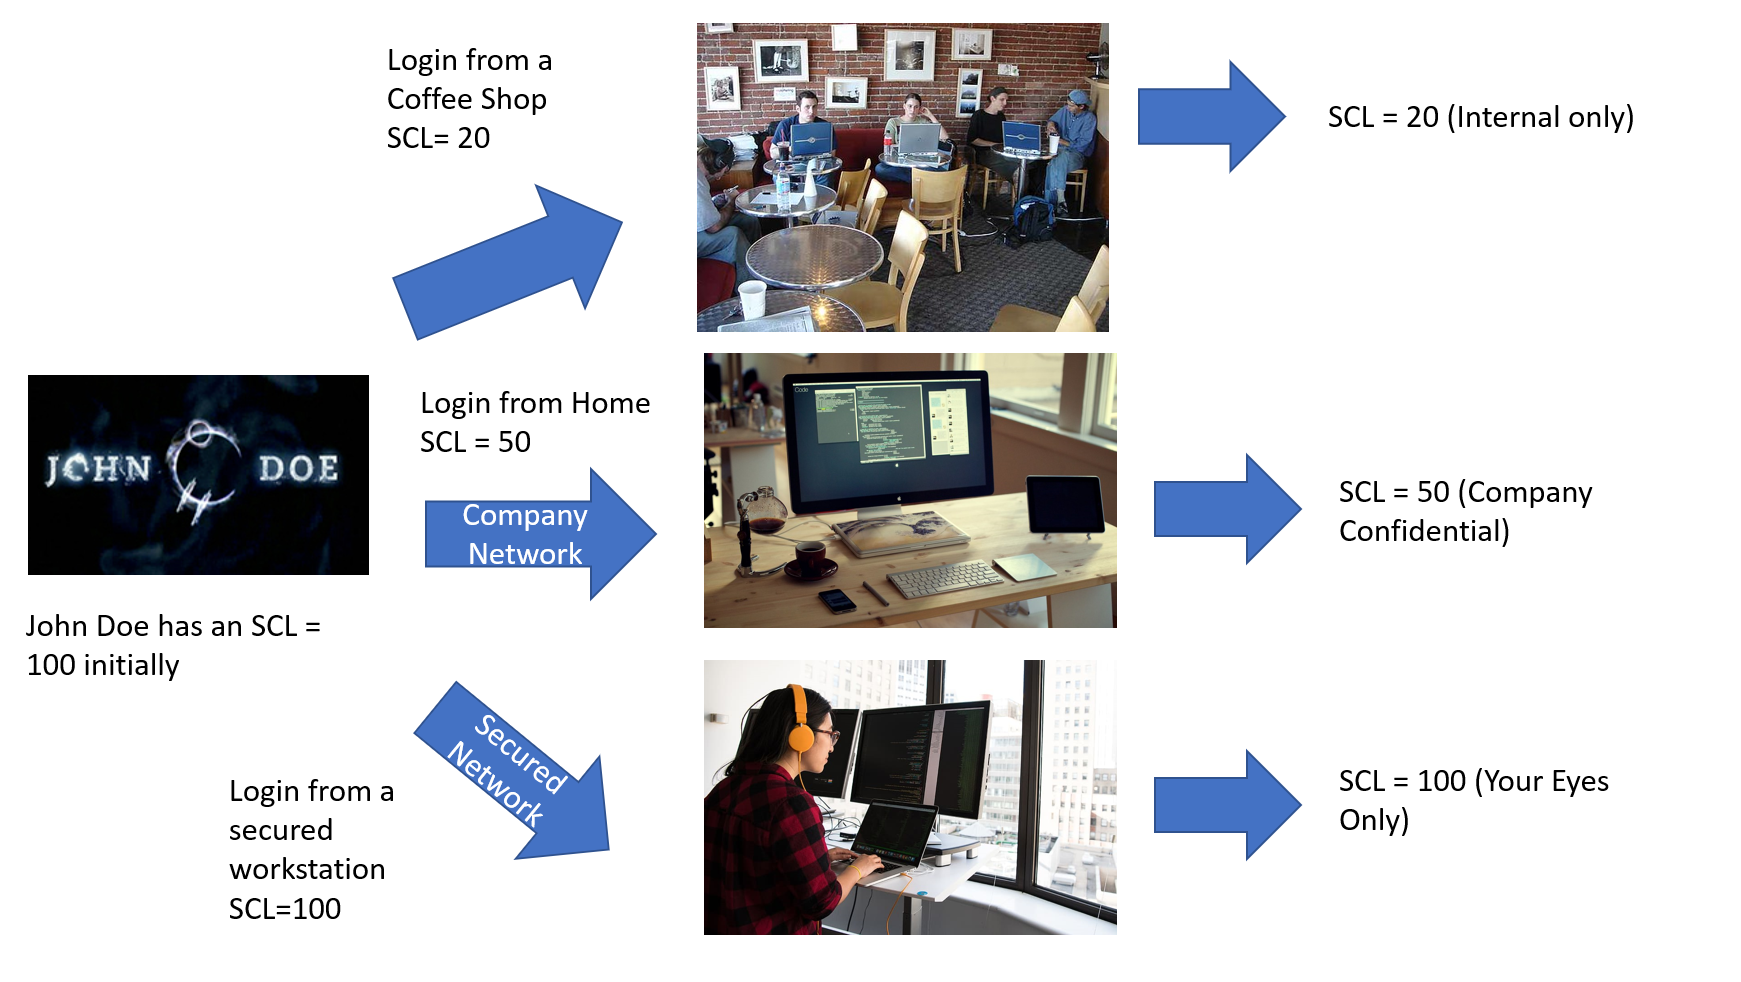
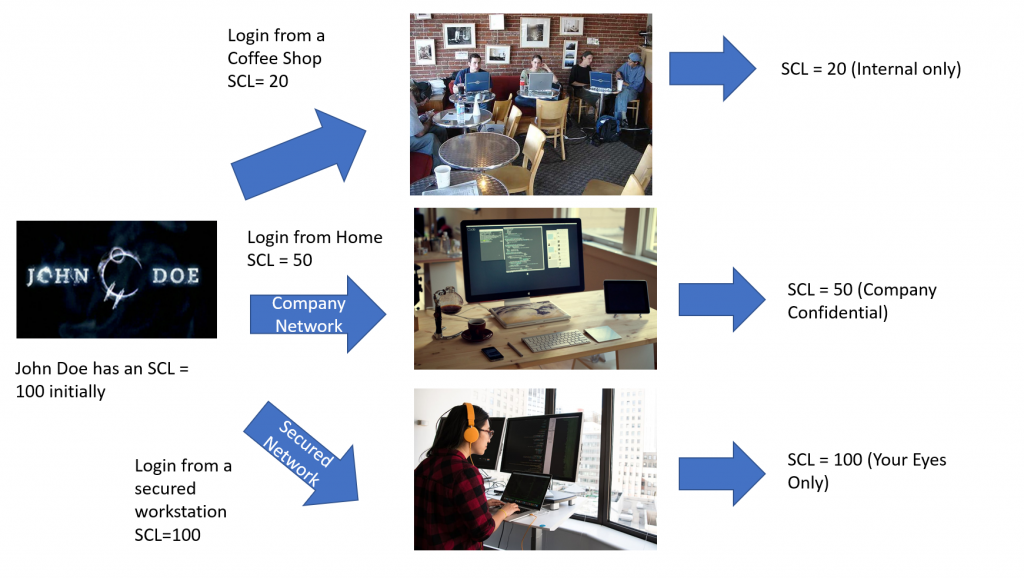
Good news for security concerned organisations. Finally, its possible to assign different Security Clearance Levels for different organizational conditions, such as devices logged in or network used to login.
Let me explain this using an example.
A company manager called John Doe is regularily working with secret and top secret docs. Therefore he is assigned the highest level of SCL, 100, which allows him to access the most confidential docs of the enterprise, like the canteen menu or so……
All from his normal office with a secured network.
But, when he is on the road, he occasionally is in other offices of the company using the company network. Or even in Home Office, which is a good idea in these times. Here, from time to time he has to check things, but on a lower security level.
Also, from time to time, he wants to have a coffee in some coffee shops. But he wants to hide all information from other guests (maybe Mary Jane?) , so he wants only access to the company intranet docs. This implies an even lower SCL.
And, of course, he an amend his SCL up to the level originally granted anytime he wants.
How does it work?
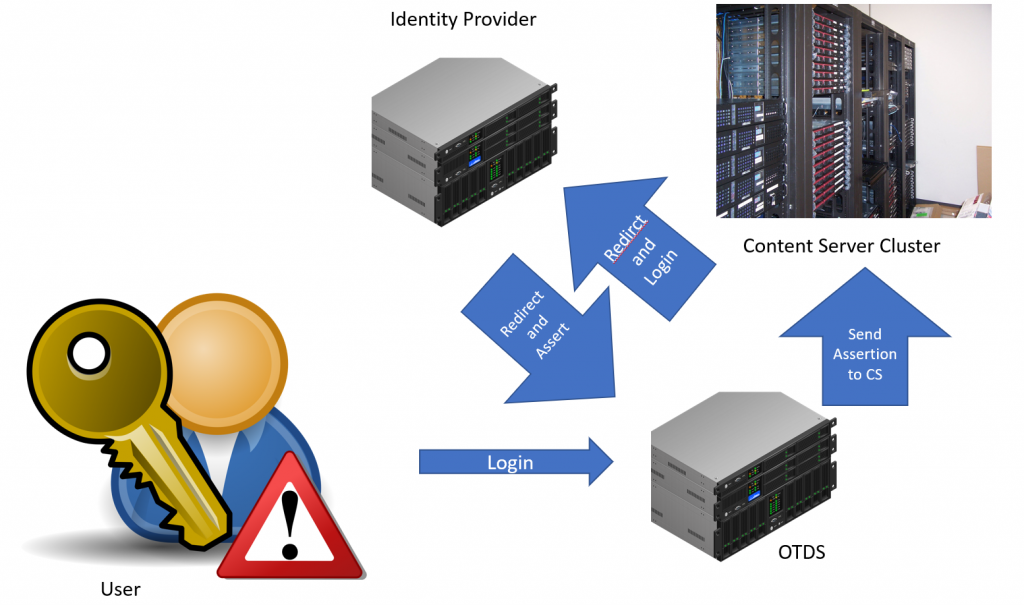
At first, it works only with a SAML Identity Provider of any kind. SAML means Security Assertion Markup Language and is an open standard for exchanging data between an identity provider and a service provider.
Wow, sounds like an alien thing.
Not really, we already know OTDS (OpenText Directory Services. And our Content Server (Cluster) is the Service Provider. If a user logs into the Content Server, he is redirected to OTDS, his ID is verified and he can log in the Content Server.
In all cases, the Service Provider has to trust the OTDS.
Logins can be handled in the easiest cases directly from OTDS, OTDS can also utilize any LDAP directory for getting the Verification.
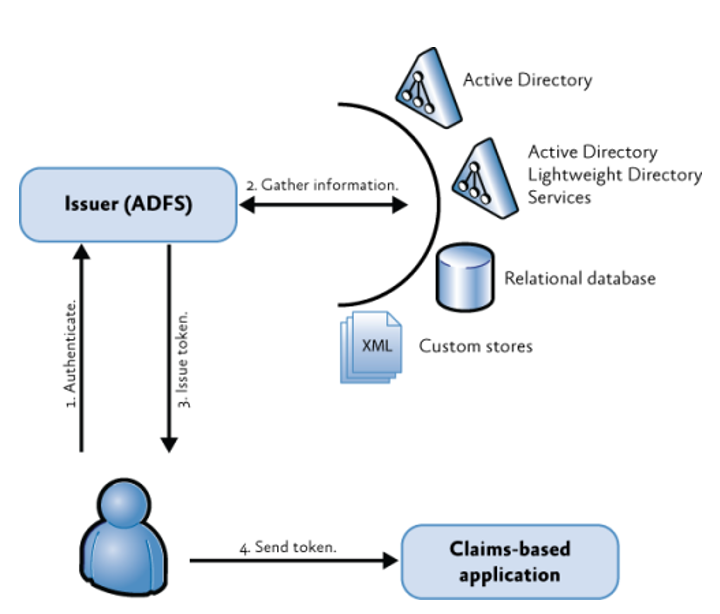
Identity Provider. An example
Next in our chain is the Identity Provider. There are many Identity Providers available, but let’s start with ADFS (Microsofts Active Directory Federation Services).
In this schematic there is the so called “Claims based application” which is OTDS with Content Servers. There must be also any information to tell something abount the user and if he is ok or not. This is dprovided by Active Directory / Active Directory Lightweight Directory Services or any Database or custom storages for the user information.
ADFS is only an example, there are many other Identity Providers avaliable, like Octa, OneLogin, Google, Centrify, Azure, Salesforce, SAP, …….
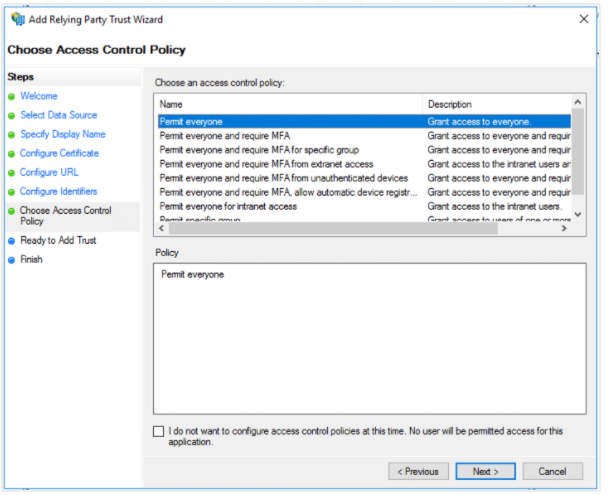
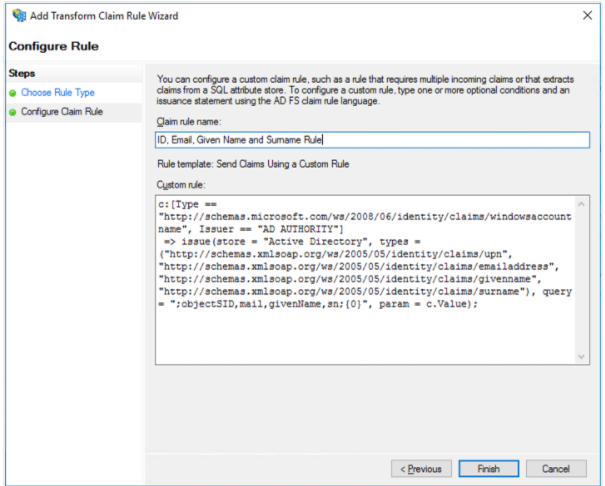
Here at ADFS there are three things left to do.
define an Access Control Policy
2. Define the rule against attributes
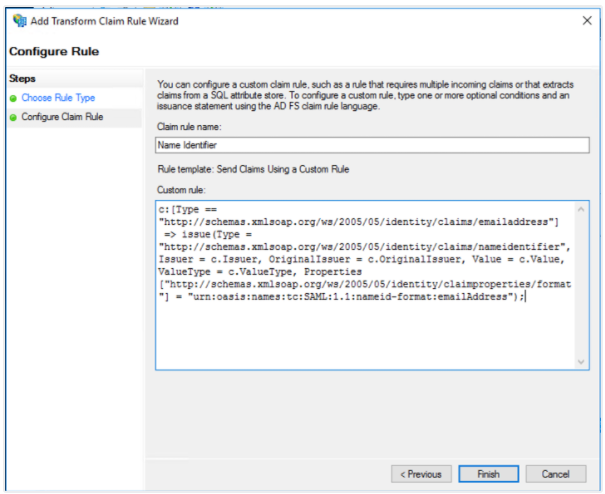
3. Define the Assertion to send
Here, its an example “ID, email, Given Name and Surname” – Rule.
Good News for Content Server Administrators. They are no longer aloane on monitoring the system.
A new type of Administrator is born, the Business Administrator. The Content Server now has two kinds of events. The “System Events” are for Administrators, the “Business Events” are for Business Administrators.
Business Events are not only for a relief of System Administrators but also to capture events of interest to Business Administrators operating their normal day business.
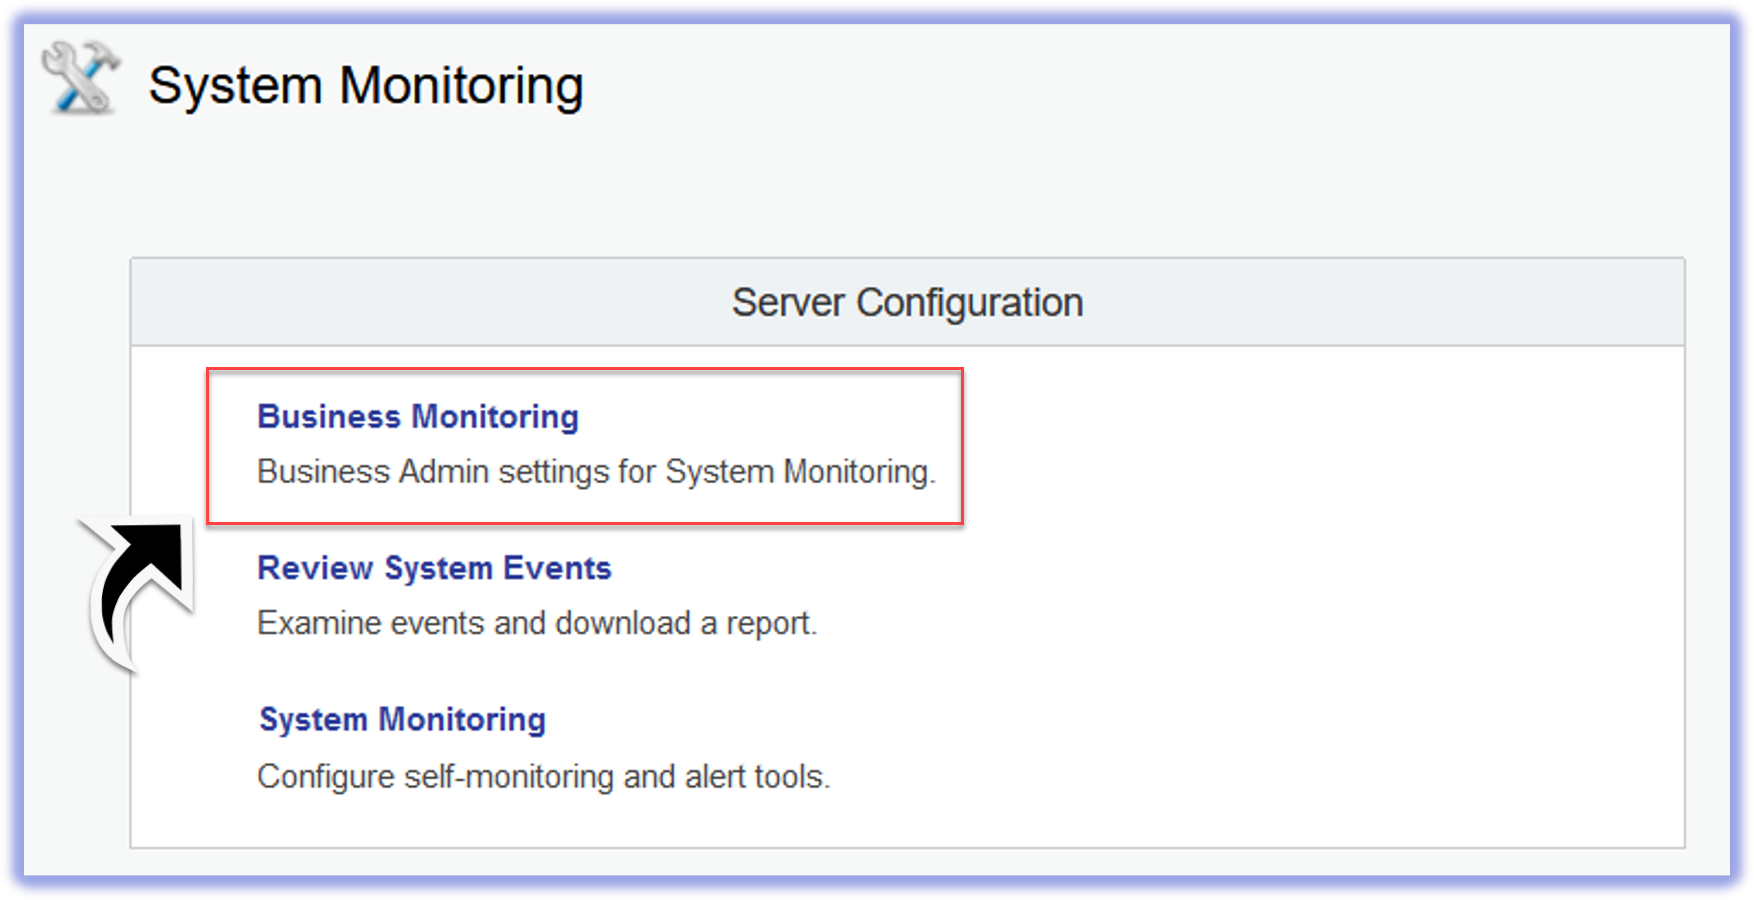
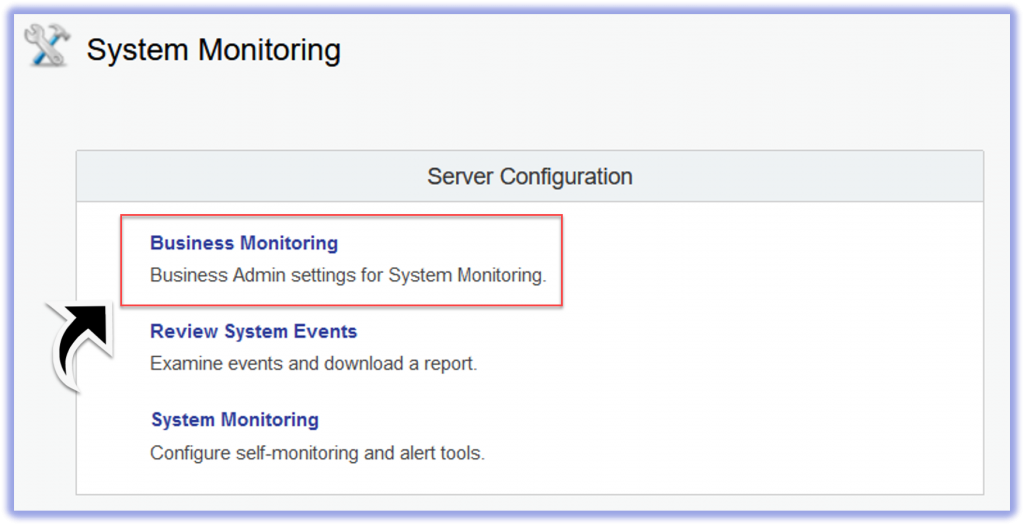
New in System Monitoring
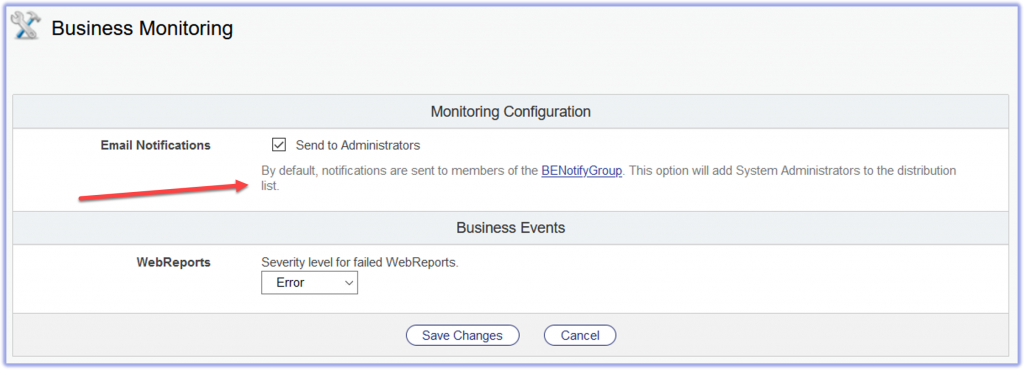
There is a new link in the System Monitoring Admin Pages
In the Configuration, email Notofications will be send automatically to the group BENotifyGroup. This group is created for new installs and upgrades. An option to send these notifications also to Administrators is per default on.
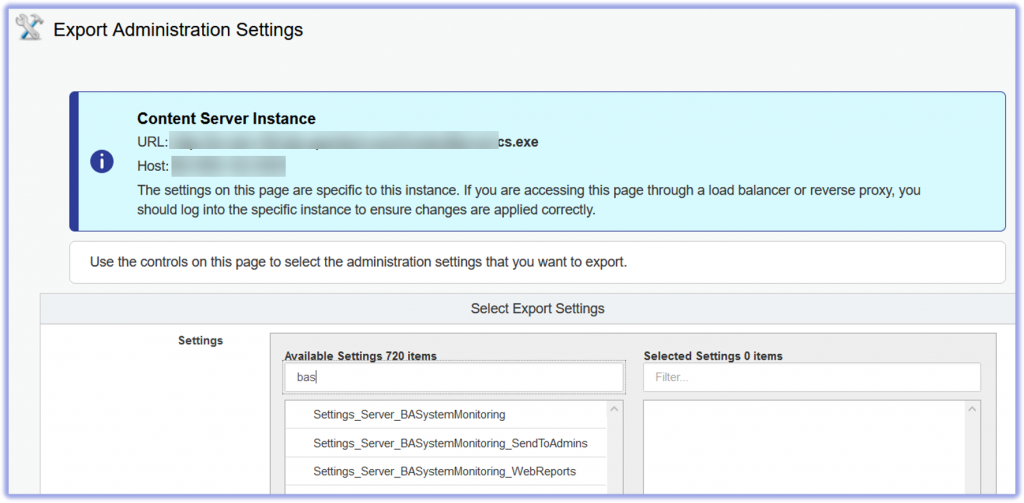
This Events are also scriptable and exportable
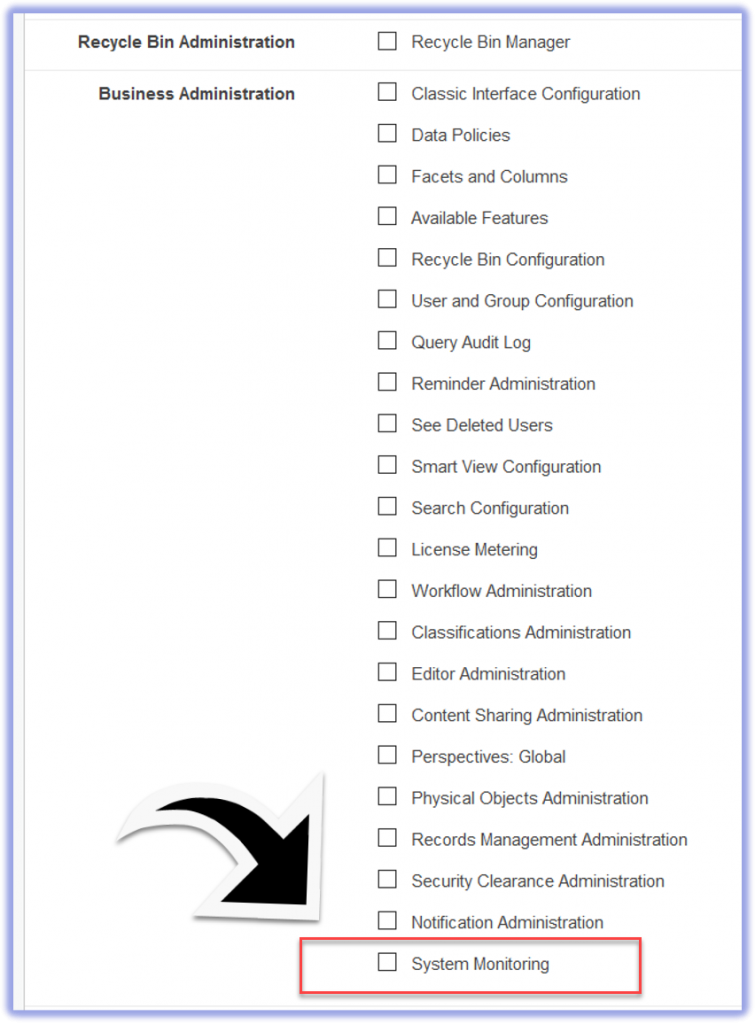
And also there is a new Usage Privilege called “System Monitoring”. With that privilege you can access the “Business Events” configuration page ans the “System Events” reports page.
To access, the group “Business Administrators” must be enabled, which is the default, otherwise the access will be restricted.
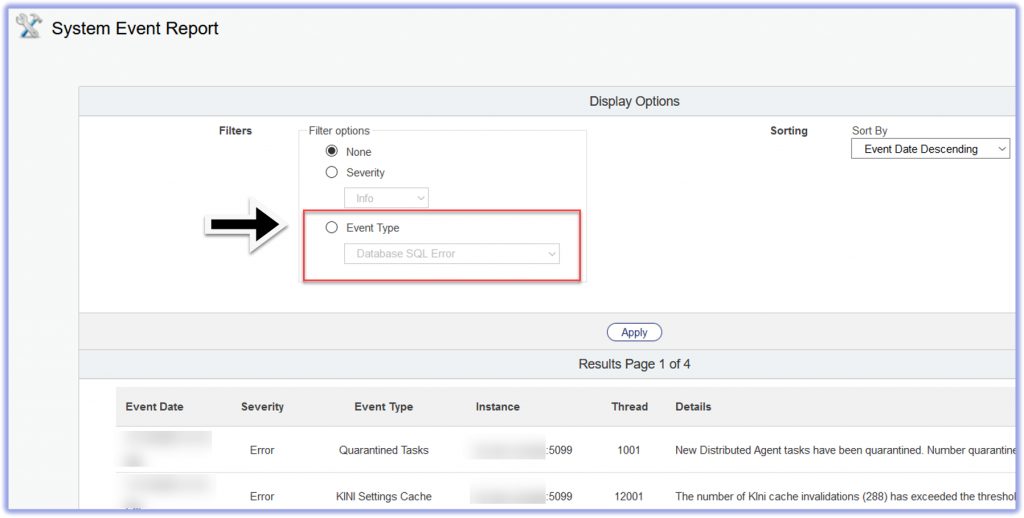
Business Event Reports
The “System Event Reports” is a shared admin page for reviewing and exporting reports. Here we have two kinds of users:
Business Administrators see Business Events, no System Events.
System Administrators see only System Events, unless the “send to Administrators” is checked. If its checked, they see both.
New on this page is the filter by Event Type.
Happy Event Monitoring for Business Administrators and Happy Spare Time for Administrators.
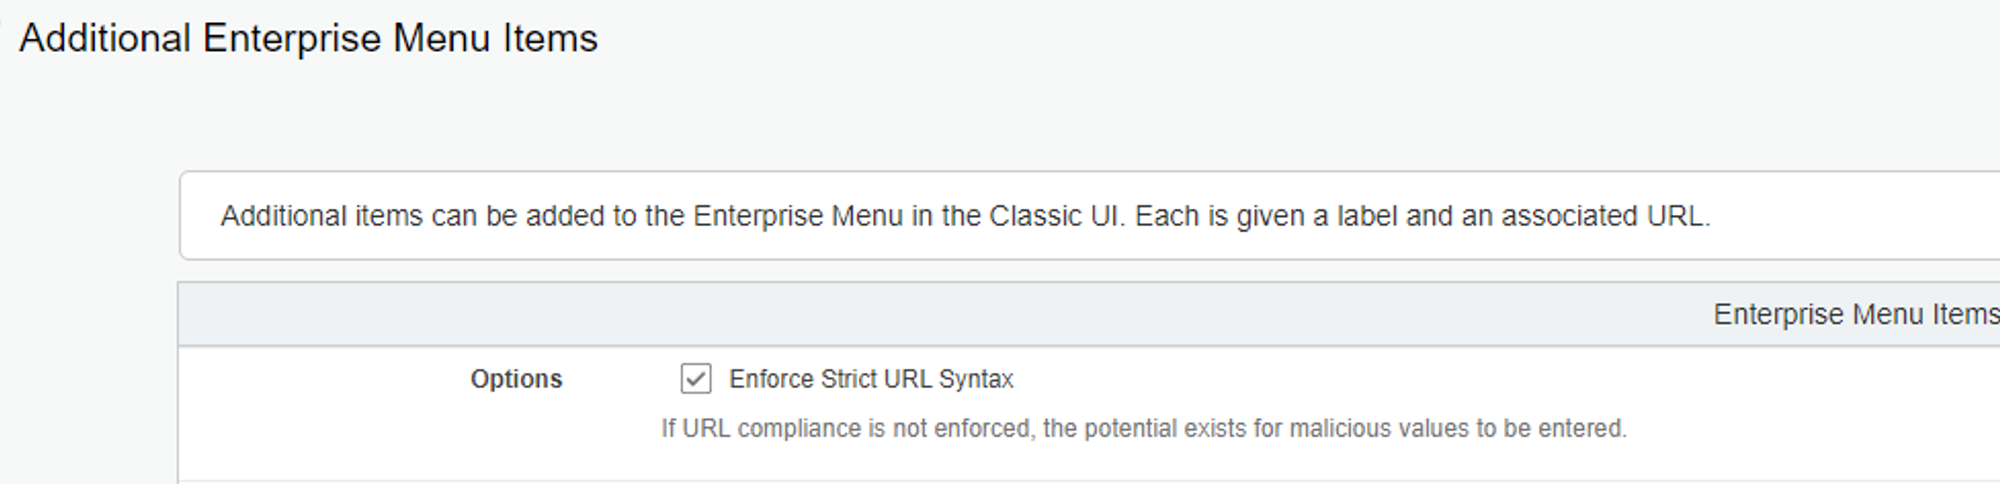
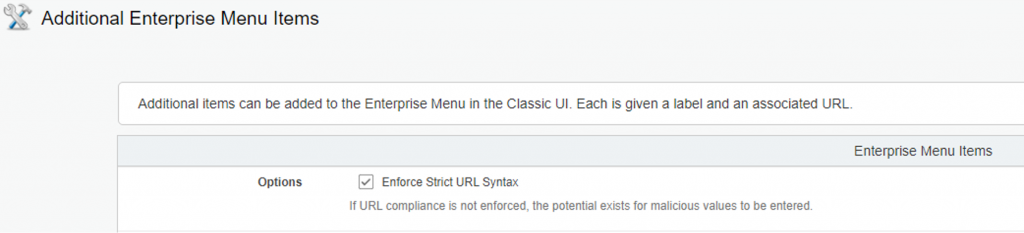
In 21. there is a new checkbox in the “Additional Enterprise Menu Items” Admin page. This allows you to enforce a stroct URL Syntax without Javascript or relative URL Syntax.
A small extension to 21.1, but a giant leap for Administrators to enforce more security on the Enterprise-Menus.
The Admins have an option to overrule this restriction by unchecking the new option. But this page is restricted to Content Server Administrators and not available for Business Administrators.
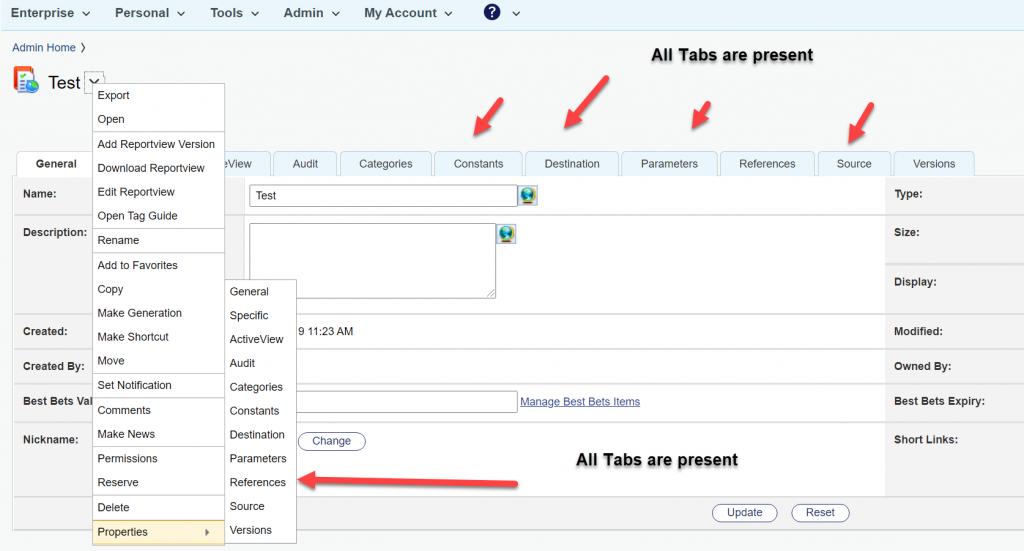
A short, but sometimes time consuming thing are the missing Webreport Tabs. Imagine, you have a Content Server with an jetty based internal Admin Server or an external Admin server on a fast machine.
The problem
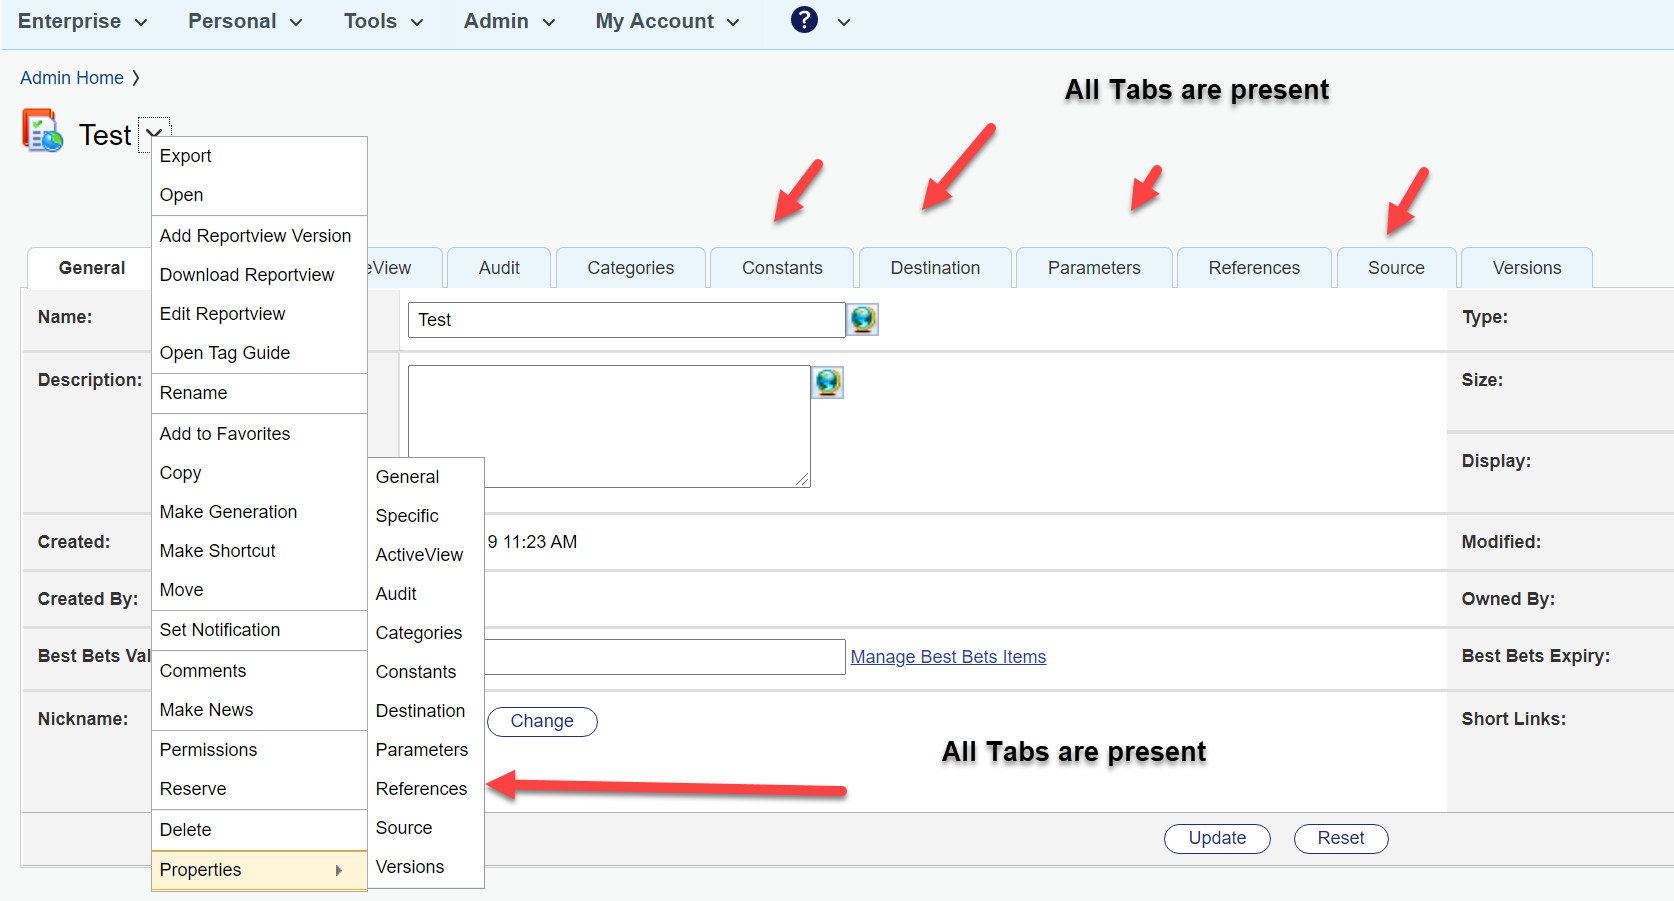
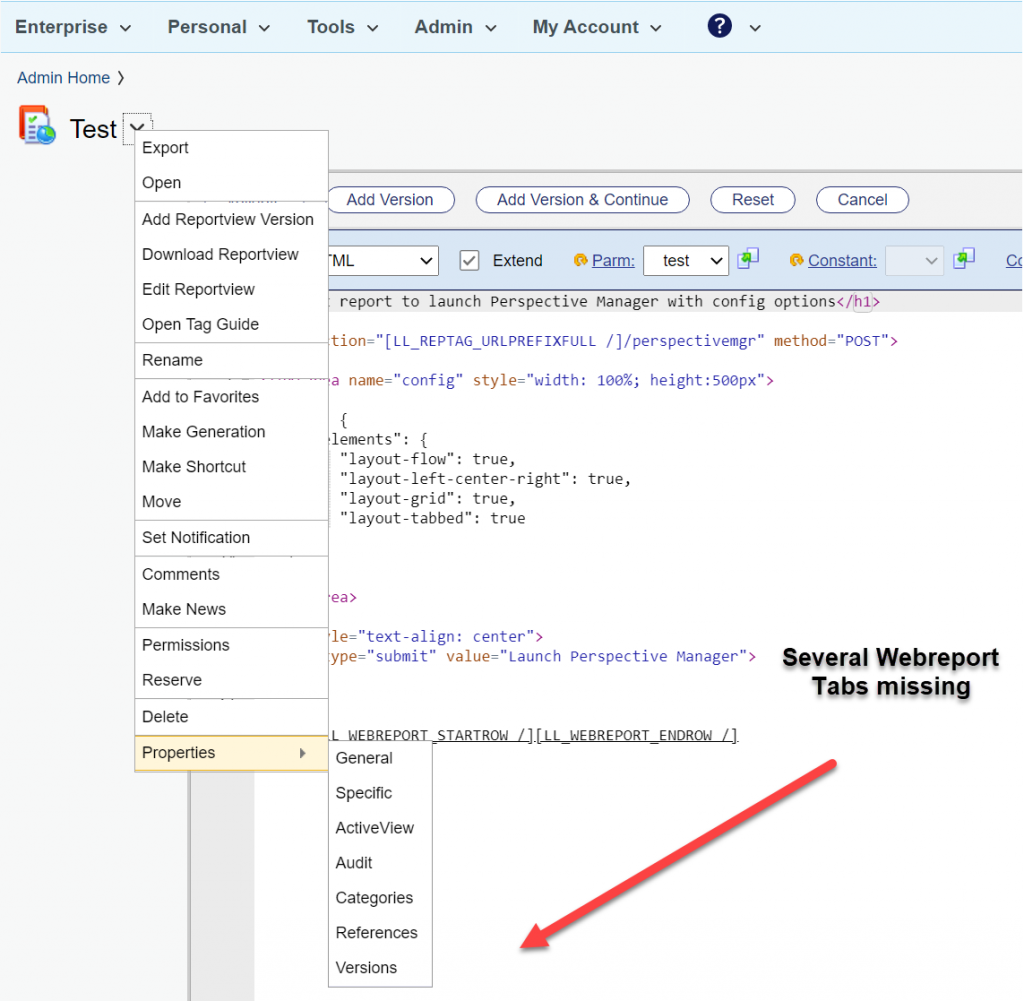
Then, from time to time, you will see this on editing a webreport:
All Edit Tabs for the webreport are missing. Although you can start the missing functions within the URL, its annoying.
The Cure
If this happens, use this Magic Trick N,12:
Simply stop Content Server and Admin Server. Start the Admin Server and wait at least 5 min before starting the Content Server.
Then you’ll see everything is there.
Wow. You made it. You are a great wizard.
Seriously:
There is a timing problem in the Content/Admin Server. If the Content Server starts to fast, COntent Server thinks, there is no license for webreports at first. Later, it gets the license, but the GUI is drawn without the webreports tabs.
Wait for your Content Server to start up. Wait at least for 5 min. Then everything will be drawn in the GUI.
From time to time you’ll have to deal with distributed agents inside content server. This can be a little confusing, so maybe this post is helpful there
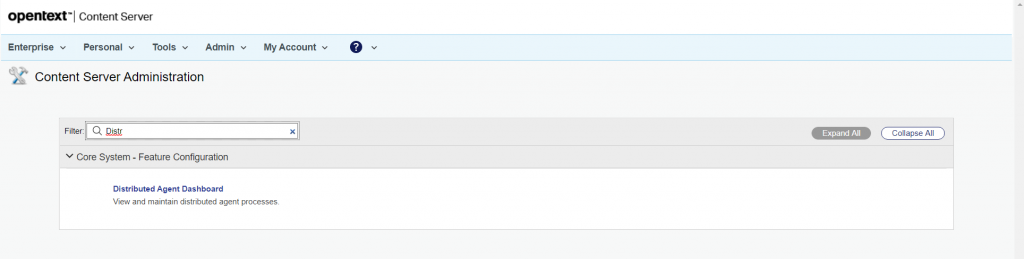
In the Admin Pages, you’ll find a dashboard to control the default setup. Either add a func=distributedAgent.AgentStatus to your servers URL or search inside the admin pages for distributed Agent things like this
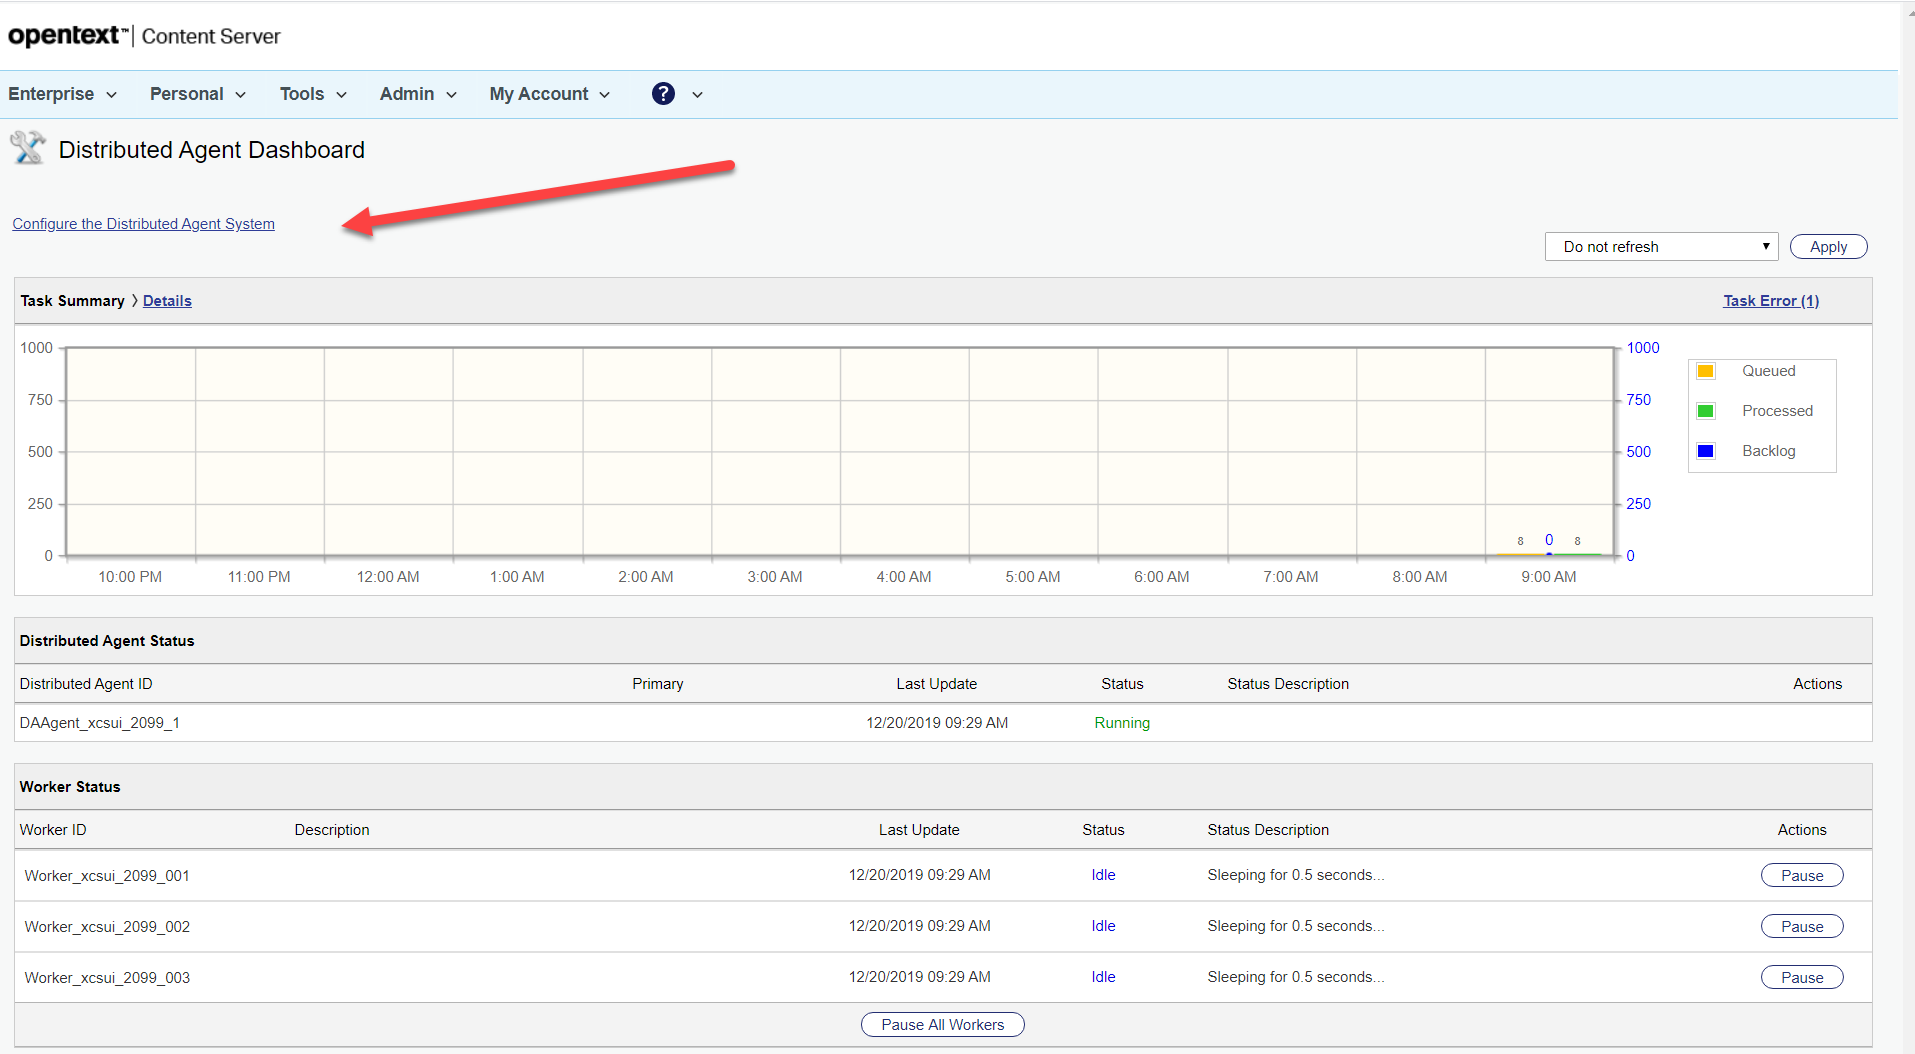
Click on Distributed Agent Dashboard.
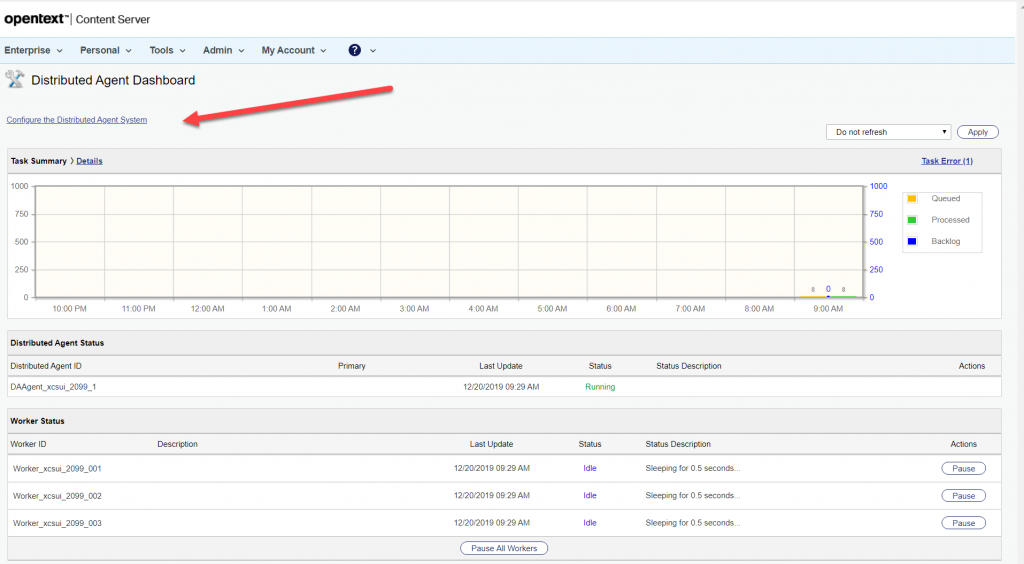
Then you’ll see the distributed Agent dasshboard
Here you’ll find all information about the current state of the system and the configuration of the distributed agent system
Per default a content server has one distributed agent with three workers. You can change the number of workers used by the agent by changing the number of workers in the opentext.ini file in the [distributedagent] section.
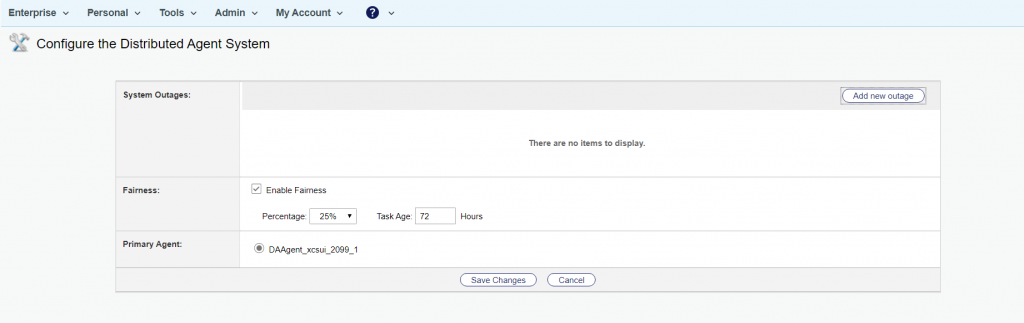
You can configure the whole distributed Agent system by clicking on the link indicated with the red arrow above. Then the configuration page opens:
Here you can set up values for the the treatment of low priority tasks (Enable Fairness). The agent can spent between 5% to 50% on low priority tasks, which will be processed aftera minimal age set by “Task Age”.
When you have more than 1 agent in the system, you can switch the priority Agent here also. OpenText recommends that you select the Distributed Agent with the greatest capacity to be your Primary Distributed Agent. Typically, the Distributed Agent with the greatest capacity resides on your most powerful or your least busy computer.
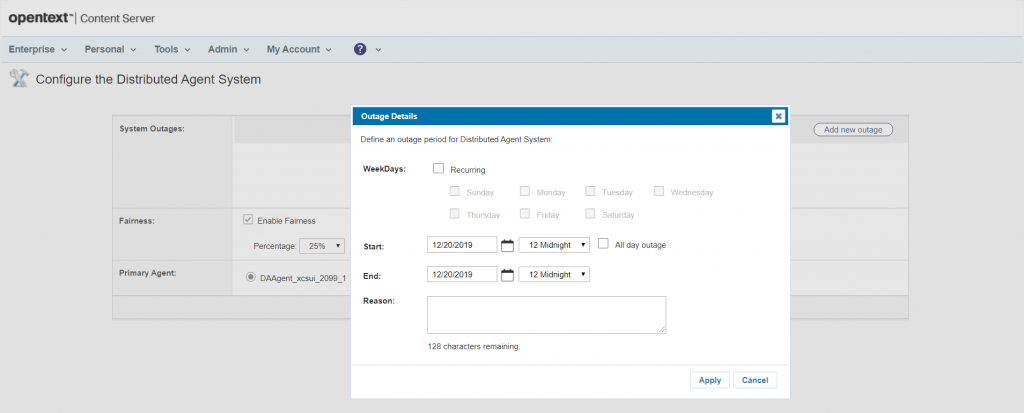
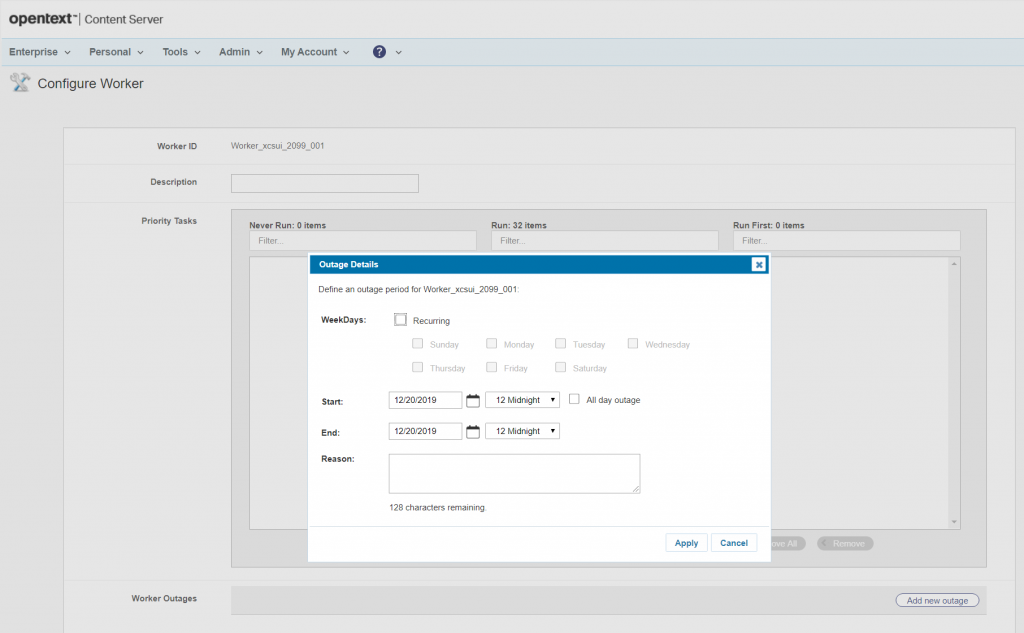
If you want a defined outage to be set, you can do this for the Agent by clicking on “Add new Outage” at the upper right. You can do the same for specific workers, we’ll discuss this later.
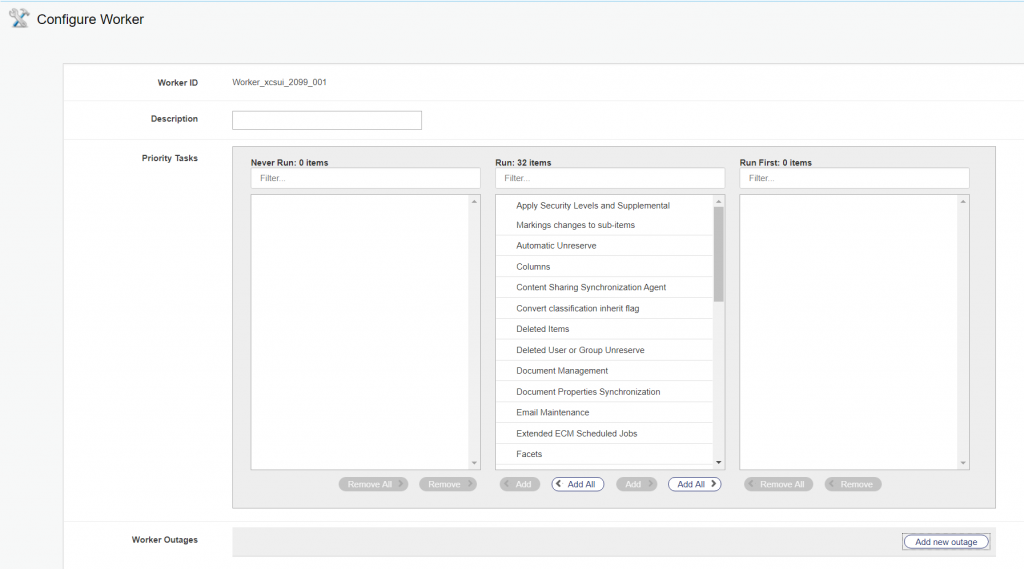
Back on the DashBoard, you cal also modify single workers. SImply click on the name of a worker, then the “Configure Worker” page opens
If you want to set a more specific name as that automatically generated, fill the Description field.
Much more important are the three columns “Never Run”, “Run” and “Run First”. The Run column contains all tasks this worker is supposed to do.
You can exclude tasks from this worker, then this worker will never execute this task. You can also prioritize a task, which means this worker will do this task at first.
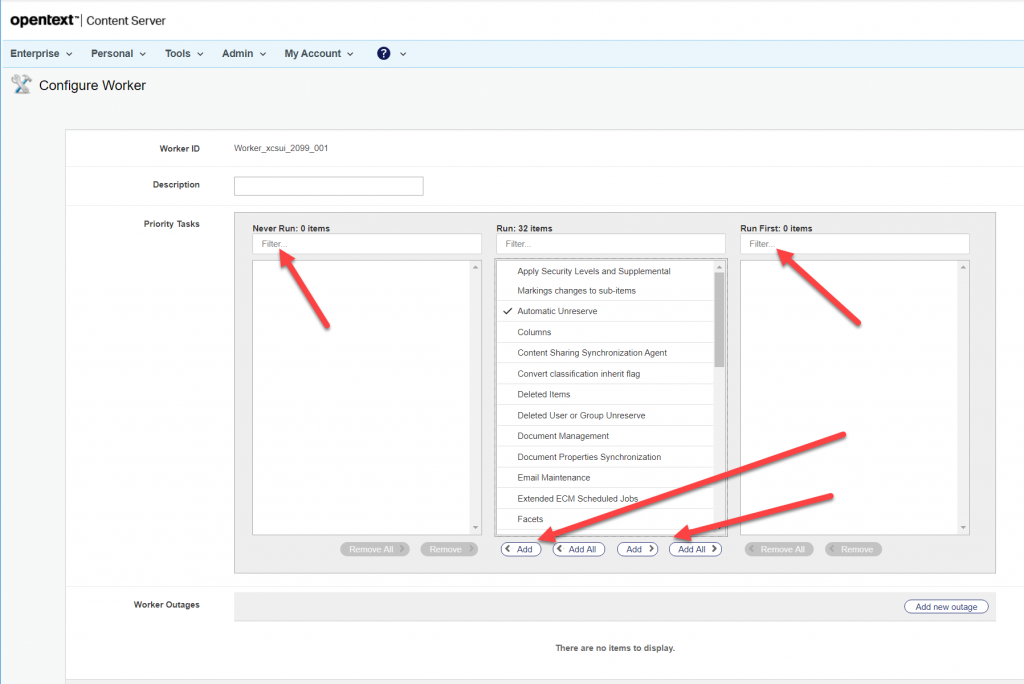
To configure this, select either all of the tasklist under “Run” or one or more tasks from the tasklist and move the entries either to “Never Run” on the left (worker will never execute the tasks) or to “Run First” on the right (worker will execute this tasks at first).
This allows you an effective task prioritizing for a single worker.
You can also define an outage for this worker by clicking on the Button “Add new Outage” on the lower right.
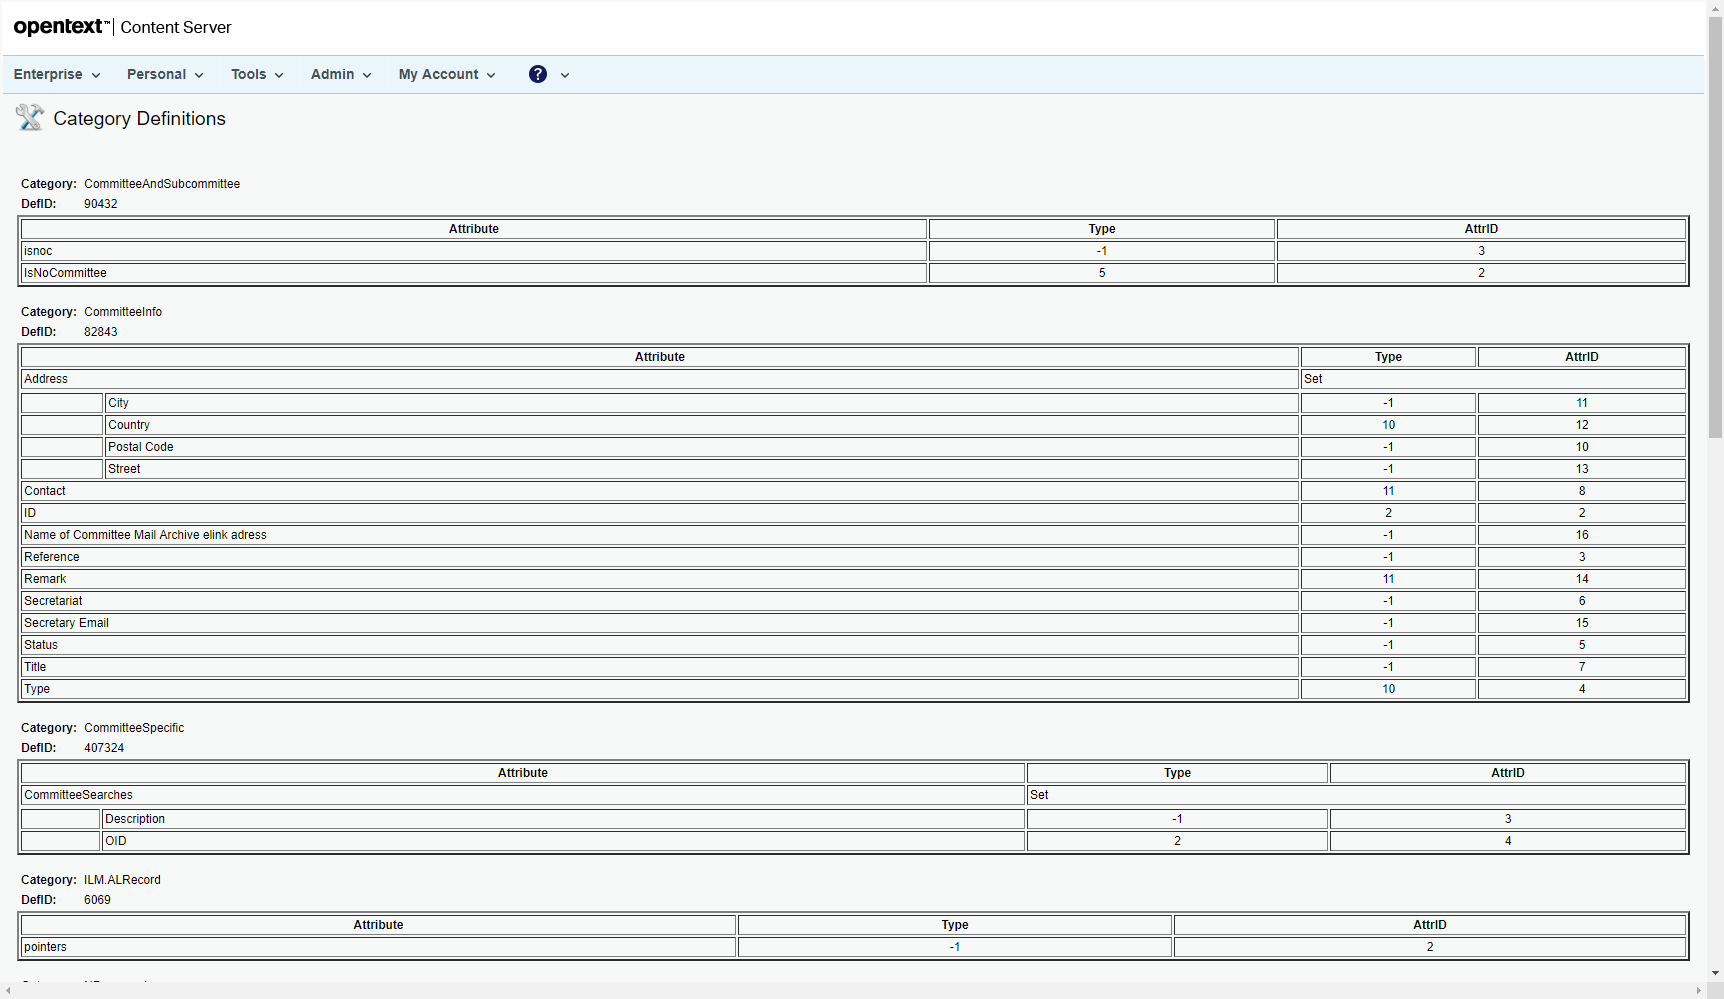
Looking for a quick list of all Categories and Attributes configured in a Content Server? Tired of browsing the Categories Volume? Want to see all attrobutes and their IDs in a list?
In Content Server 16.2.6 the Cluster Manager is gone.
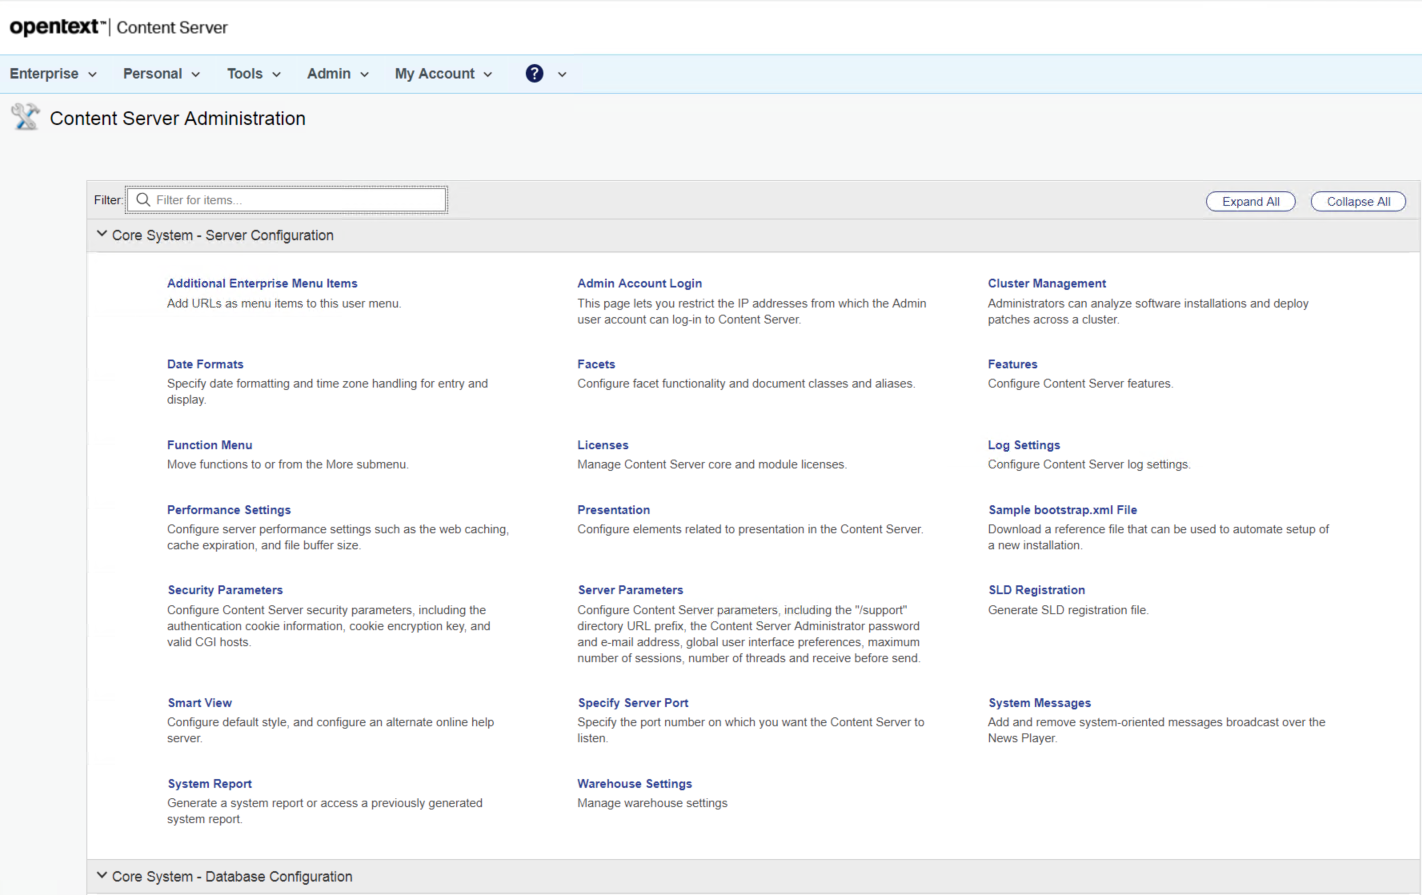
Whenever you try to open the Admin pages, you see this:
Admin Page 16.2.6
The new Entry “Cluster Management”
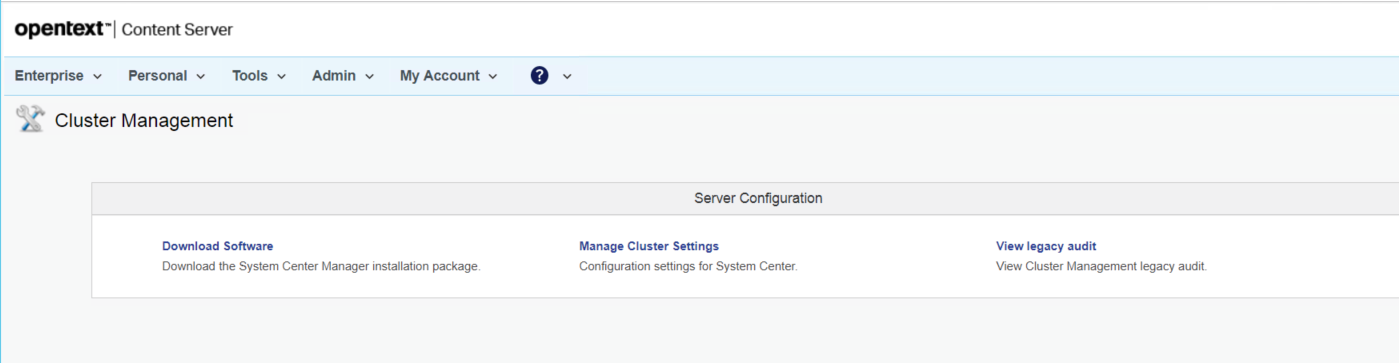
Install the System Center Software
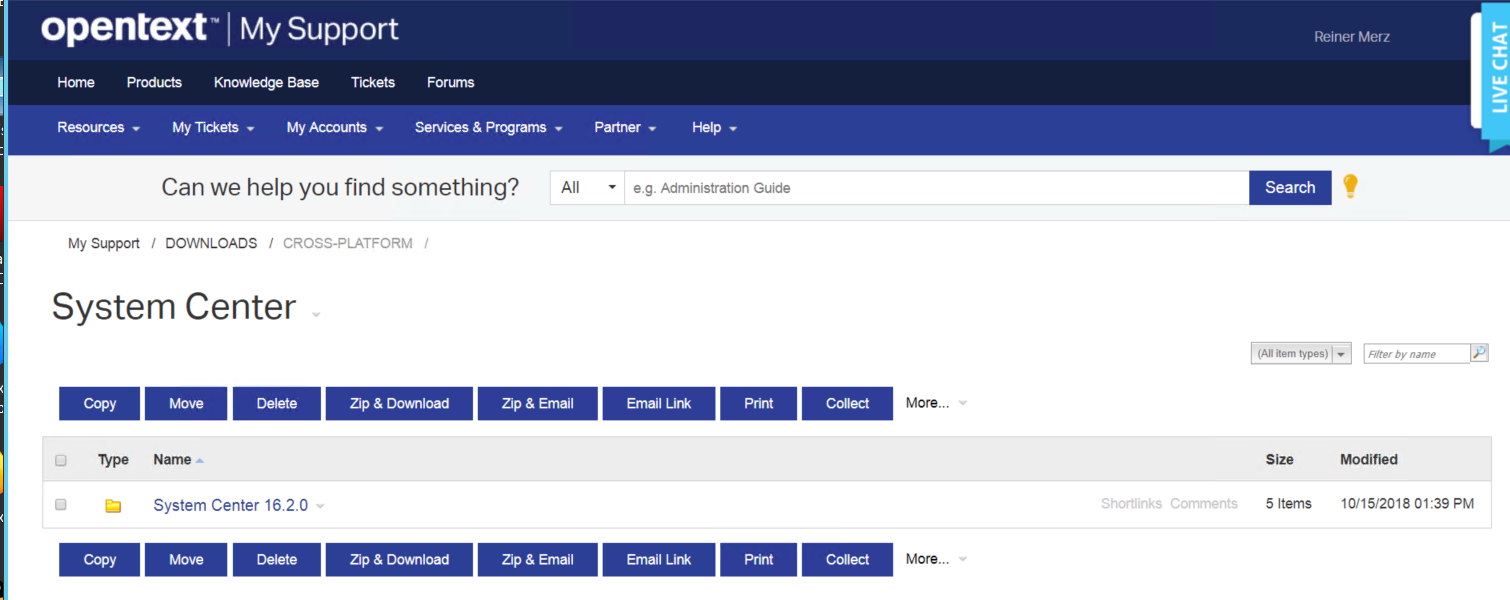
First, you have to download and install the System Center Software. Clicking on the Link “Download Software” directly connects you the the Knowledge Center. After logging into this Knowledge Center, you’ll arrive at the Landing Page for the System Center.
Knowledge Center “System Center Landing Page”
The System Center(s) are avaliable for Windows and for Linux servers. Select the proper version for your system and download it.
Install it.
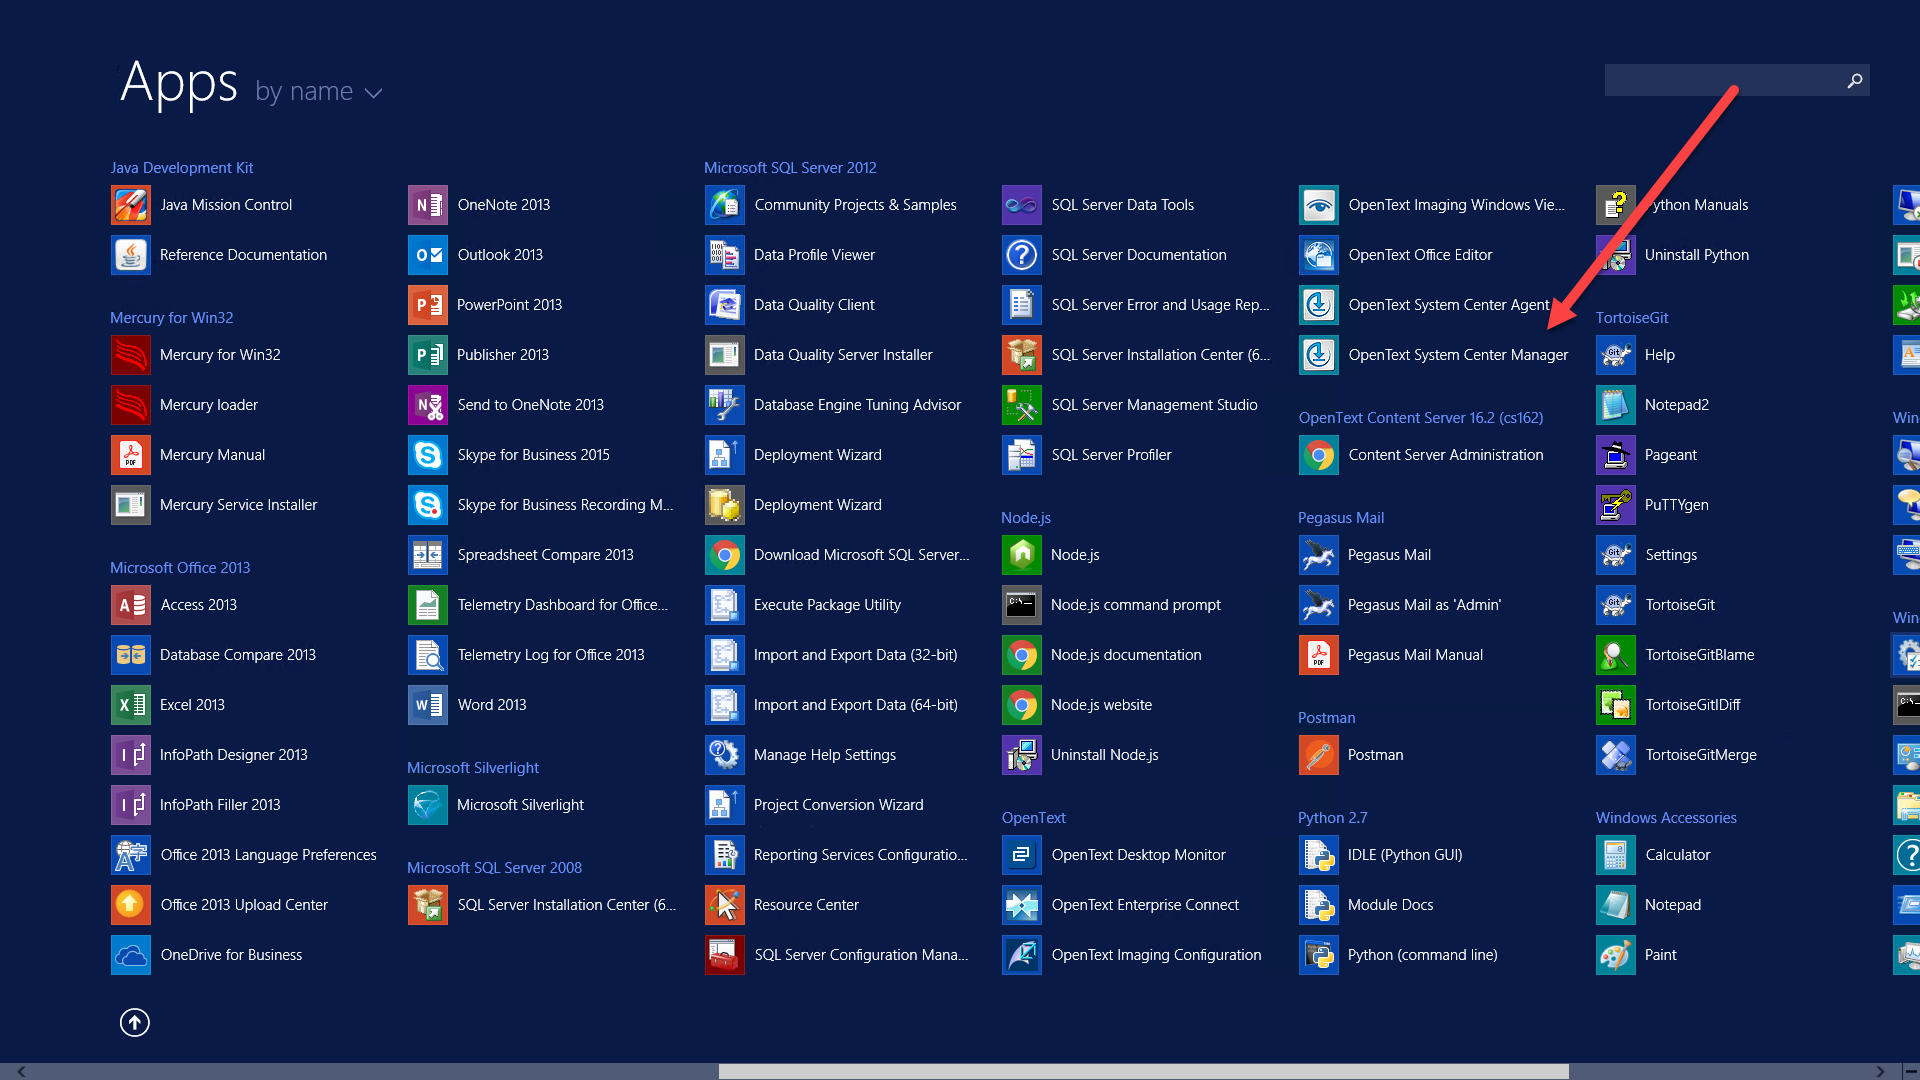
You’ll find the System Center directly in the list of programs, like here in Windows Server 2012
Configure it
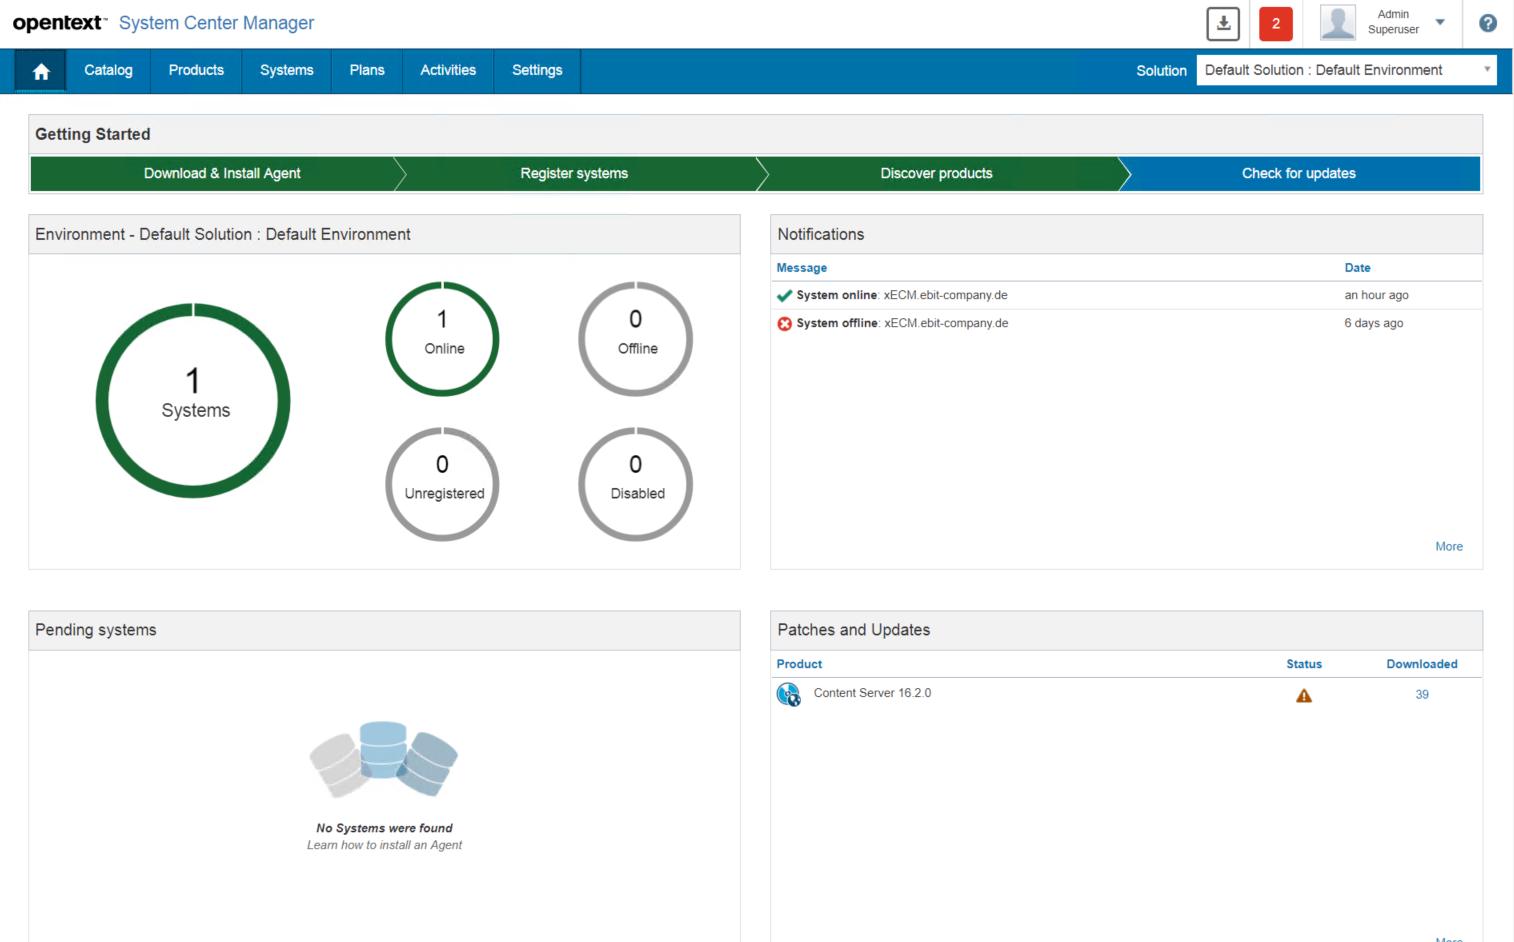
Double Click to start. Next, you’ll see the System Center Home Page
Like in the cluster management, you’ll need to download an agent per Content Server system and install that agent at that particular system – Click on Download and Install Agent.
(dont forget your local system!).
Next, you have to register the systems, onto which you just unstalled the agents. Go back to the “Home” of the System Center and click on “Register Systems”
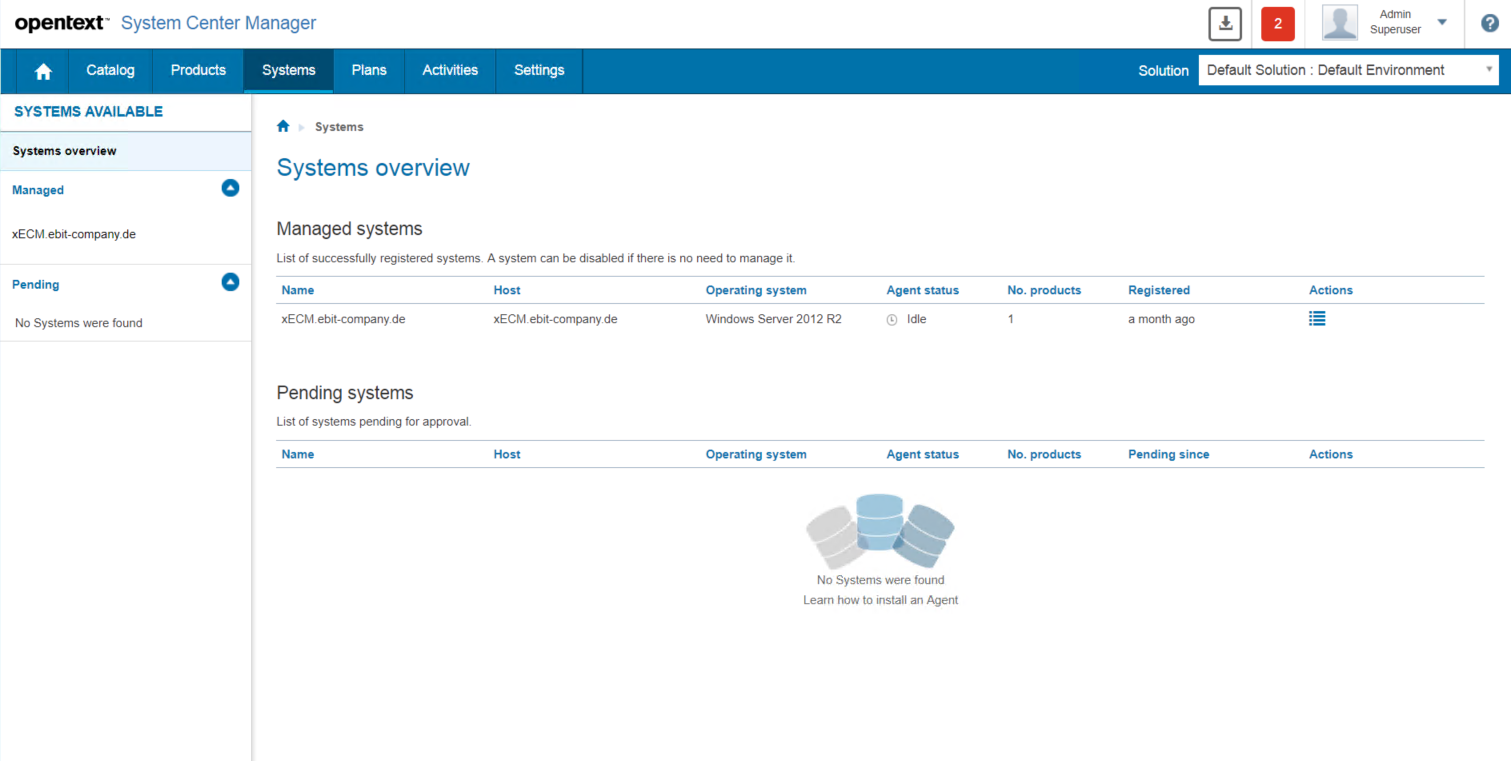
Under “Managed Systems”, you see all systems already registered, under “Pendig systems” there are all systems with agents recognized by the System Center.
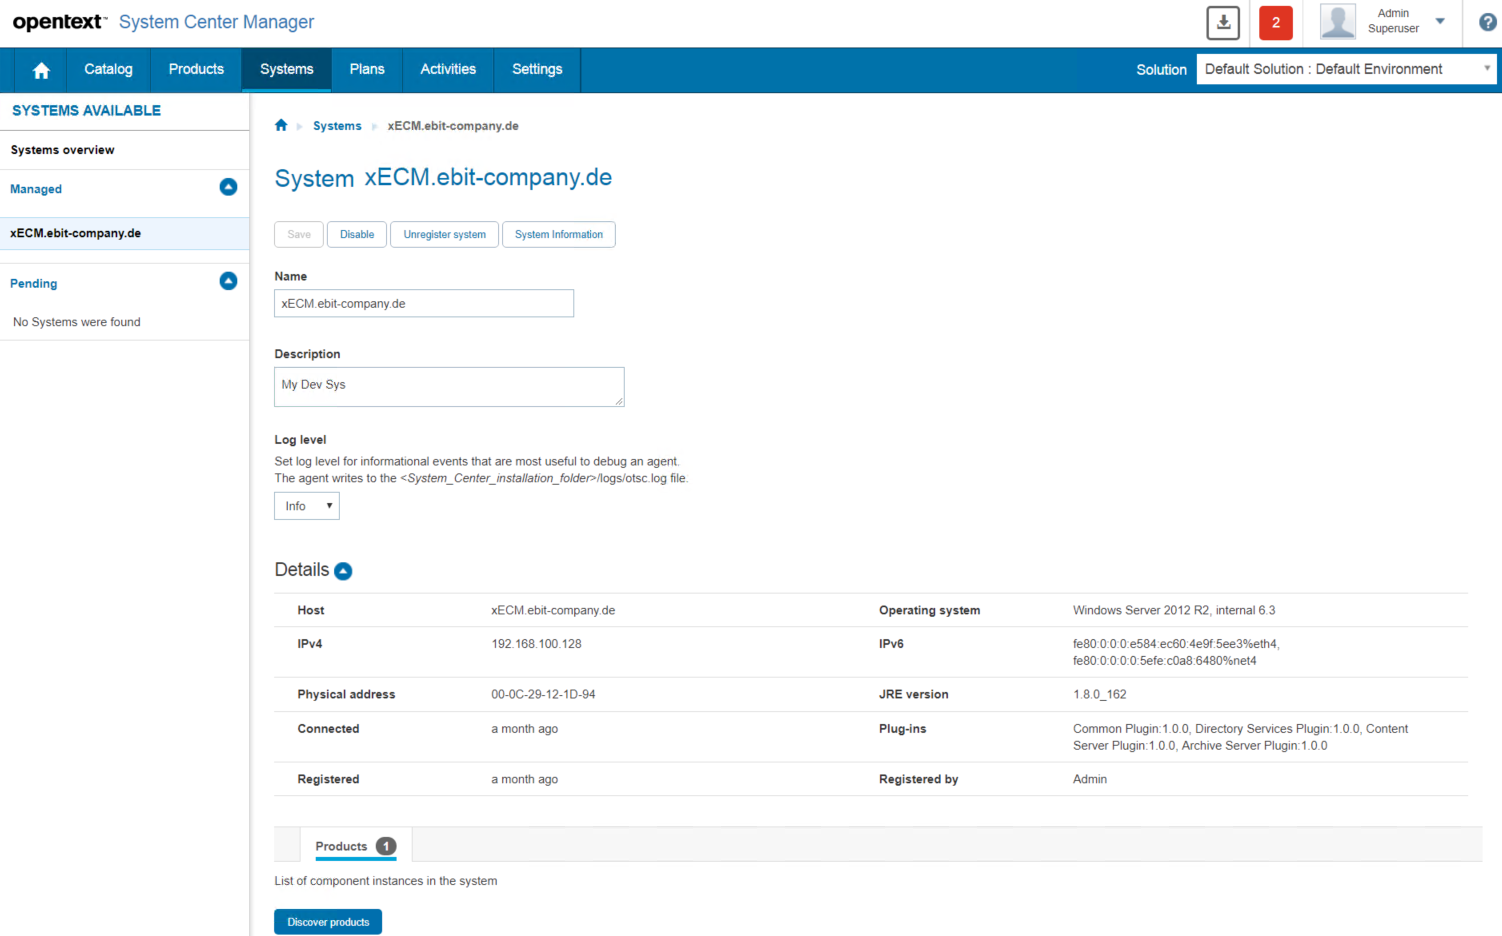
Click on the entry in the column “Actions” on the system pending, and you can register the agent. A Click will give you the detail view (here the system is already registered)
So you are nearly done!
Click on “Discover Products” for this particular system at the bottom of the page and the system is checked for all supported products and those installed are listed.
How to check for patches and install them?
Easy. Until now, you did the setup.
This has to be done only once.
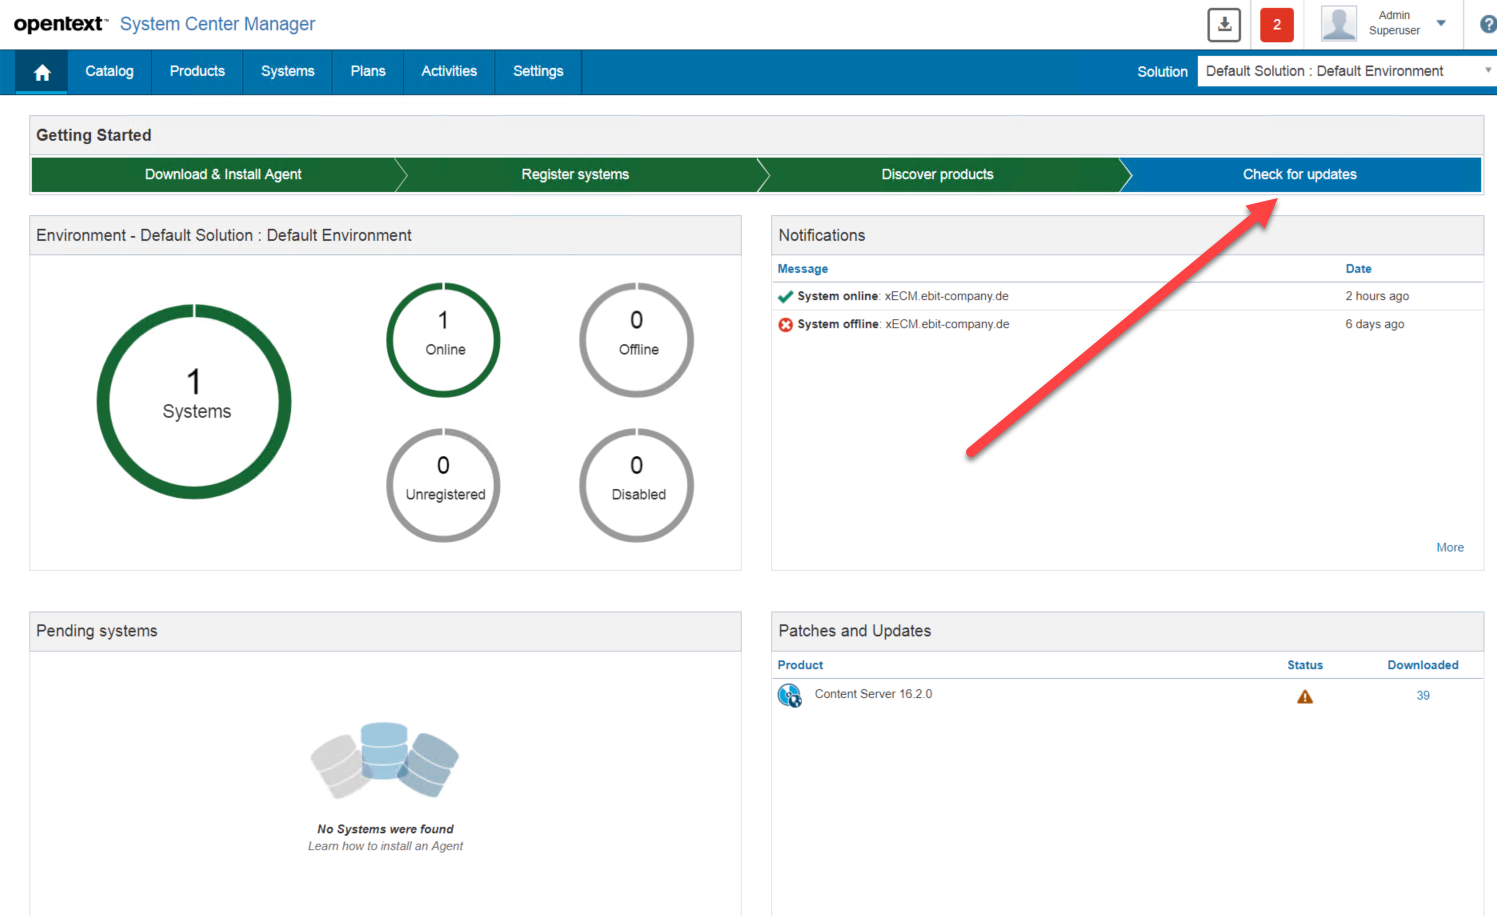
Go back to the “Home” and click on “Check for Updates”
This will lead you to the “Products” tab with Updates for the registered product.
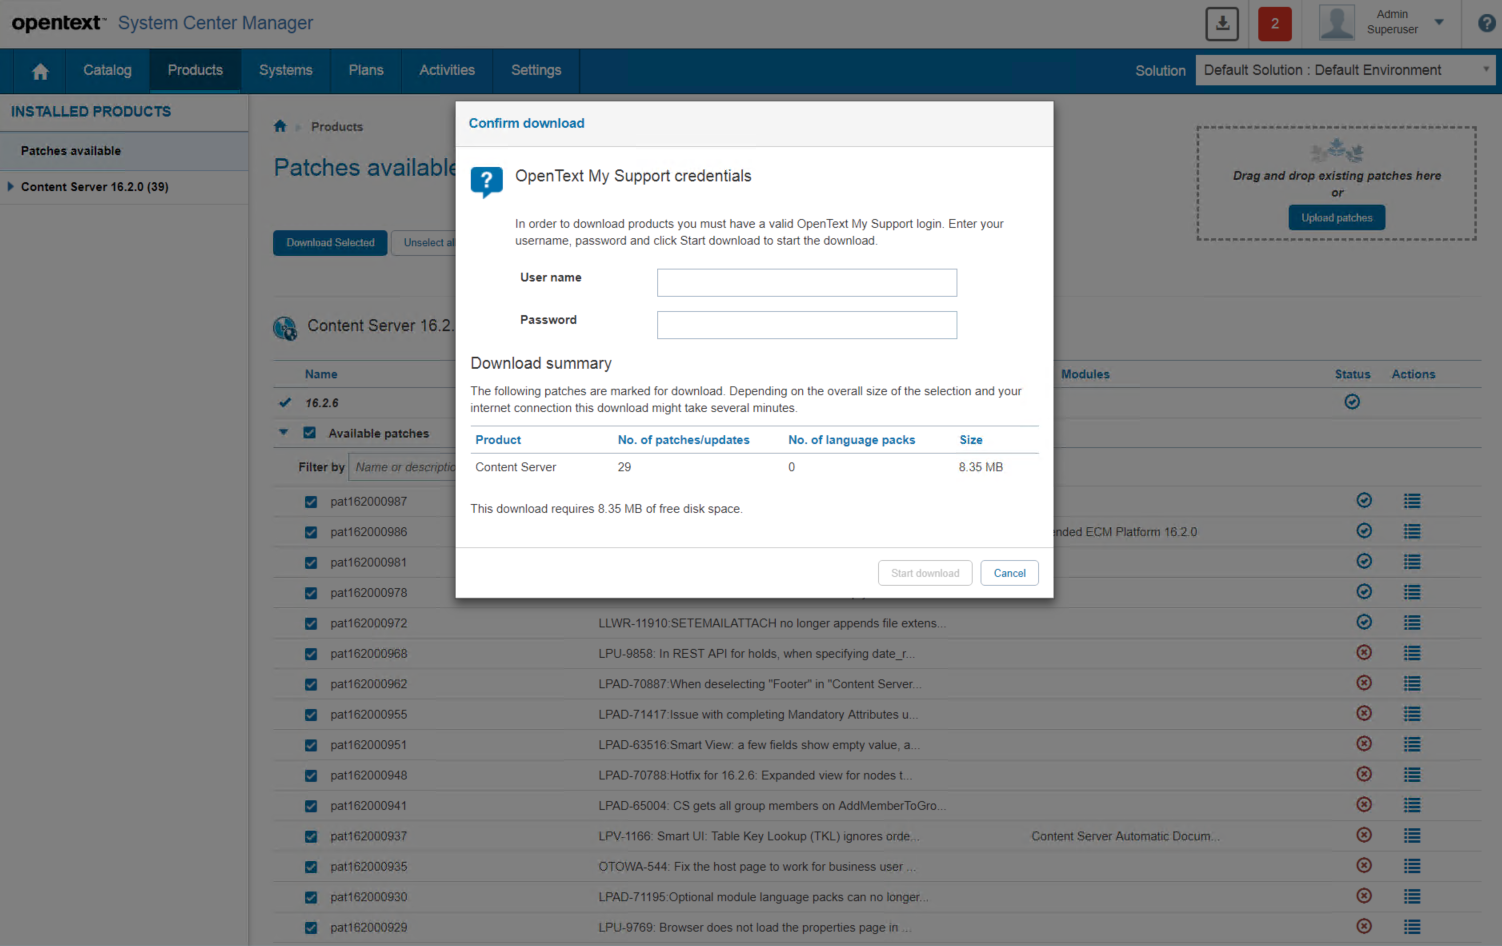
Either expand the “Avaliable Patches” entry and select the patches you want to install or select all by checking the checkbox at “Avaliable Patches”. Then click on “Download Selected” and see the system working.
First you need to login into Knowledge Center
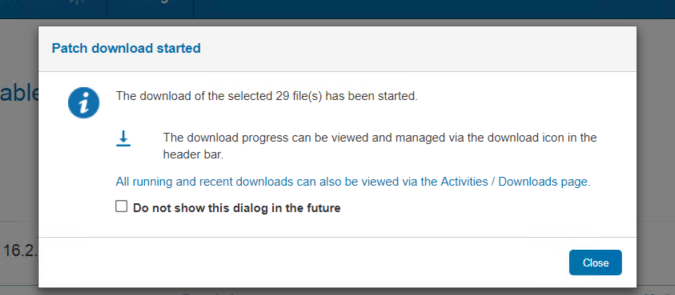
Patch Download started
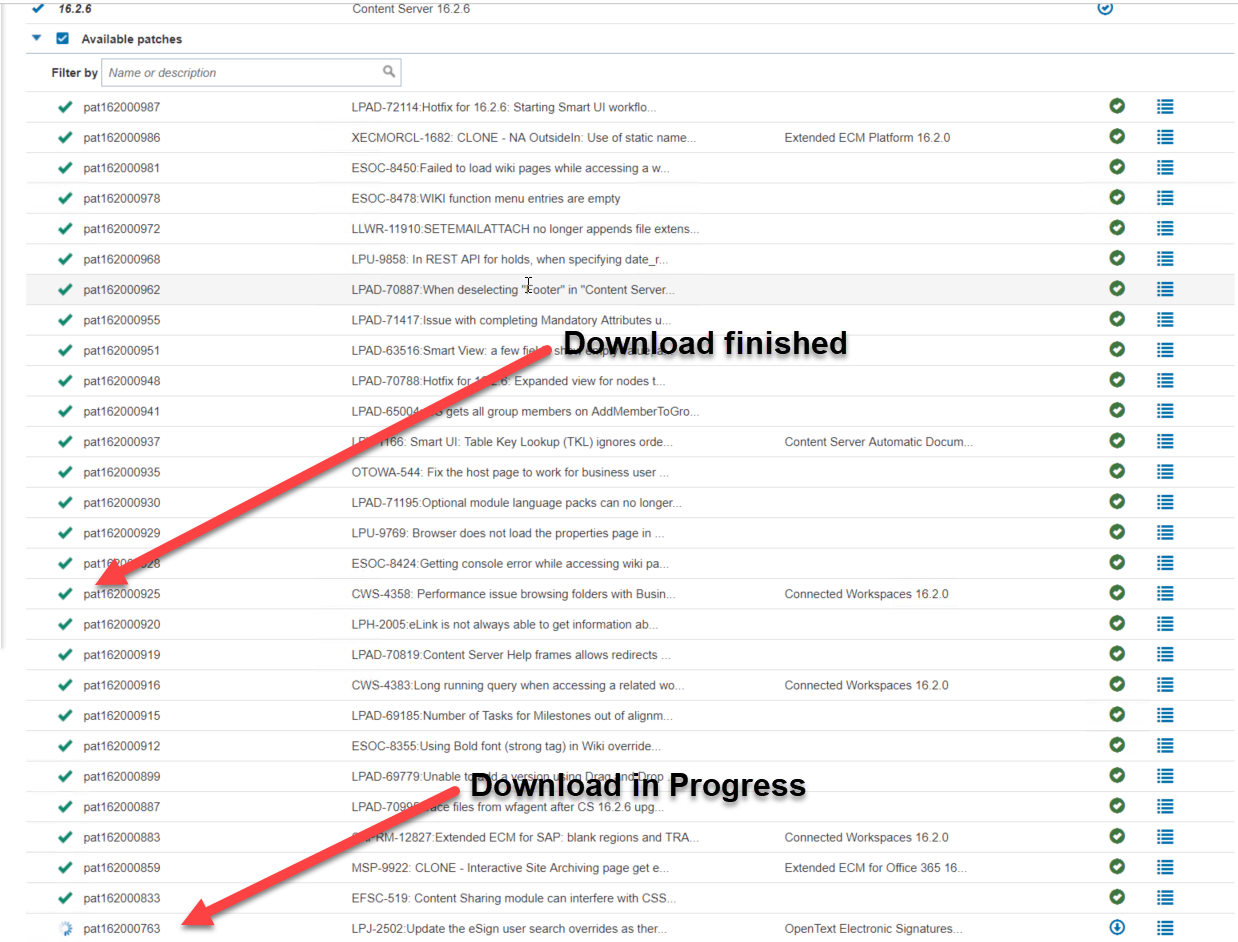
Press Close and you see the download window. As the download is done async, you see green marks (downloaded and installed) and also the moving circles (waiting for download or still in progress)
Download Window in System Center
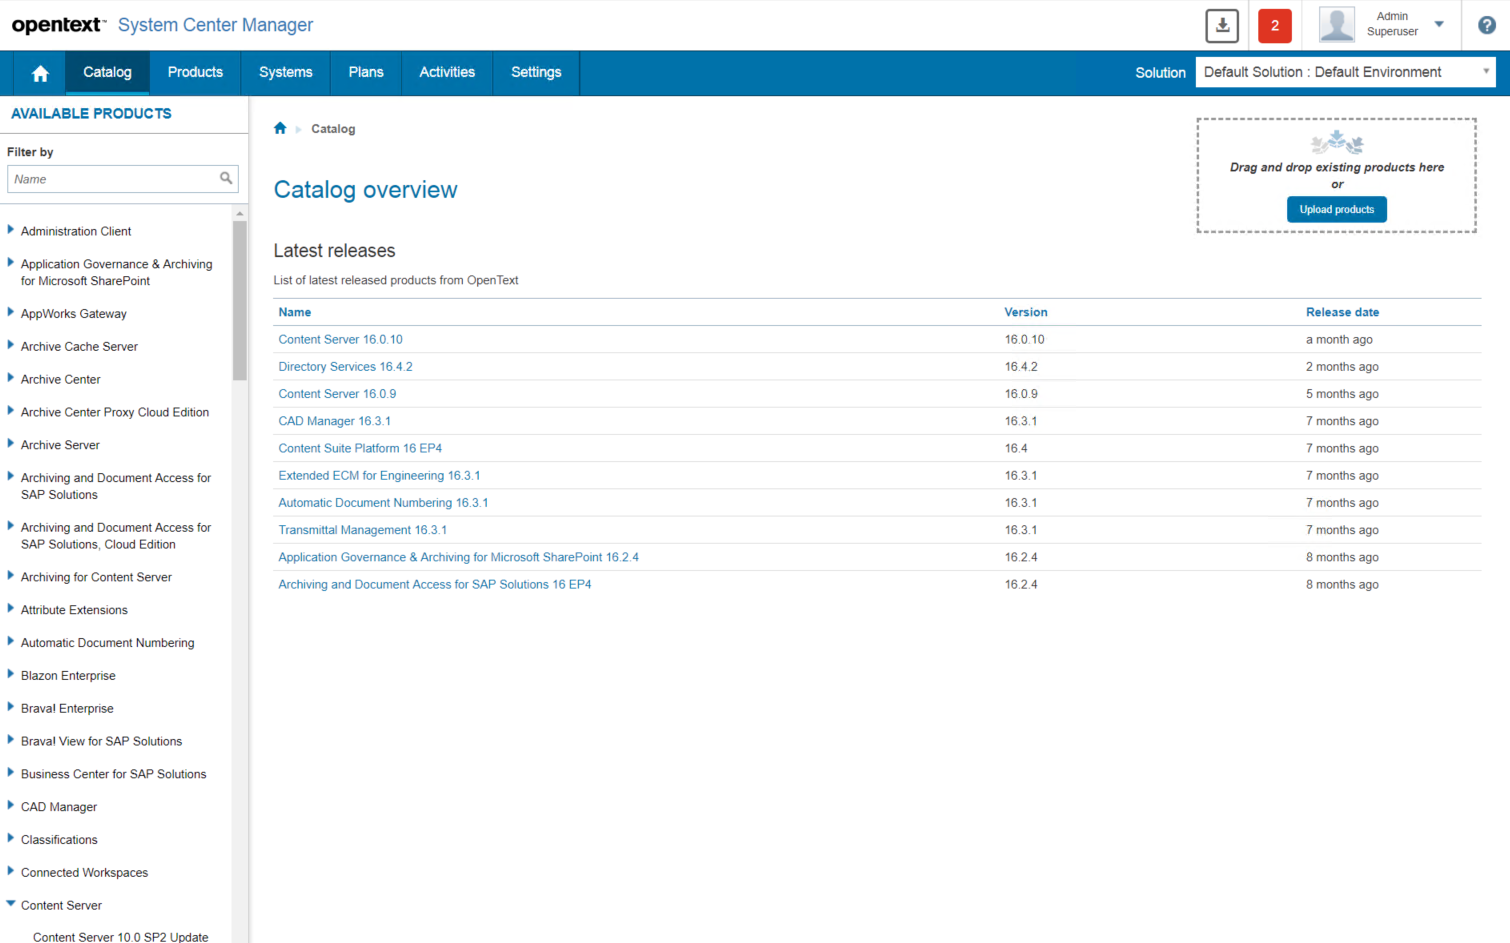
It also provides a list of supported products by clicking “Catalog” from the “Home” page of the system Center
Catalog of supported products
The latest releases are listed directly in the calalog overview.
So the System center is much better then the Cluster Management doing updates.