
From time to time you’ll have to deal with distributed agents inside content server. This can be a little confusing, so maybe this post is helpful there
In the Admin Pages, you’ll find a dashboard to control the default setup. Either add a func=distributedAgent.AgentStatus to your servers URL or search inside the admin pages for distributed Agent things like this
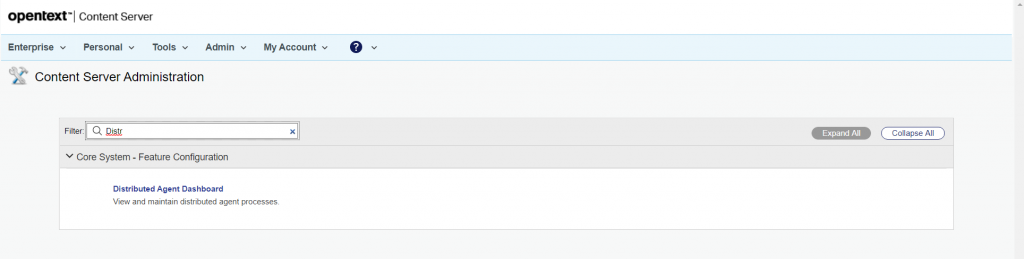
Click on Distributed Agent Dashboard.
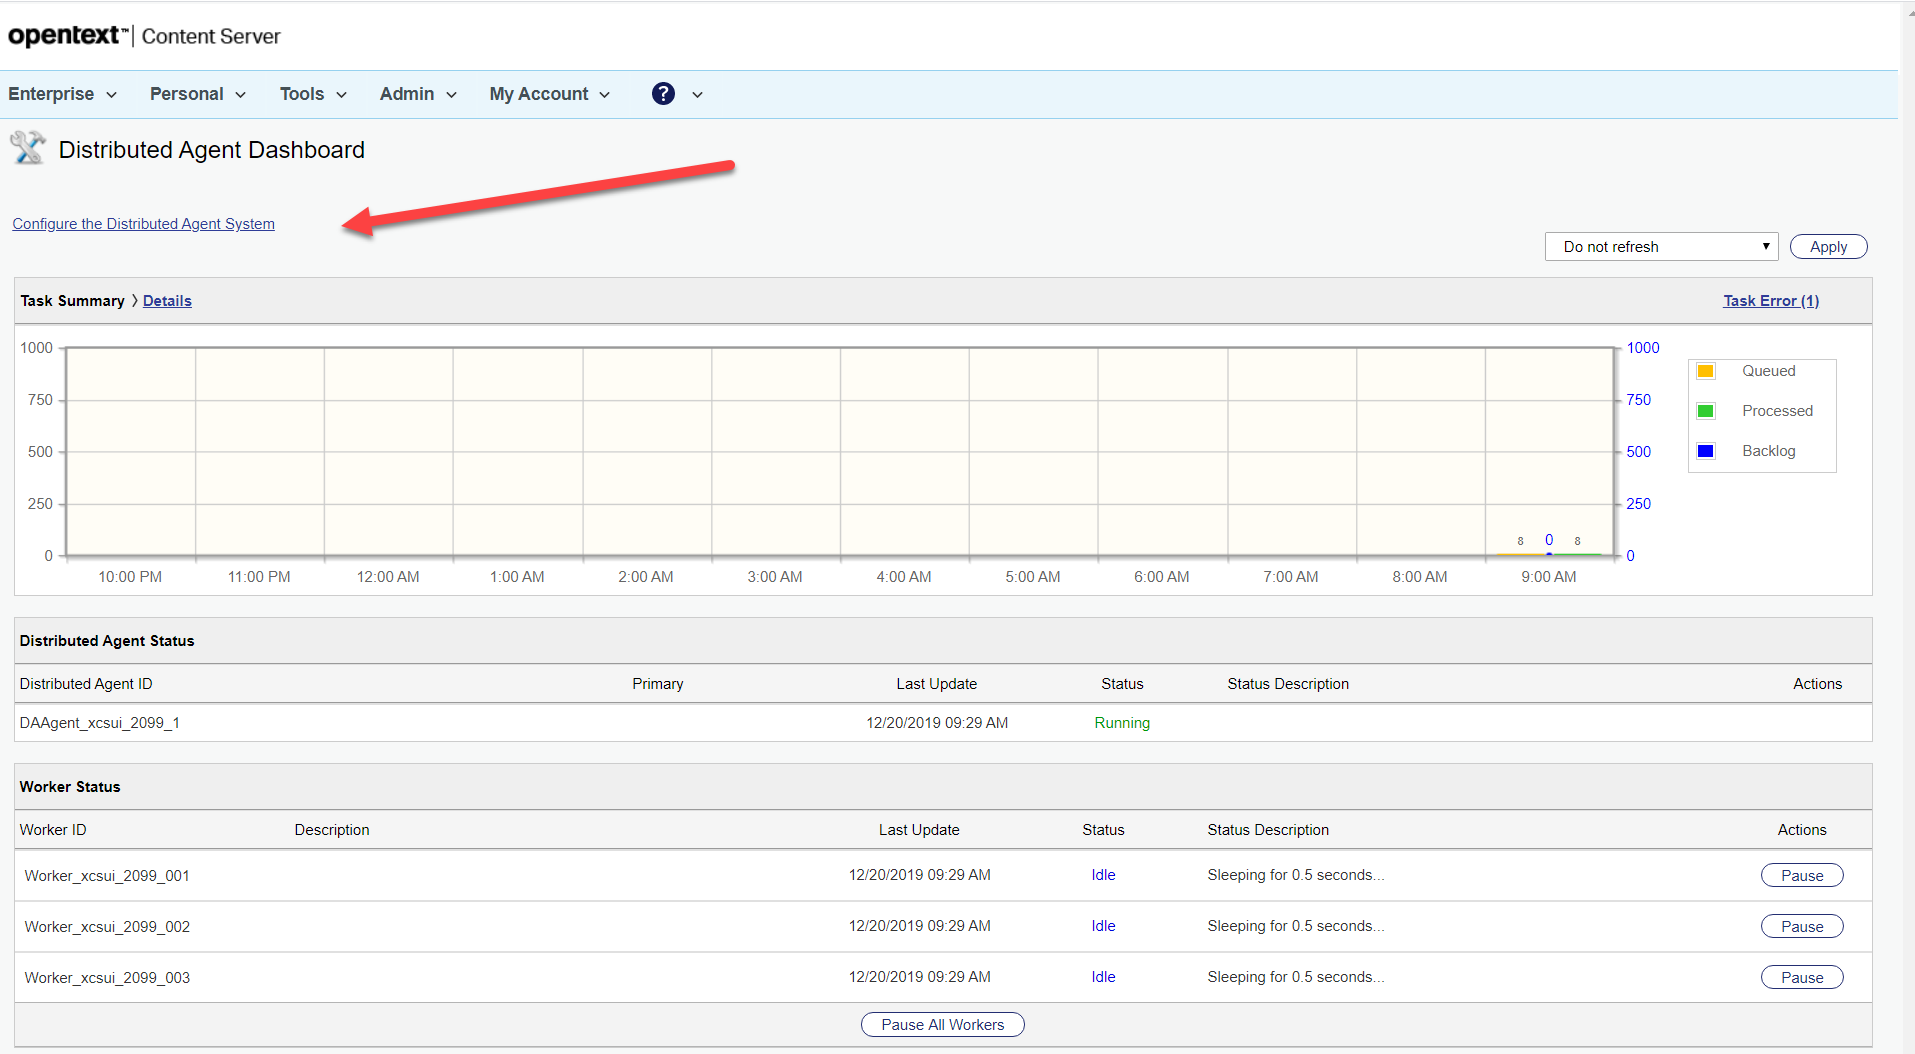
Then you’ll see the distributed Agent dasshboard
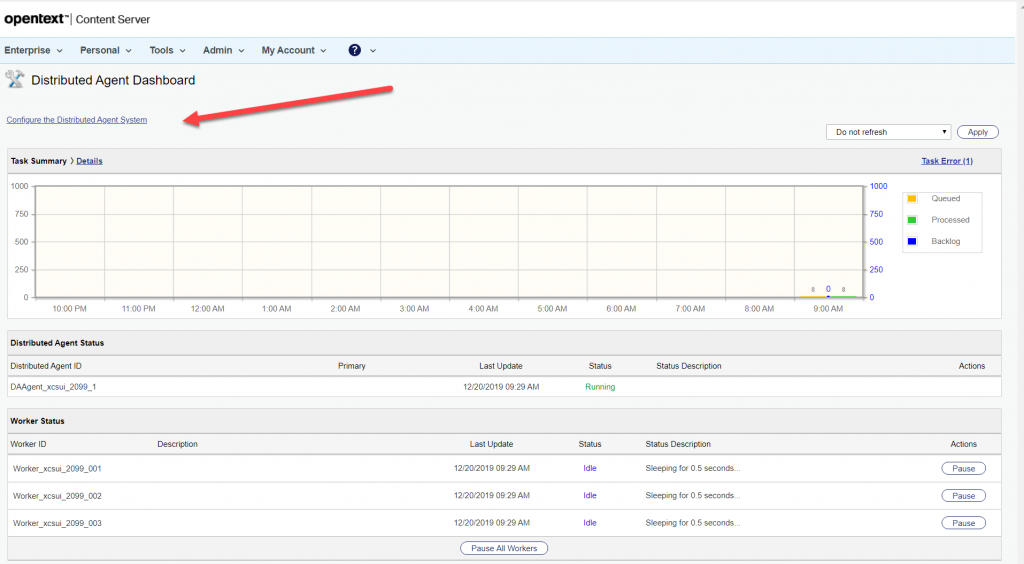
Here you’ll find all information about the current state of the system and the configuration of the distributed agent system
Per default a content server has one distributed agent with three workers. You can change the number of workers used by the agent by changing the number of workers in the opentext.ini file in the [distributedagent] section.
You can configure the whole distributed Agent system by clicking on the link indicated with the red arrow above. Then the configuration page opens:
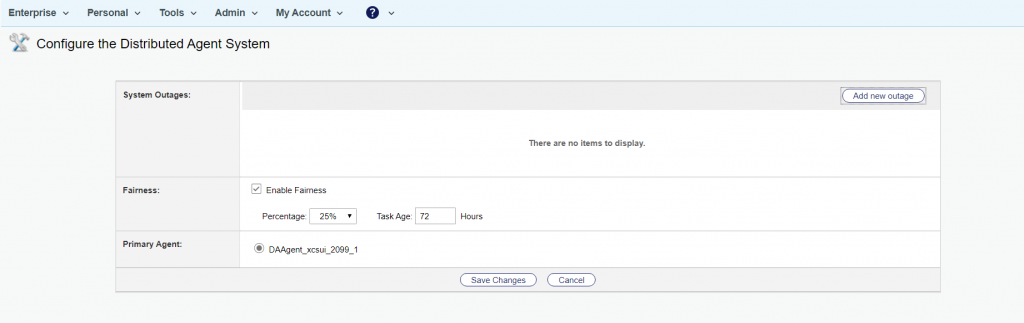
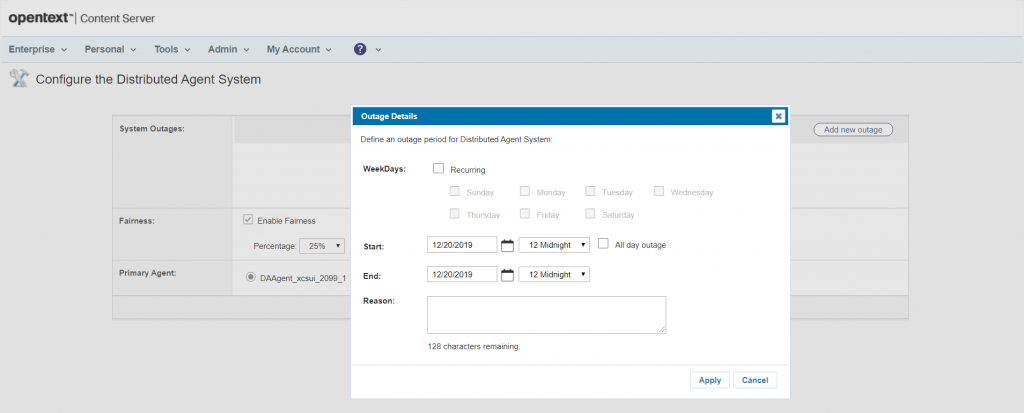
Here you can set up values for the the treatment of low priority tasks (Enable Fairness). The agent can spent between 5% to 50% on low priority tasks, which will be processed aftera minimal age set by “Task Age”.
When you have more than 1 agent in the system, you can switch the priority Agent here also. OpenText recommends that you select the Distributed Agent with the greatest capacity to be your Primary Distributed Agent. Typically, the Distributed Agent with the greatest capacity resides on your most powerful or your least busy computer.
If you want a defined outage to be set, you can do this for the Agent by clicking on “Add new Outage” at the upper right. You can do the same for specific workers, we’ll discuss this later.
Back on the DashBoard, you cal also modify single workers. SImply click on the name of a worker, then the “Configure Worker” page opens
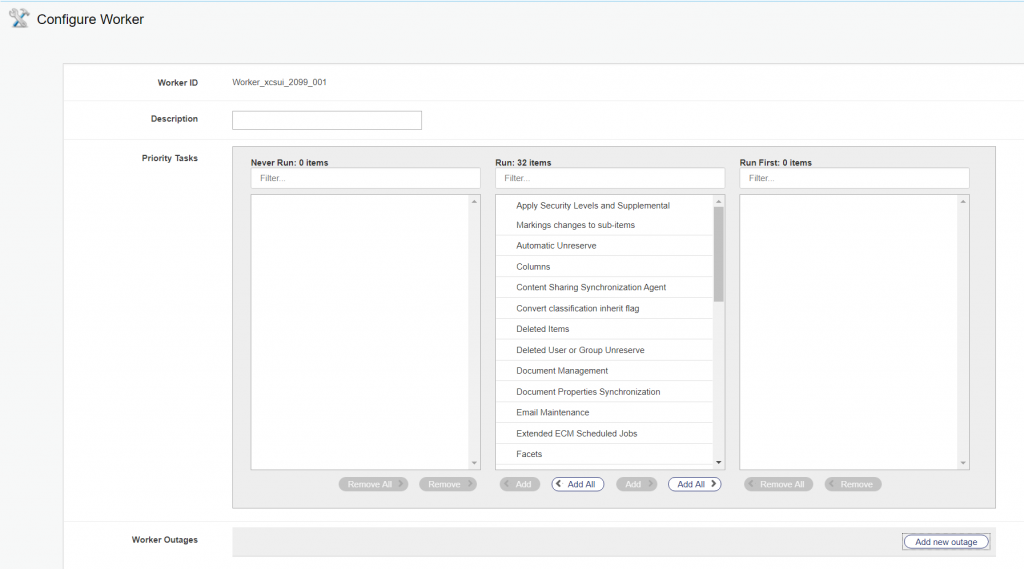
If you want to set a more specific name as that automatically generated, fill the Description field.
Much more important are the three columns “Never Run”, “Run” and “Run First”. The Run column contains all tasks this worker is supposed to do.
You can exclude tasks from this worker, then this worker will never execute this task. You can also prioritize a task, which means this worker will do this task at first.
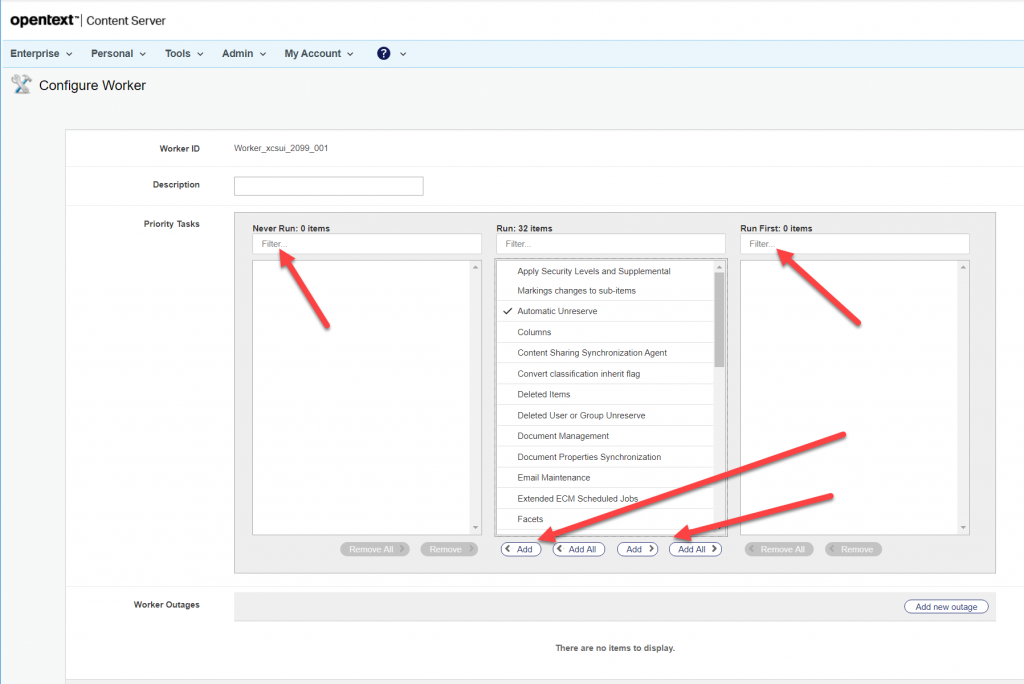
To configure this, select either all of the tasklist under “Run” or one or more tasks from the tasklist and move the entries either to “Never Run” on the left (worker will never execute the tasks) or to “Run First” on the right (worker will execute this tasks at first).
This allows you an effective task prioritizing for a single worker.
You can also define an outage for this worker by clicking on the Button “Add new Outage” on the lower right.
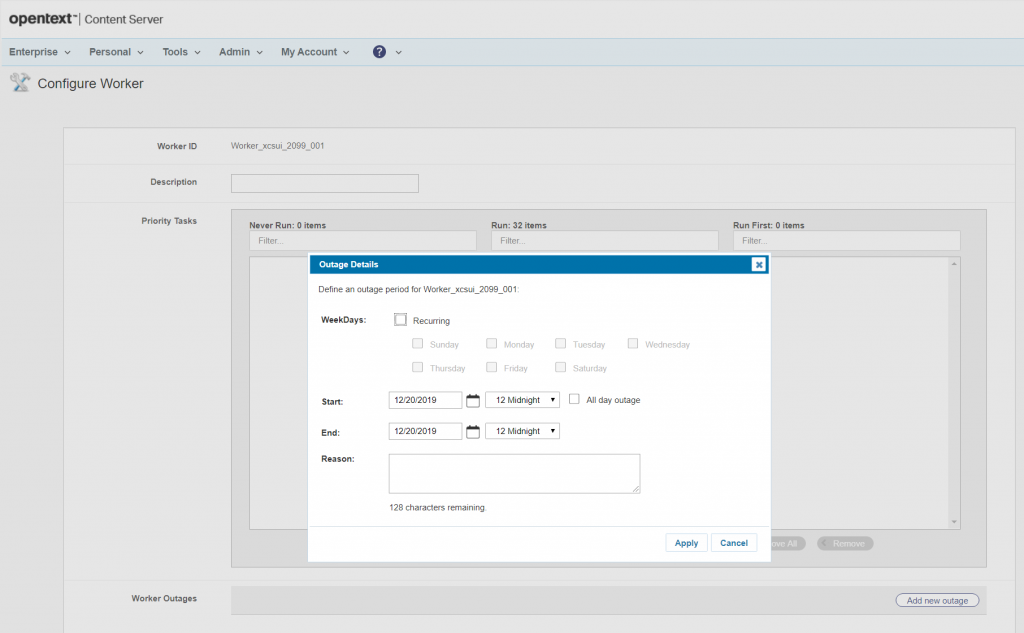
Easy, isn’t it?