

This is the second part of a multipart post of the new SMART TOOLS – a product supporting mlm and renditions in smartui.
You can get the first part smart UI in practice: SMART TOOLS(1) – the beginning
Today lets look on the functionality of the multilingual metadata part of smartUI.
Its directly integrated in the properties manager of the nodelist widget.
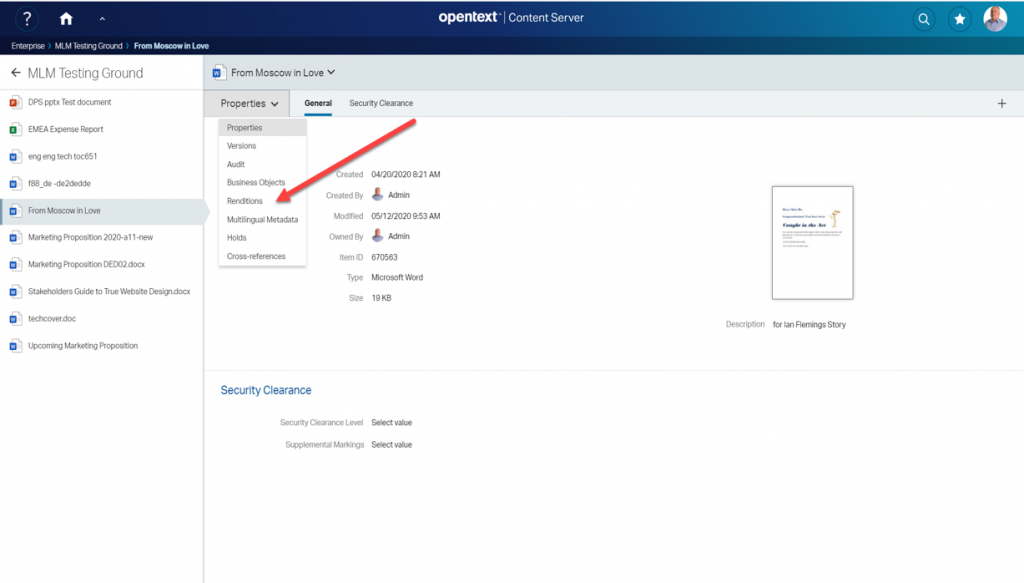
The multilingual metadata panel
Use the pulldown menu in the properties manager.
If you go to the “Multilingual Metadata” entry, you’ll see a list of the two attributes, which make up the multilingual metadata in all supported languages.

Here, just for demo purposes, metadata languages are English, German, French, Italien, Japan, Spanish and simplified Chinese.
Automatic translation with Microsoft Azure services
At right, there is a globe icon visible. If there is a globe icon, then this language is configured to do an automatic translate using Microsofts Translate service. Its to translate from the users default metadata language (here English, also displayed with a different background) to this target language. Simplified chinese is not configured to use automatic translation, therefore there is no globe set at chinese. To configure that is the job the Content Server administrator.
Clicking on the globe will replace any text with the translation of the attribute in the default metadata language (here “a special cover letter”).

Although this translating machines are quite good, its always a good idea to have the opportunity to manual correct the automatic entries. Its done simply by clicking on an entry.

By pressing <RETURN> in a inpput field or by clicking on any language name, the edit mode is switched off and the green button “save mlm data” is activated. By pressing this button, mlm data is saved on the server.
Print a list of actual mlm data
If you have a lot of these language entries, its unlikely for one person to check all language values. It would be nice to have a list (printed of pdf) with the actual values. This can be done by simply clicking on the blue Print-Button.
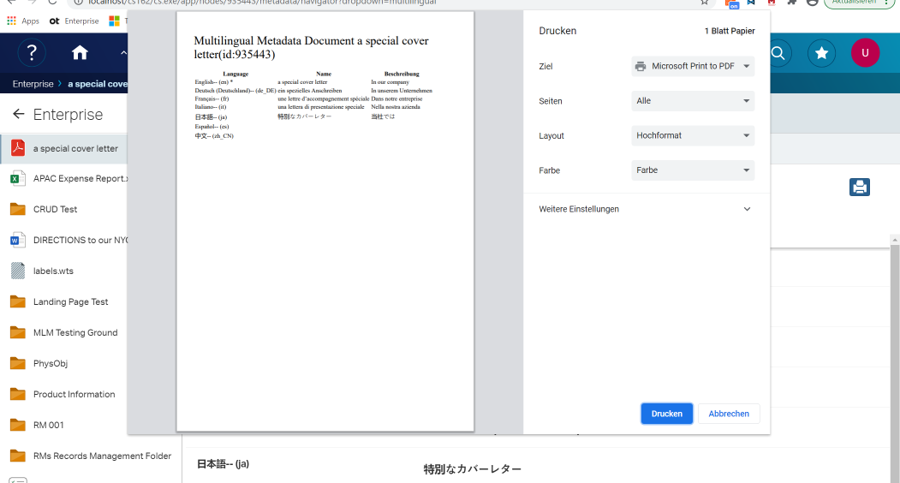
This will open the browsers print window and give you a preview of the list.
Ok, thats all for today. Next week we’ll take a look at the SMART TOOLS Rendition support.