A short, but sometimes time consuming thing are the missing Webreport Tabs. Imagine, you have a Content Server with an jetty based internal Admin Server or an external Admin server on a fast machine.
The problem
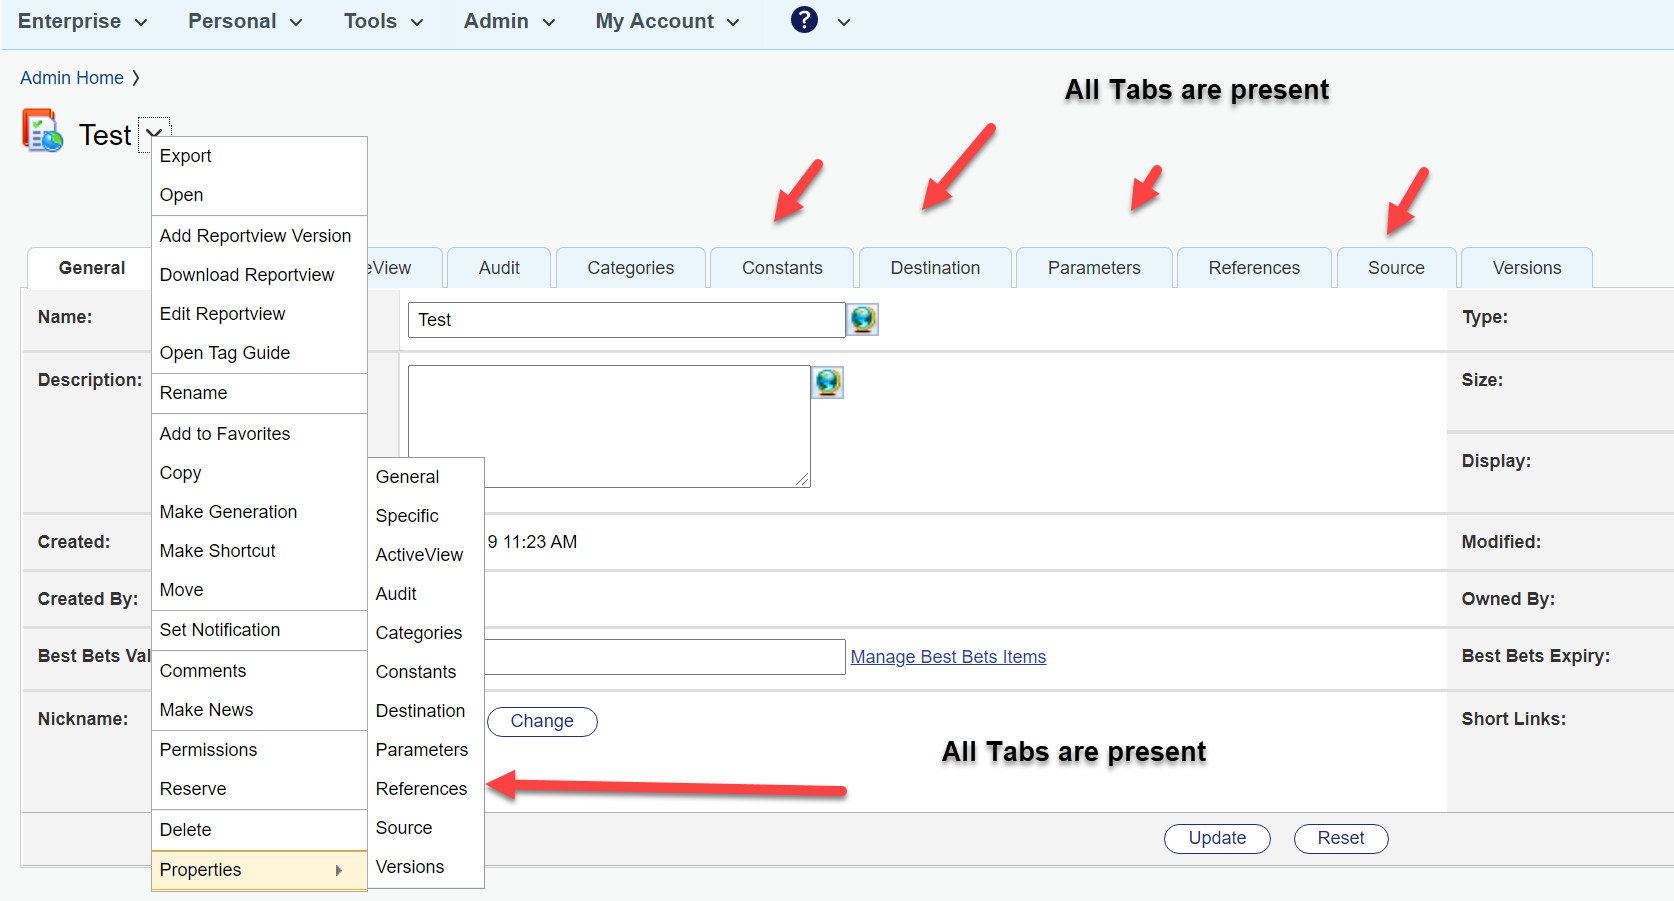
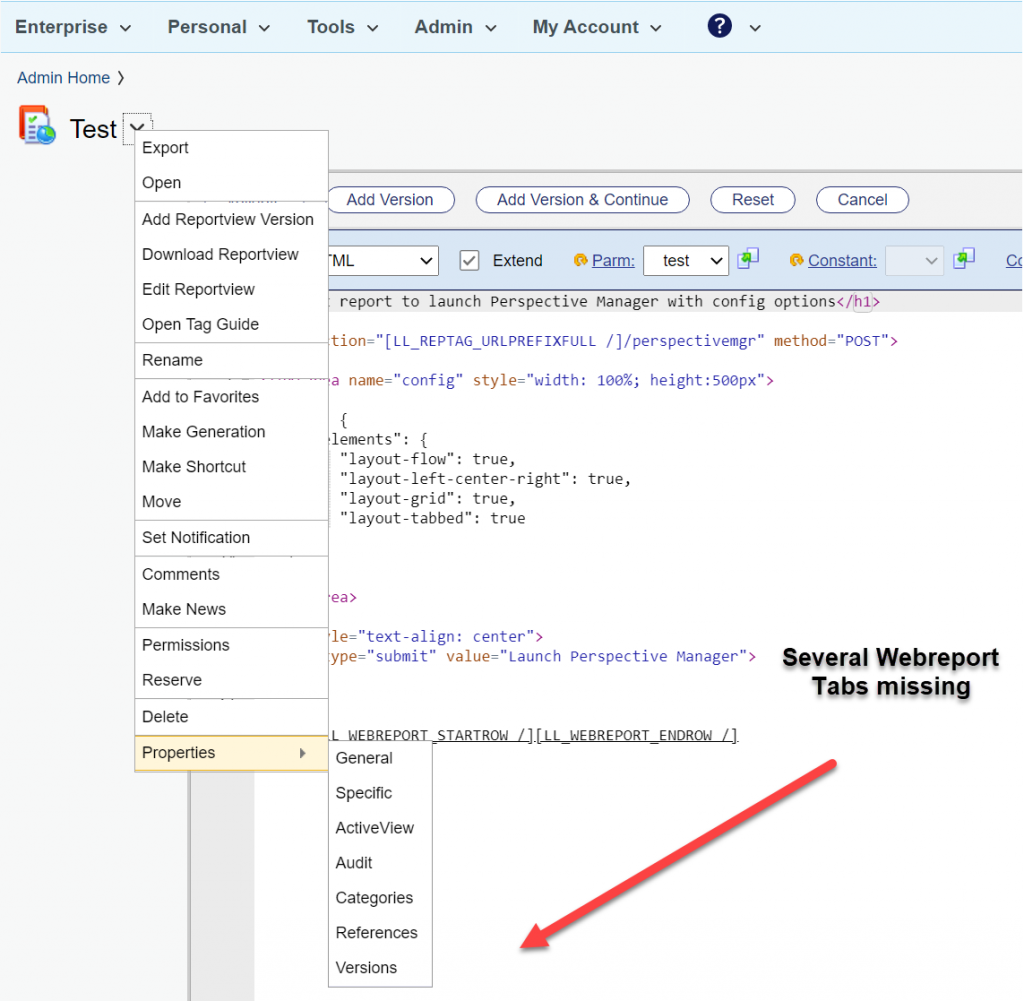
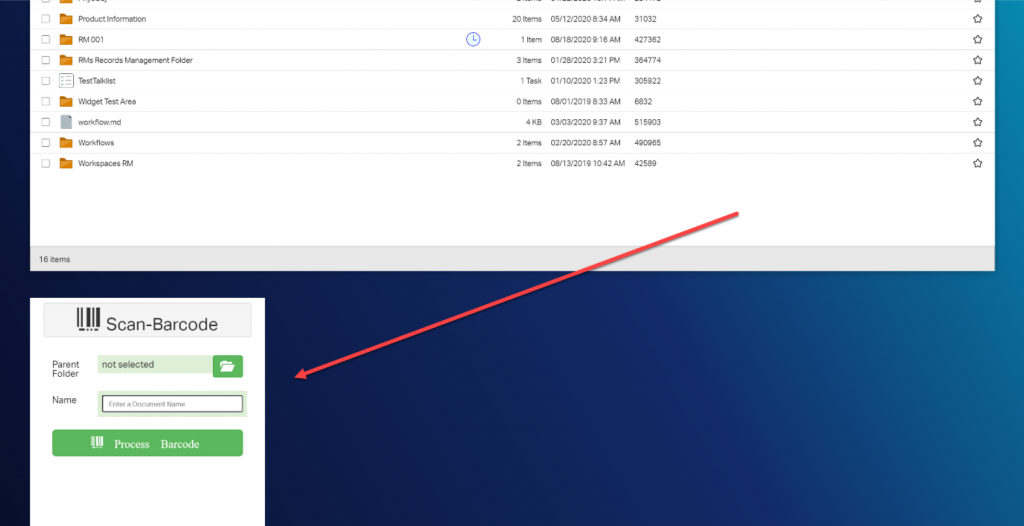
Then, from time to time, you will see this on editing a webreport:
All Edit Tabs for the webreport are missing. Although you can start the missing functions within the URL, its annoying.
The Cure
If this happens, use this Magic Trick N,12:
Simply stop Content Server and Admin Server. Start the Admin Server and wait at least 5 min before starting the Content Server.
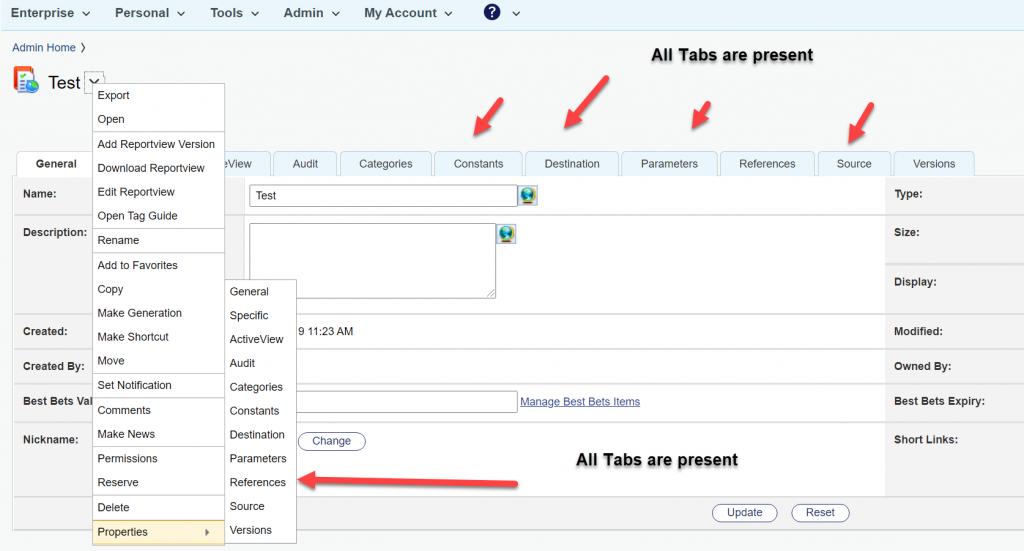
Then you’ll see everything is there.
Wow. You made it. You are a great wizard.
Seriously:
There is a timing problem in the Content/Admin Server. If the Content Server starts to fast, COntent Server thinks, there is no license for webreports at first. Later, it gets the license, but the GUI is drawn without the webreports tabs.
Wait for your Content Server to start up. Wait at least for 5 min. Then everything will be drawn in the GUI.
In the content server 20.4 you’ll encounter from time to time a requirejs error “define is not defined”. Normally on defining icons. This is very entertaining.
In 16.2.10 the same thing worked as a charm.
Dont panic, in the “Hitchhikers Guide to the Galaxy” you’ll find the solution.
42 (As always)
(Just kidding. Lets be serious.)
Serious
The case in 16.2.10:
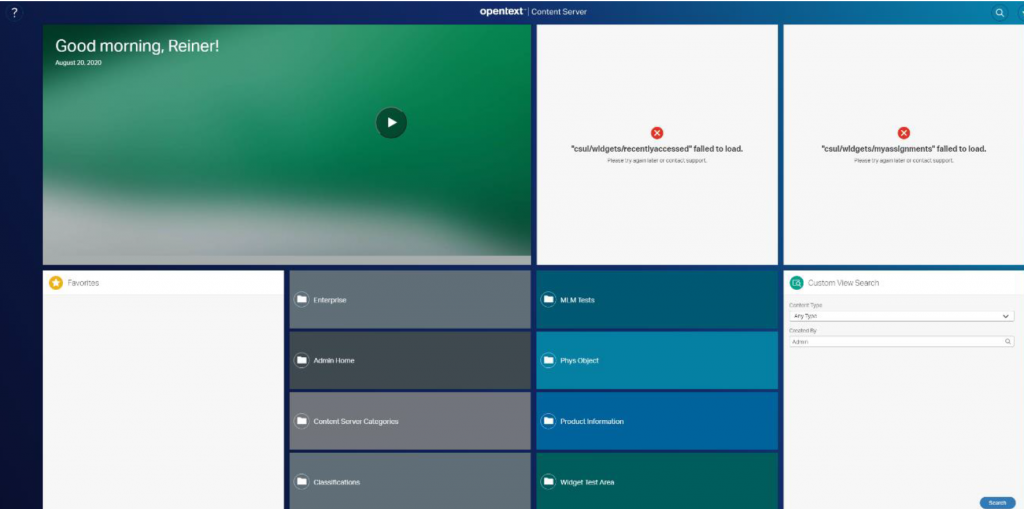
In 20.2 and above
Ups. Looking insane.
Cure
Examine the browser console output. At the debug level.
Browser Console
As a nice addition for the entertainment, the module is uglyfied, it makes no sense to search for this strings, as they are produced during the grunt tasks. But on the other hand, a couple of lines further down there are some complaints of the grid.view.js that the “getSpritePath” is missing. And the offending module is supposed to return the getSpritePath function.
So, a search on getSpritePath gave the offending module, the sprite.js, which was introduced in 20.2 and is obviously required, when a widget wants to display sprites.
The module shows
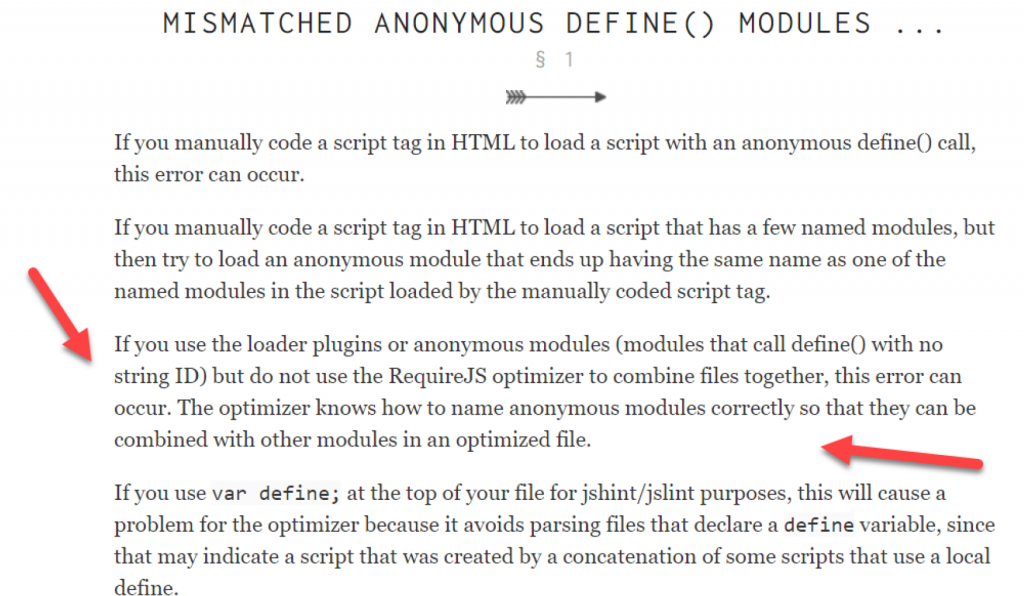
Lets consult the requirejs error page mentioned in the browser console.
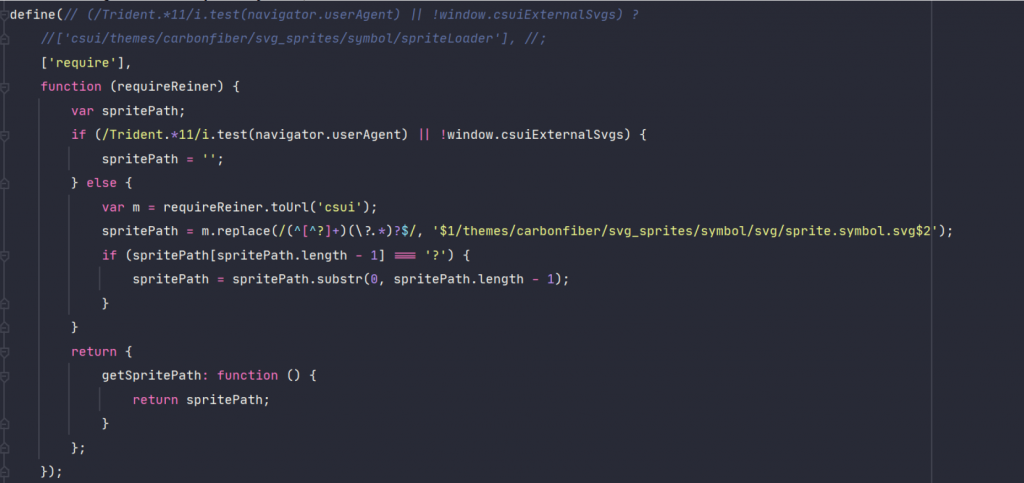
A check of stackoverflow.com gave me the resolution “name collisions can produce this” so I changed the sprite.js to
Changed Sprite.js
Changed the function argument from require to requireReiner. The name doesnt matter.
Result
Everything runs under 20.2 like it used to in previous releases. No more mismatched anonymous define() modules.
But be careful: You’ll get the old js file in all new SDK releases. You should override the old file with the corrected one in all js projects.
As always:
Disclaimer: This works for me. The usage requires proper testing and I will not be liable for any problems whatsoever on that.
From time to time there are real gems waiting to be discovered in the deep abyss of smartUI. Today we’ll take a look on the Wizard control.
Example
Lets look at an example.
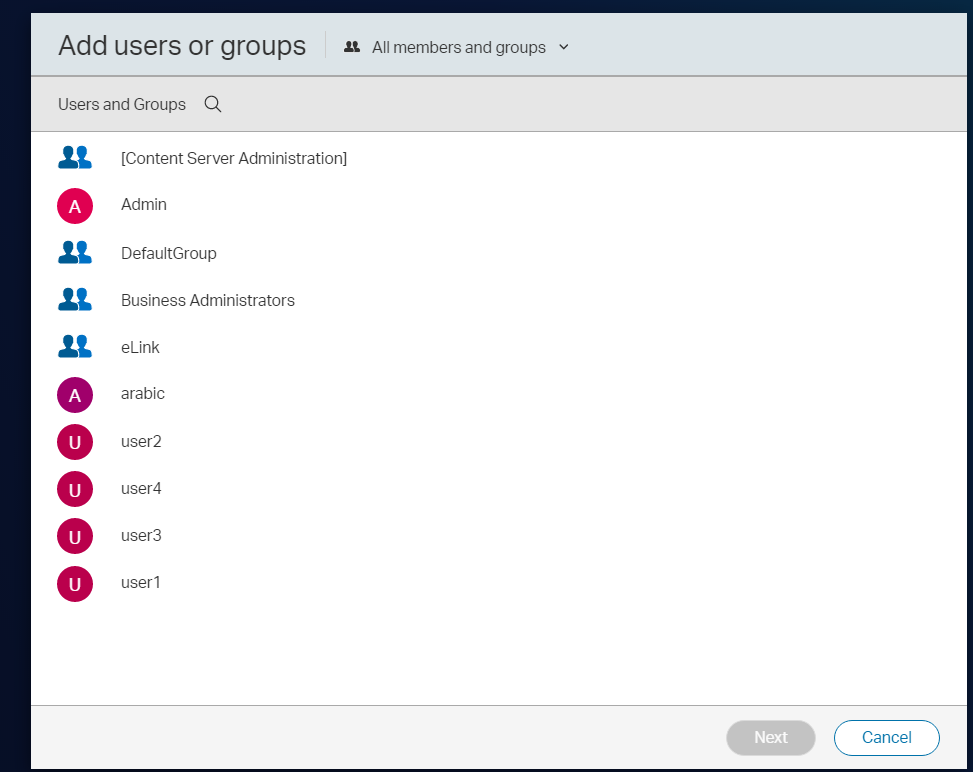
Hidden inside the permission explorer, there is an option to assign a new user with some permissions to a document.
When you select a document, you can select a user or a group to add to this document. This is the first page of our wizard. This control directly calls the MemberPickerWizard with this two steps.
Almost immediately the memberPickersDialog is instantiated and shown:
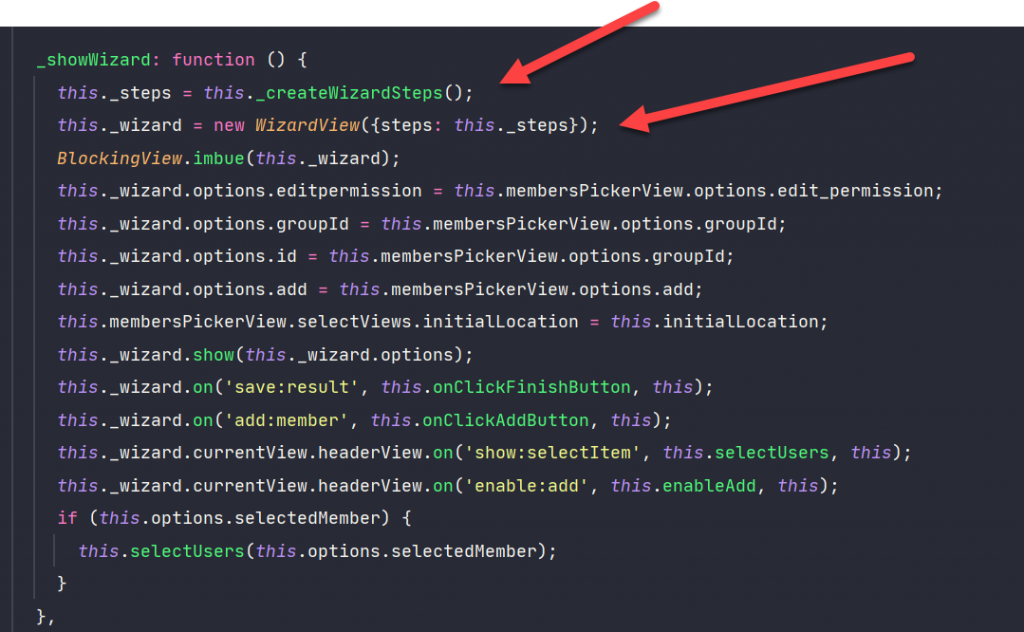
As we can see, here is our wizard.view.js used as reference.
The wizard itself is wired inside the prototyype:
First, the steps are created in _createWizardSteps (see below).
All of these steps are used as argument on instantiating the wizard. Then the wizard listens to some events (“save:result” and “add:member”) and processes them.
Thats all. Easy.
The Step Defnitions
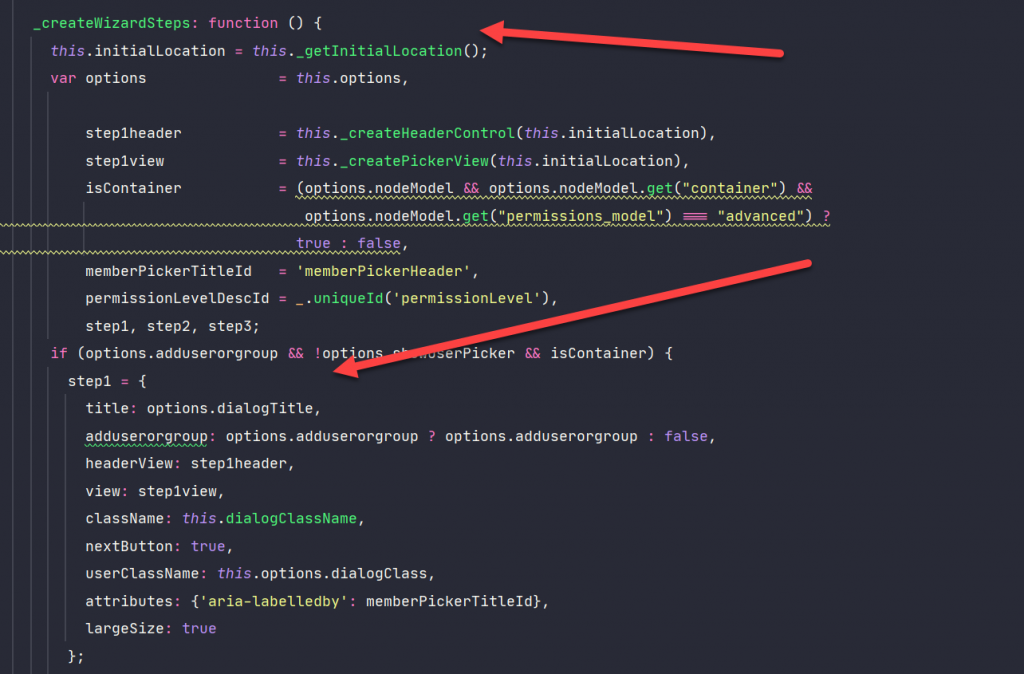
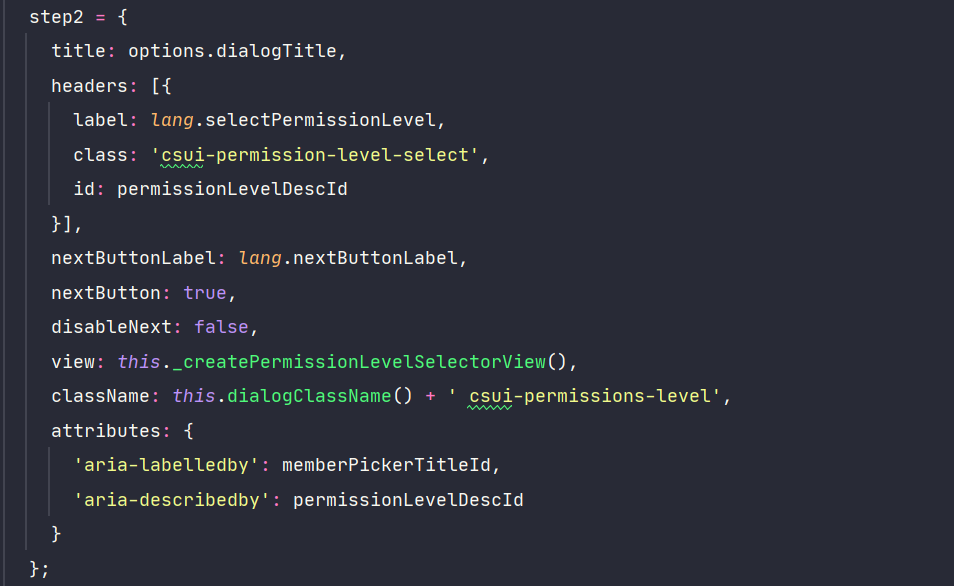
Steps are defined inside the _createWizardSteps method:
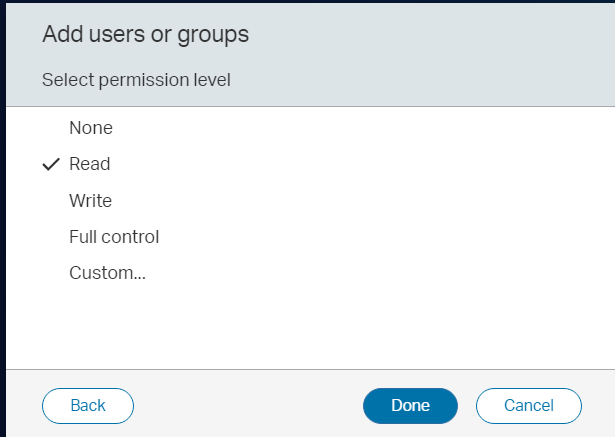
The object step1 defines the selection of the users, the object step2 (below) defines the permission level.
All steps have in common:
a title
headers (with the NLS language sting, a class and an id)
a next Button (with next button label)
and, of course, a view defining the content of the wizard step.
At the end, the defined steps are returned as array:
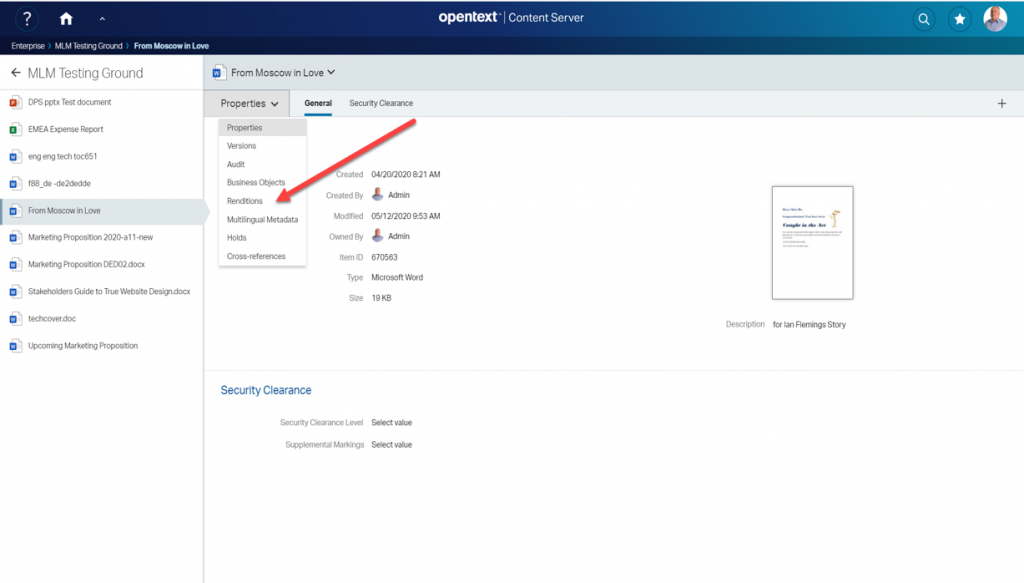
In SMART TOOLS renditions are also build in the properties manager of smartUI. Renditions can be displayed by selecting renditions on the pull down menu, just like Multilingual Metatata in my last post.
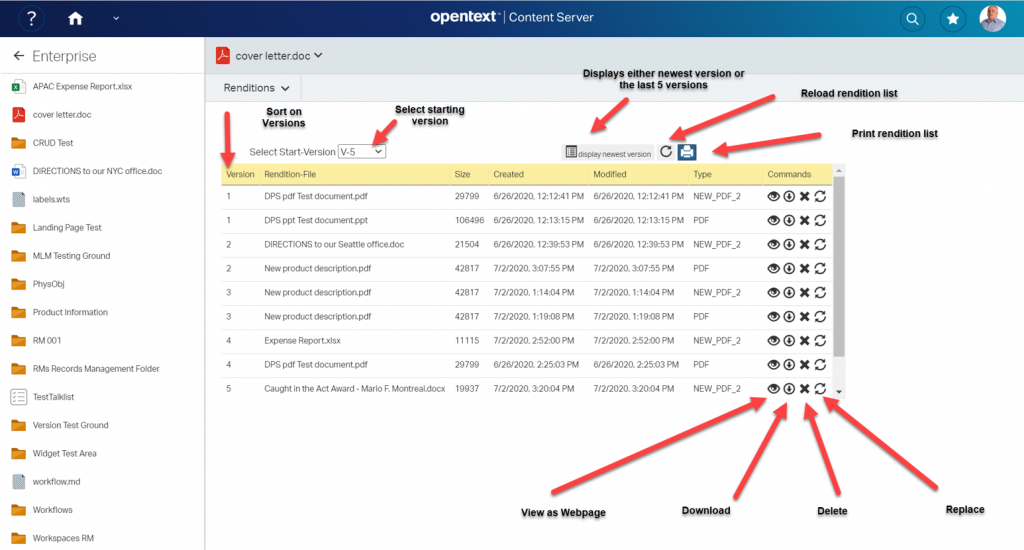
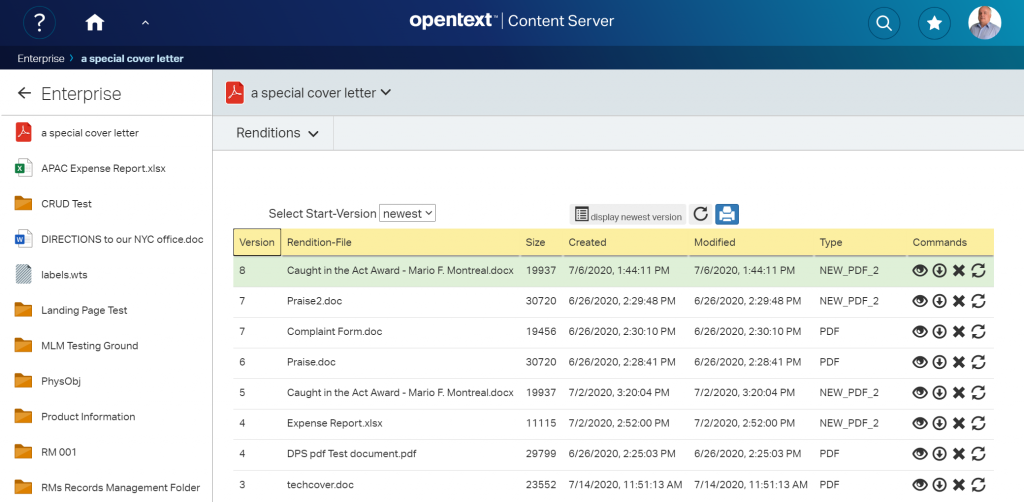
Rendition Main Panel
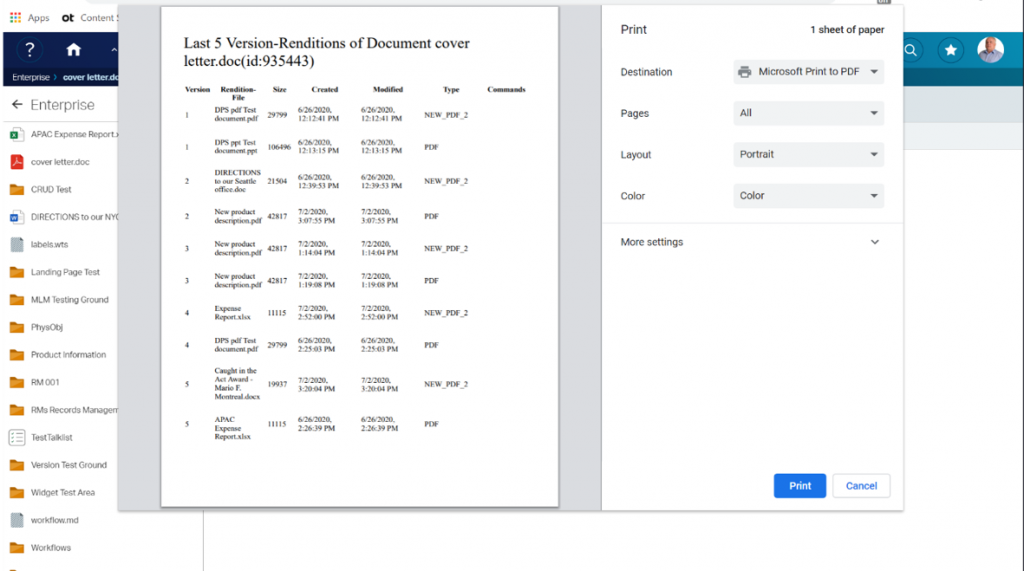
Next, the main panel of renditions is displayed. The renditions of the newest version or the latest 5 versions will be displayed.. A Rendition can be downloaded, deleted, replaced or (if configured) with “View as Webpage” be seen.
If there are a lot of versions, a starting version can be selected. Then this version and the last 5 versions with all renditions will be displayed.
Ascending or descending sorts on versions can be done by clicking on Versions.
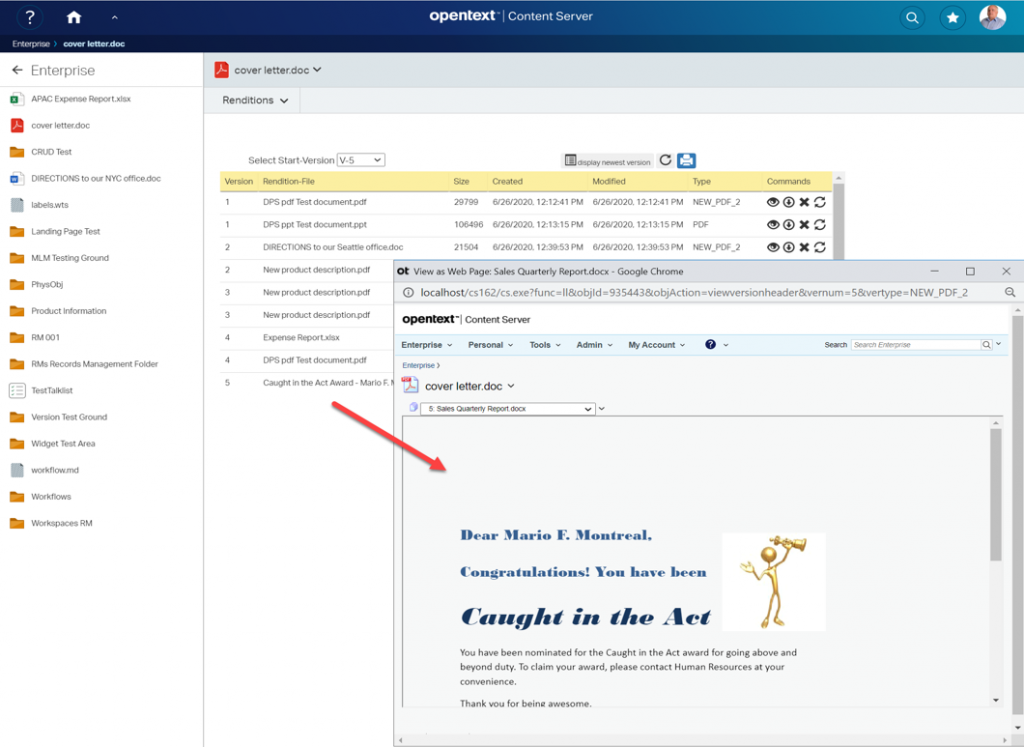
Interesting is the “View as Wewbpage” function. This is a build in function in the Content Server, so it can also be used to see the contents of any renditions in the classic UI and in a separate window.
A rendition can also be downloadeed by clicking on the down.arrow icon. This will normally download the file as setup by the users browser. If the rendition is a PDF and print.js (a standard extension in browsers) is activated, the the pdf can also be displayed directly.
A list of renditions can also be printed. This is a nice addition to help you to get an overview.
Direct Access Renditions
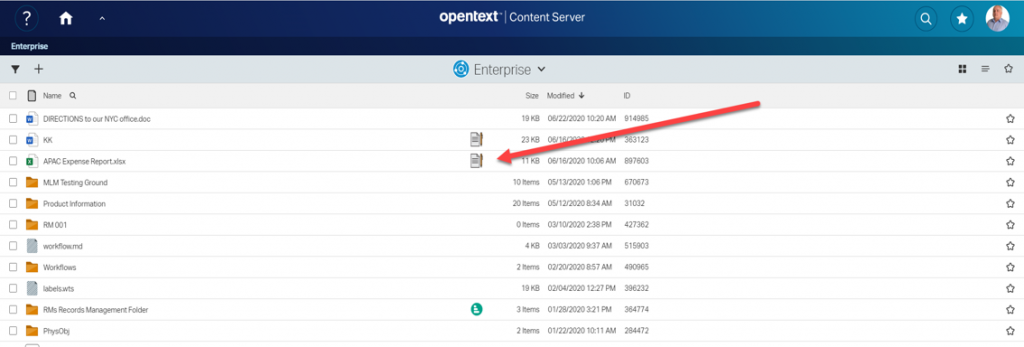
For a direct access to renditions, I also added a cell renderer to be displayed, if the newest version of the document has a rendition.
This is a little svg icon displayed directly in the list of documents.
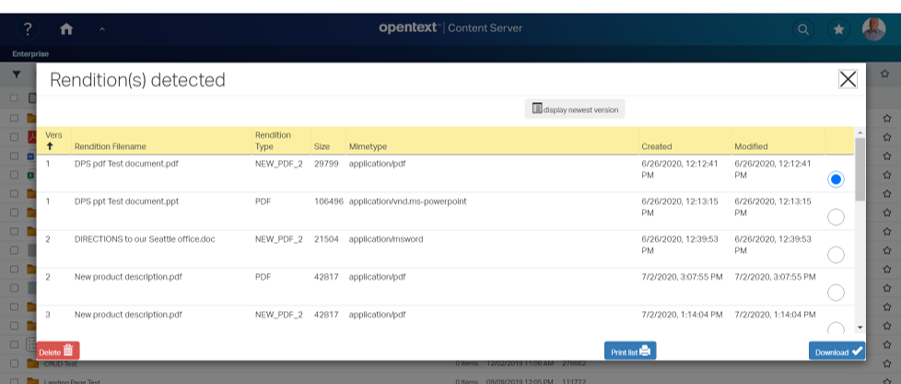
The little icon can be clicked and then a list of renditions belopnging to this document is displayed.
From this panel, a rendition can be selected and downloaded. If the user has proper permissions, he can also delete the rendition selected. Also a printed list (see above) can be made at this point.
Sorting in ascending/descending versions can be done by clicking on the Arrow in the “Vers” columnn.
Because this direct access requires a lot of calls to the server, this feature can be switched off at the Admin Pages of smartUI.
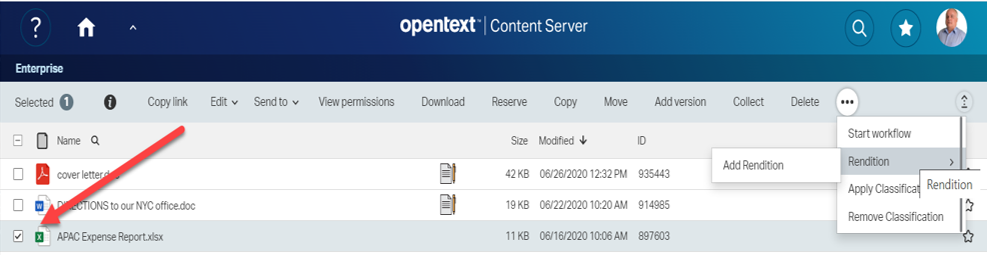
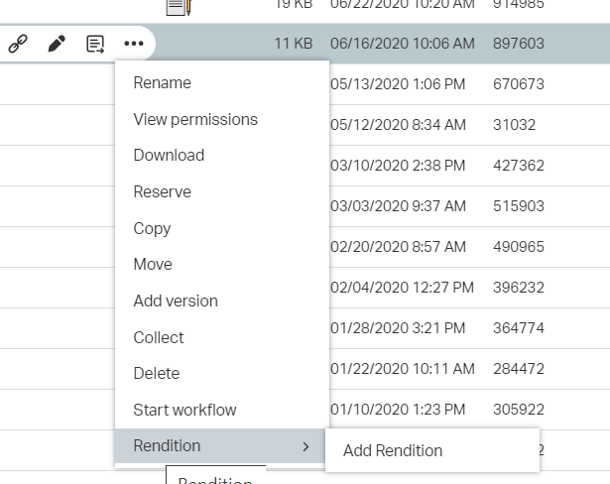
Add Rendition Command
Additionally, there is also one command required, the “Add Rendition” command. The “Make Rendition” command is not implemented, because this requires local admin rights, something which should be rare.
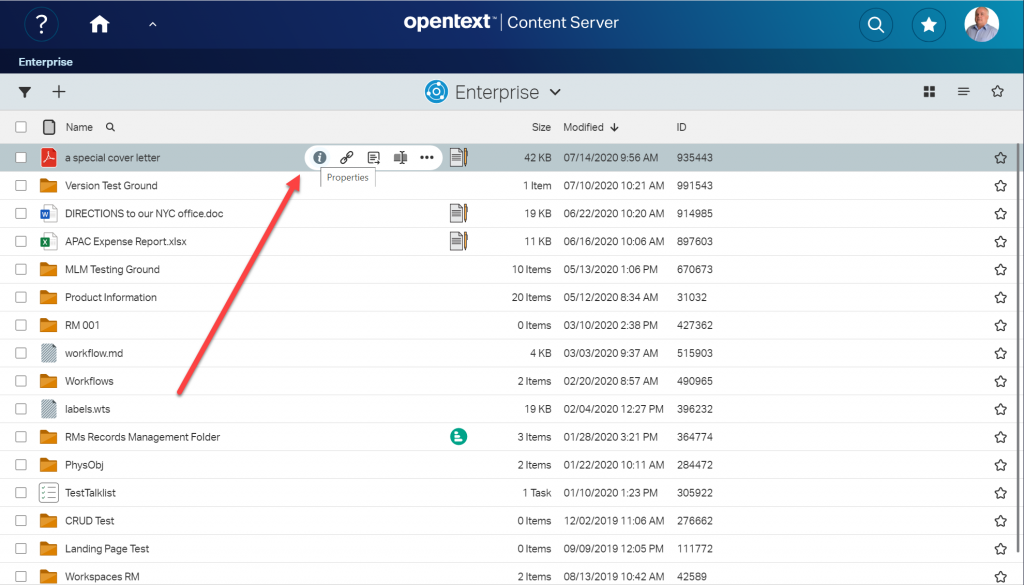
This command can be issued at any document directly from the list of documents
Commands are usually displayed in two locations, the Headertoolbar (above) and the Toolbar (below)
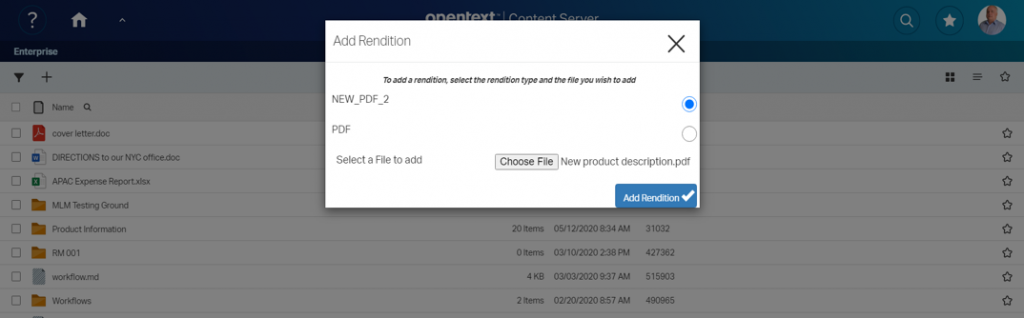
Adding a rendition means, selecting one of system defined rendition types and a file beeing intended as the rendition. If the selected rendition type does not exist on that document, then the file is uploaded and used as a rendition.
Next week, we dive more in the direct access of renditions and the Pros and Cons of that technique.
Missed something in the Posts? Here are the parts already posted:
Today lets look on the functionality of the multilingual metadata part of smartUI.
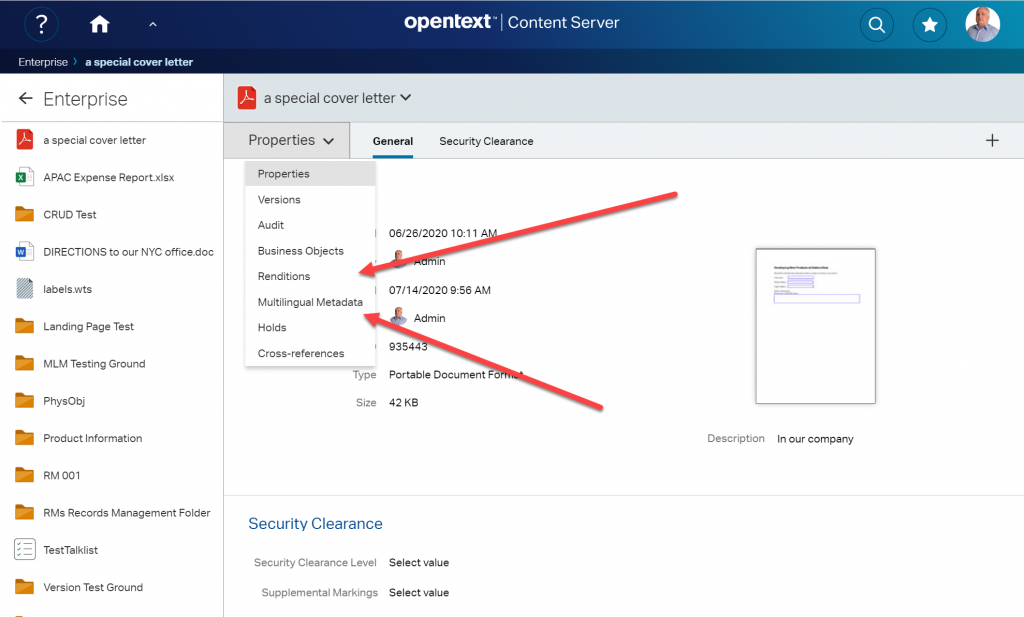
Its directly integrated in the properties manager of the nodelist widget.
The multilingual metadata panel
Use the pulldown menu in the properties manager.
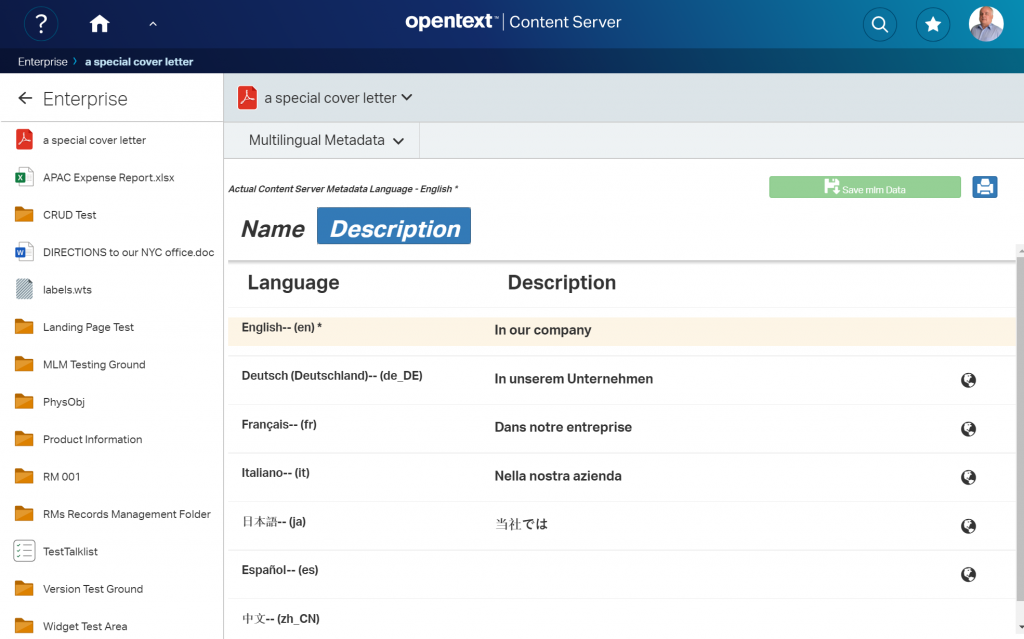
If you go to the “Multilingual Metadata” entry, you’ll see a list of the two attributes, which make up the multilingual metadata in all supported languages.
Here, just for demo purposes, metadata languages are English, German, French, Italien, Japan, Spanish and simplified Chinese.
Automatic translation with Microsoft Azure services
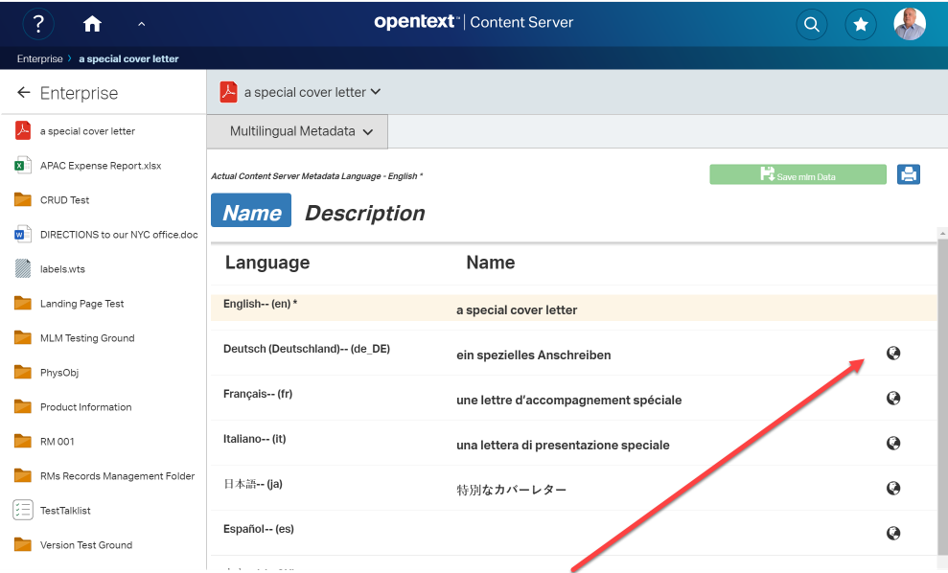
At right, there is a globe icon visible. If there is a globe icon, then this language is configured to do an automatic translate using Microsofts Translate service. Its to translate from the users default metadata language (here English, also displayed with a different background) to this target language. Simplified chinese is not configured to use automatic translation, therefore there is no globe set at chinese. To configure that is the job the Content Server administrator.
Clicking on the globe will replace any text with the translation of the attribute in the default metadata language (here “a special cover letter”).
Although this translating machines are quite good, its always a good idea to have the opportunity to manual correct the automatic entries. Its done simply by clicking on an entry.
By pressing <RETURN> in a inpput field or by clicking on any language name, the edit mode is switched off and the green button “save mlm data” is activated. By pressing this button, mlm data is saved on the server.
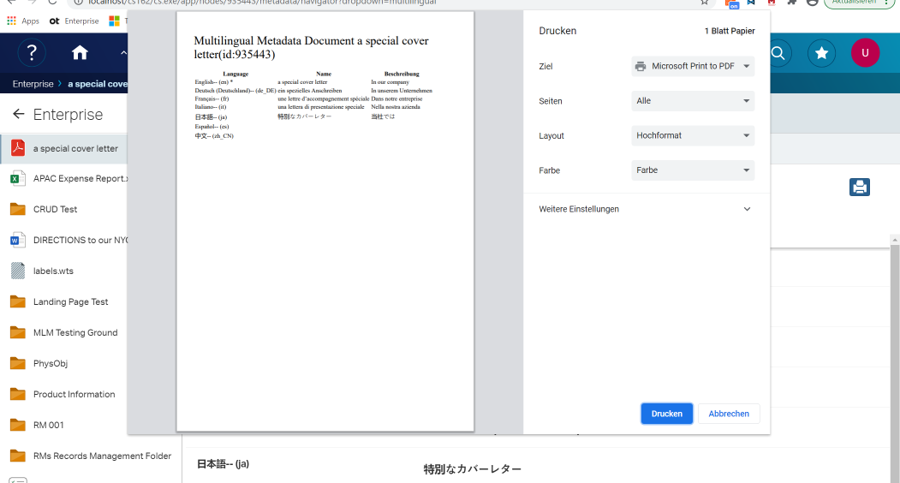
Print a list of actual mlm data
If you have a lot of these language entries, its unlikely for one person to check all language values. It would be nice to have a list (printed of pdf) with the actual values. This can be done by simply clicking on the blue Print-Button.
This will open the browsers print window and give you a preview of the list.
Ok, thats all for today. Next week we’ll take a look at the SMART TOOLS Rendition support.
Using OpenText Content Server as as developer, you have to face it sooner or later: Write an application in smartUI. This will give you a lot of experience for smartUI projects, especially on the Cost/Times/Materials base.
I did chose to build a product called SMART TOOLS with Renditions and Multilingual Metadata Support. Product means, it can be sold by other OT partners as well.
This is a multipart post. Today we talk about the basics of the application running in Content Server 20.2. Additional posts will explain the usage and some technical aspects
Features
SMART TOOLS includes these features:
Adds support for Multilingual Metadata to smartUI
Automatic Translations for the multilingual data using Microsoft Azure REST service (as nobody speaks all languages on this planet)
Add print lists (to get a list of the data entered for editing)
Add/edit mlm data directly
Integrated in the standard nodelist widget using the property manager
Adds support for Renditions
List all Versions and Renditions
Use “view as webpage” as a base viewer
Download renditions
Delete renditions
Replace renditions
Add Renditon as command
A cell icon marks all documents in the document list having renditions at the newest version. Clicking on the icon will open a window to show all renditions. Download or delete a rendition.
Adds configuration support for the javascript client software from the Admin pages. Critical things like MS Rest API key can be protected by sending this things at the page creation time to the client.
The SMART Tools are build for Content Server 20.2. A a considerable amount of new REST services also to be implemented in the Content Server.
The Integration
Integration is simply direct in the nodelist widget using the property manager.
By clicking in the first icon in the list, the property manager opens.
The panels adressed by this menu are the multilingual metadata panel (with the two fields Name and Description) and the rendition panel. Here you see the mlm panel with the autotranslate Icon (the globe at the right).
This is the rendition panel which shows all renditions attached to all versions.
Language support
The SMART TOOLS support a couple of UI languages like
English
German
French
Spanish
Italian
This is one example on the multilingual metadata dialog using German, French and English.
The nls feature of smartUI is nice, isn’t it? I even tried it (experimental) for Arabic, and it worked!
Lets go more in detail in the next posts, as this here is intended to be a simple overview.
Next week I will describe the multilingual metadata support of smartUI