
Lets discuss the strategies on how to “widgedize” an existing legacy GUI based module to support smartUI.
As we are discussing smartUI, we do only discuss the client side, the things to do on the server side are only drawn.
Ok, let’s start:
To keep the example easy, we use the Barcode Module, which is part of the core Content Server and is providing a very easy service.
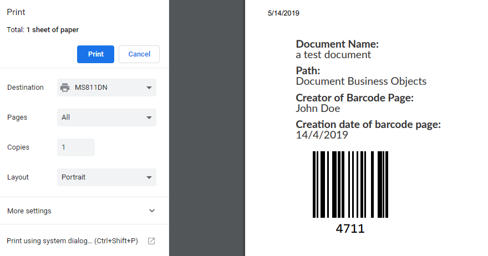
- Allows to mark a folder and to enter a filename and will print out the coversheet at the right
- Used to be the designator of a document to be scanned with Enterprise Scan. The document wll be scanned and stored under the folder (defined by the path) and the name (defined by the Document name) in the Content Server.
- Base for a Scan-Workflow
- The Barcode module gives this as result
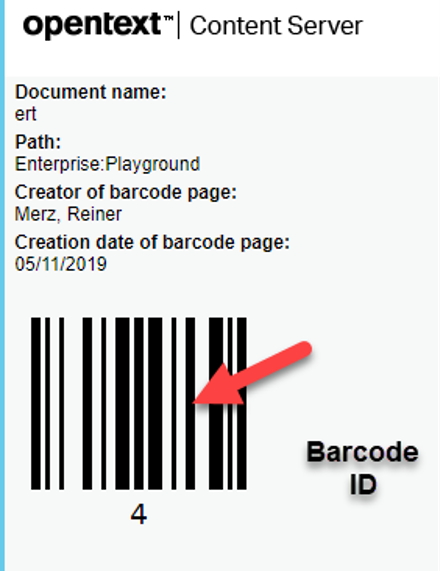
This gives a Barcode ID, the Document Name and the Content Server Path. This sheet can be prited and scanned using Enterprise Scan. Then the next scanned document will be stored in the Content Server with that name and that path.
First, we have to do some investigations.
Investigate the GUI
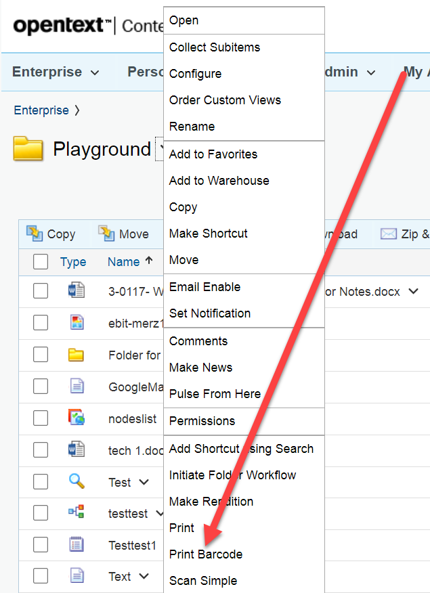
- Invoked by clicking on „Print Barcode“ at the container node menu
- Will ask for the name of the scanned document and output the cover sheet for the scan order

Investigate the module
- •Next, the module is interrogated for
- Data Storage
- Request handler
- Internal processing
- This can be done with the help of CSIDE
- Use the Module-Tab and DONT(!) unlock the module or import.
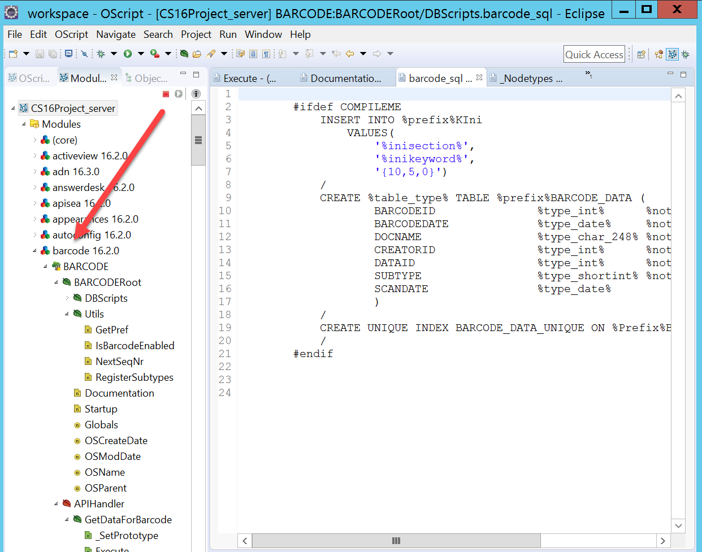
Results
Obviously the module uses a table with this format
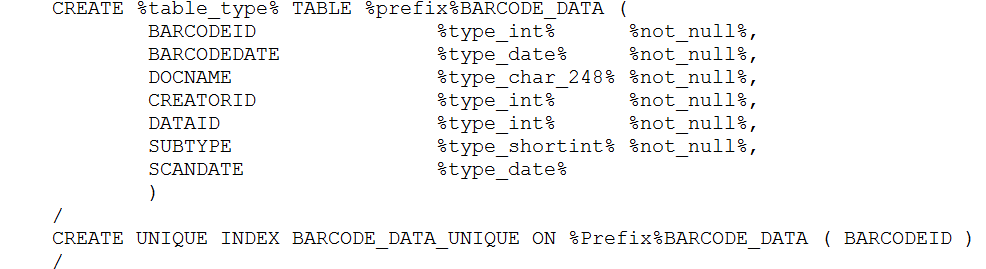
With a unique index on the barcodeid. This is the number which is printed as barcode.
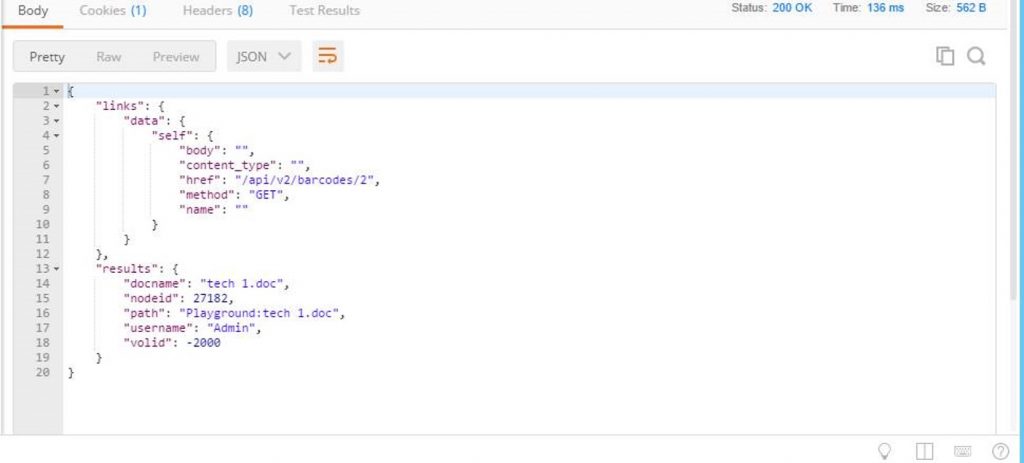
There is also one REST command existing. This REST command /api/v2/barcodes/{barcodeid} is obviously used by the Enterprise Scan to store the doc in the Content Server. It gives this JSON answers:
To be implemented
Server Side (Not part of this example)
- Rest Services
- To get the next unique number
- To store the Barcode ID, Document name, the Path, the User and the Date in the barcode table
Client Side
- New Barcode Widget
- To select the parent container
- To query for Document Name
- To process all dates
- To print the cover sheet locally
- To be used as a small widget under connected workspaces
Client Side Development
- Copy the base demo widget to a new folder under [yourprojDir]/src/widgets with a new name (p.ex.barcode)
- Rename all references from the base demo widget to the new name (using wingrep etc)
- Rename all files to the new widget name
- Use the test\index.html to verify that all in the copying procedure was successful.
- At this point the new widget should display the same output as the base widget
- Add a Nodepicker to get the parent node
- Use fiddler to search for the REST commands used by the nodepicker
- Use postman to get the REST answers against an existing CS
- Setup the REST mock up to test without the need to install the widget (text\index.html)
- Put the output of the nodepicker to a text field to avoid typos


- Add a document name input field with a label of „Document name“

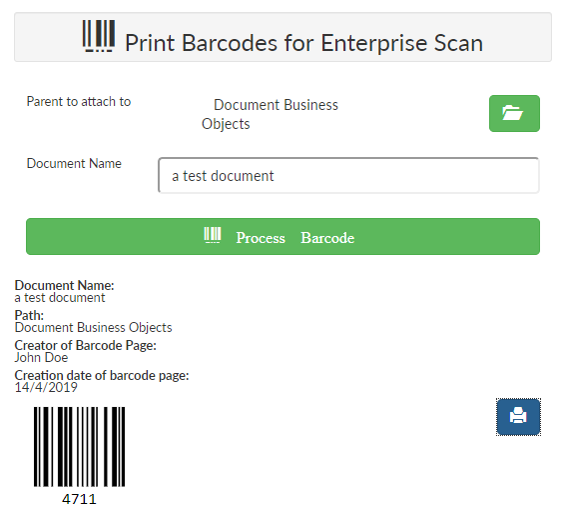
Next, you can add a „Process Barcode“ button, because everything is gathered. The User Name is in the Context, the Date is today. Process Barcode should (not part of this exercise) report the next sequence number from the table, store all data in the table and render

- Add a display field for the cover sheet. First with dummy data, then with the actual data filled in. Ensure that the actual user is requested by using the base model.
- Add a Print-Button
- Add some Print Functionality using browser printer capabilities
The complete widget would look like
ToDo if the Widget is correct
- Implement the REST Services in the server
- Add the REST client functionality in the widget
- Add the REST calls in the mockup
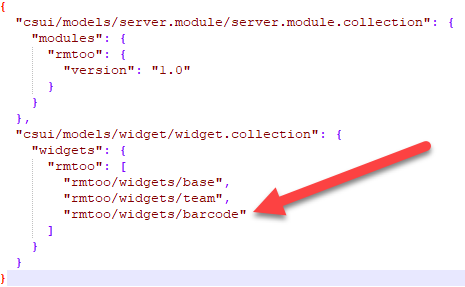
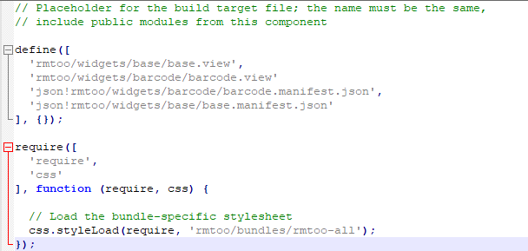
- Add the barcode widget in the project-name-extensions.json
- Add the widget and the widgets manifest to the bundles file
- Grunt
- Copy the resulting files to the support dir of your carrier module
- Test it
And you have added smartUI support to the barcode module and any Enterprise Scan workflows.
Easy, isn’t it?