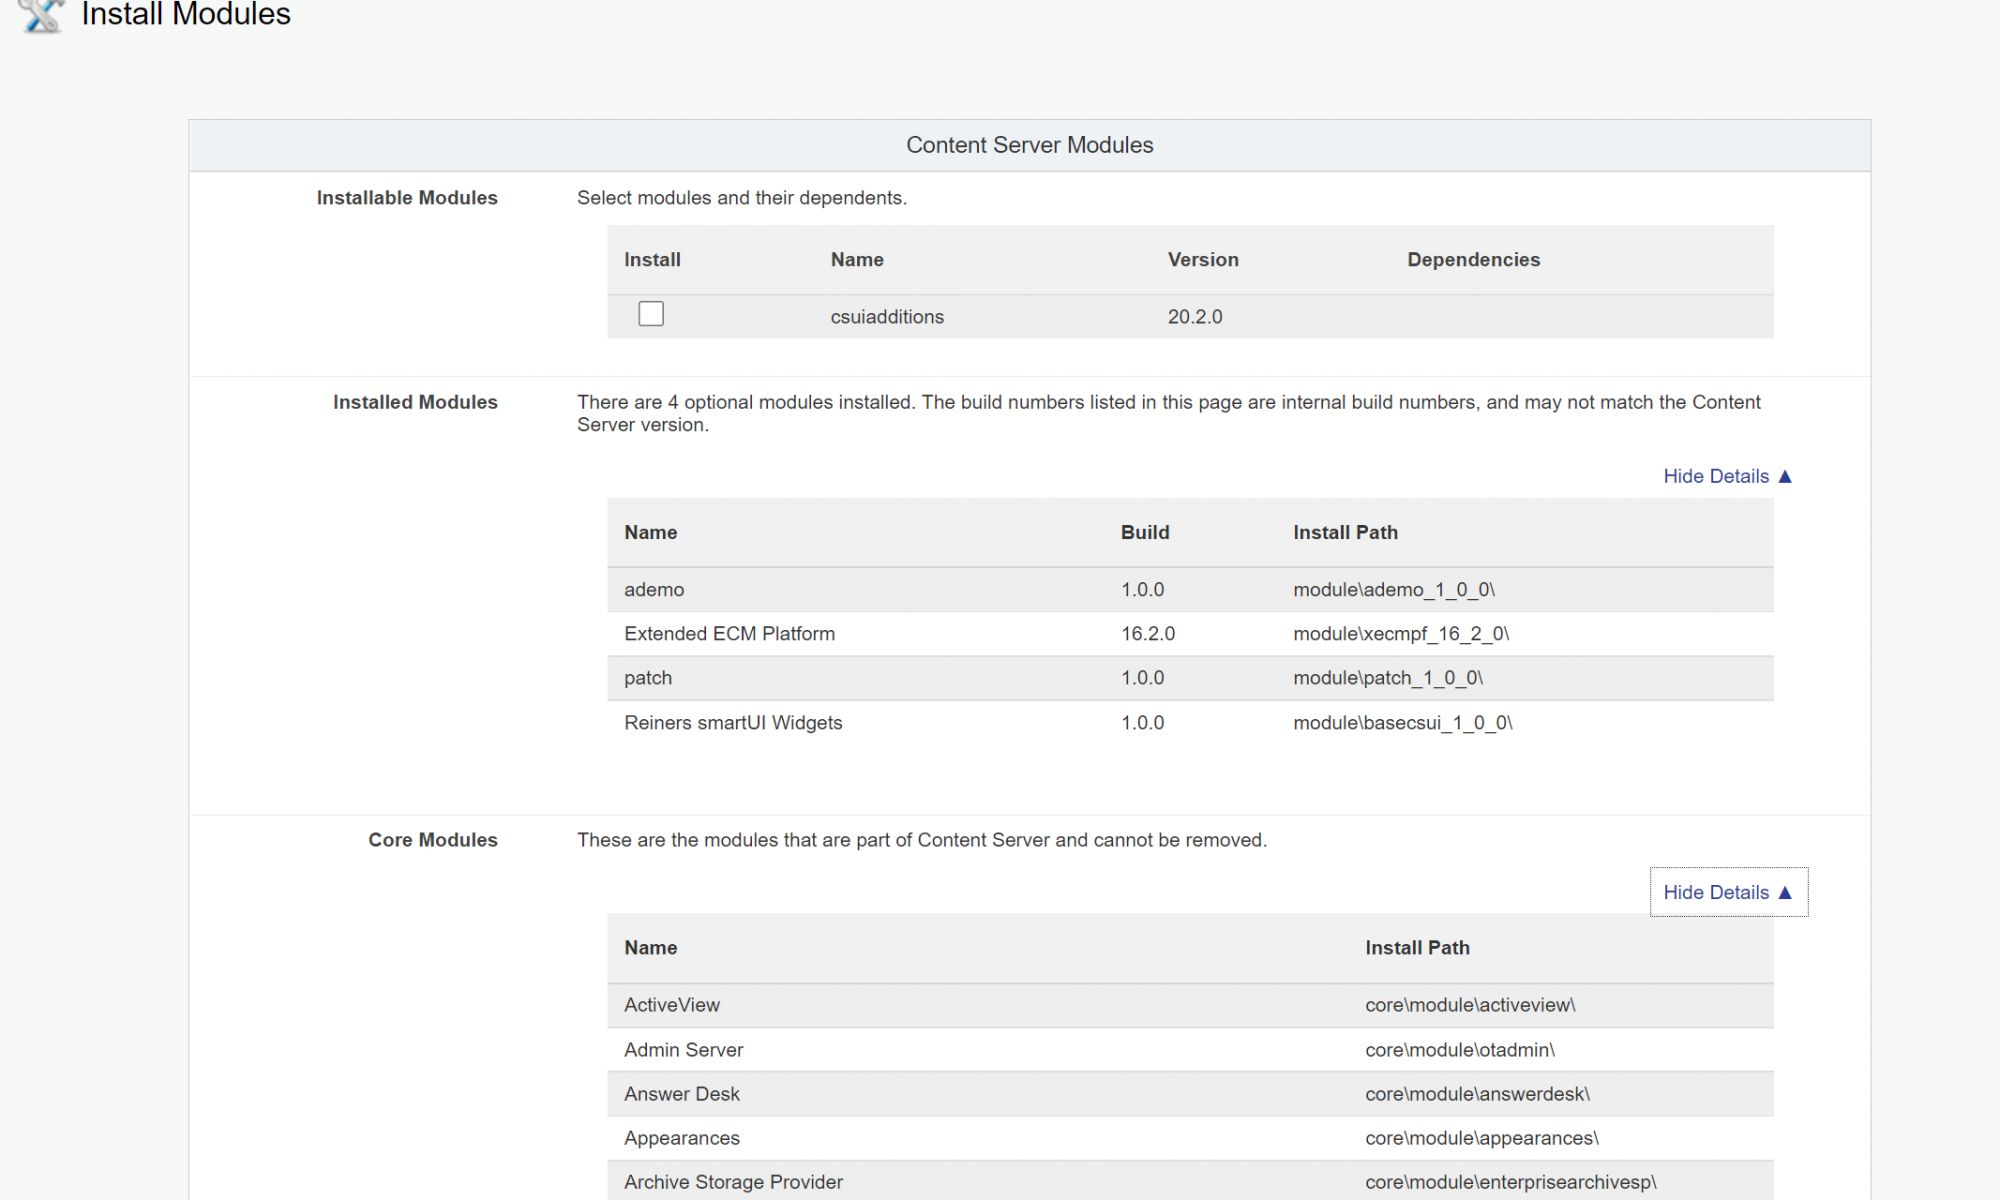
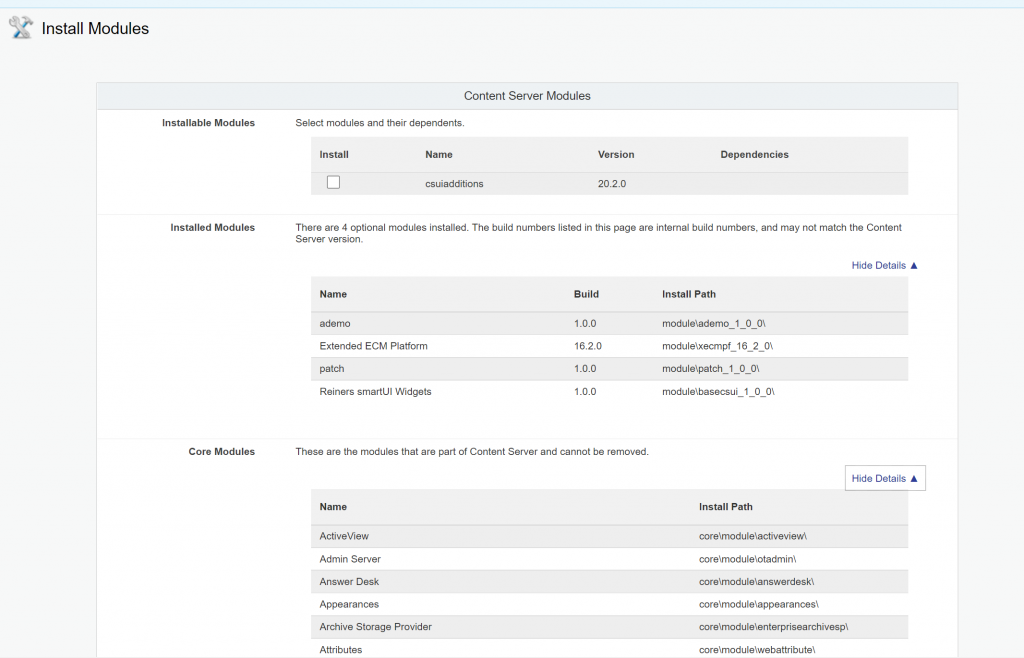
In the versions prior to 21.4 the module version numbers tented to be confusing. To fix this, there is a changed “Install Modules” page.
This page has been redesigned to avoid confusion.
The standard modules appear in a separate secsion without version numbers. And the somewhat long names (like “Content Server Comments” are simplified to “Comments”.
The optional modules are listed in the “Installed Modules” section. They now feature “Build” instead of “Version” to clarify the meaning.
Have much fun with the new “Install Modules” page.
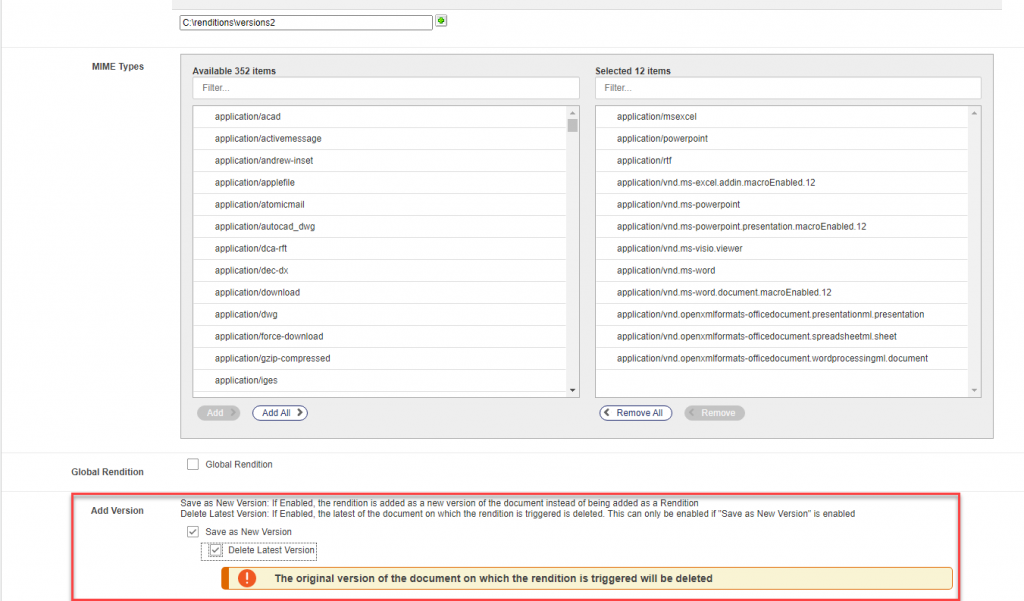
The new Rendition Administration option allows the Delete or Overwrite of the latest version. This is a configuration to be made under the Admin pages (Renditions/Configure Versions Folder/Edit Versions Folder)
If “Save as new Version” is marked on, the rendition will be saved as new version instead of beeing saved as Rendition.
If “Delete latest Version” is marked on then the document which triggered the rendition will be deleted.
This improves the workflow if processing and the retention of the original document is no longer required,
The world is bad and bad boys are amongst us. They will not even change app.html, they even can steal real documents or do other things with their sessions. As a precaution, there is a new User Session Management – Expiration
?func=admin.securityvars
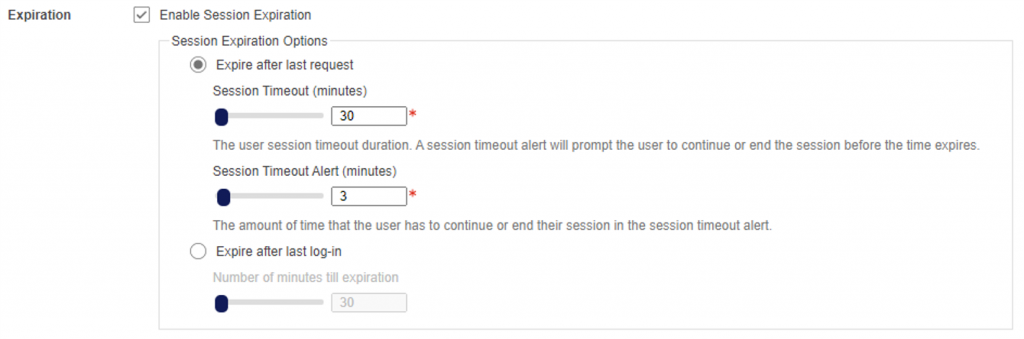
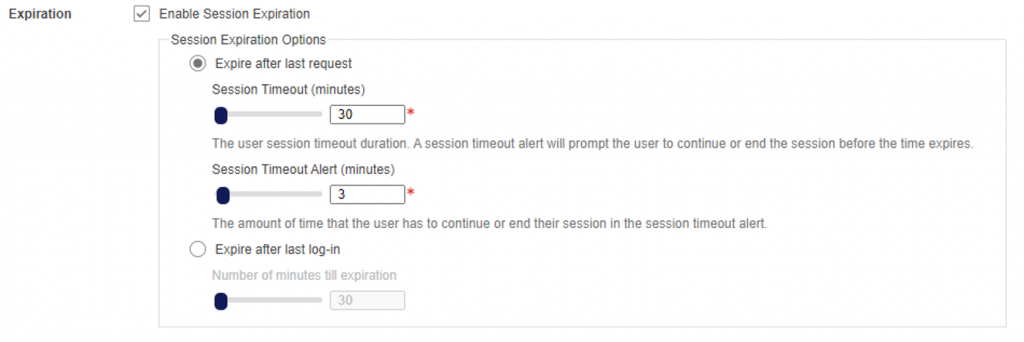
This new management allows to exploit the Cookie Authentication Infos. User sessions can be terminated in much more advanced way then the usual Security Tokens. The rules are:
By default, the session is set to expire 30 minutes after the last action is performed.
The Session Timeout minutes ranges from 1 to 10080 (7 Days)
Session Timeout Alert minutes ranges from 0 to 120
Also: Session Timeout Alert cannot be higher than the Session Timeout
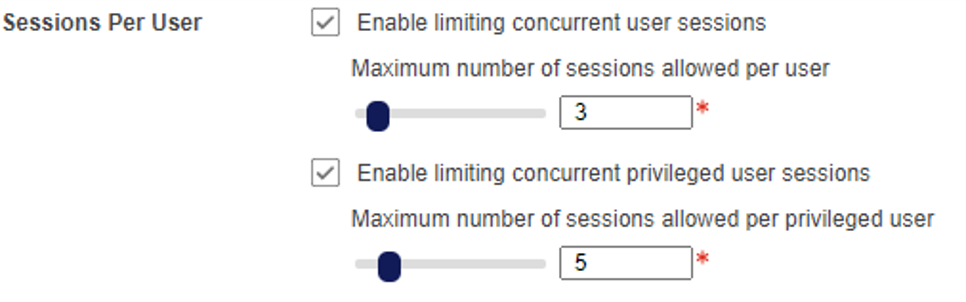
But: A session limit is not enabled by default
Example
If the user is not active, then the session will expire after 30 minutes from the last request made to the server.
3 minutes before the session expiration (on the 27th minute) an alert will be displayed to the user that their session is about to expire
Note: A session is not equal a session, the system admin must cosider these rules:
• If the Content Server is active on multiple tabs of the same browser is considered as one session
• A Content Server active on multiple browsers is a separate session on its own
• If the Content Server is active on CS Mobile or Enterprise Connect is is considered as a separate session
•And when the Content Server is active on other integrations like SAP, Salesforce, SuccessFactors etc. this is considered to be a separate session
Warnings
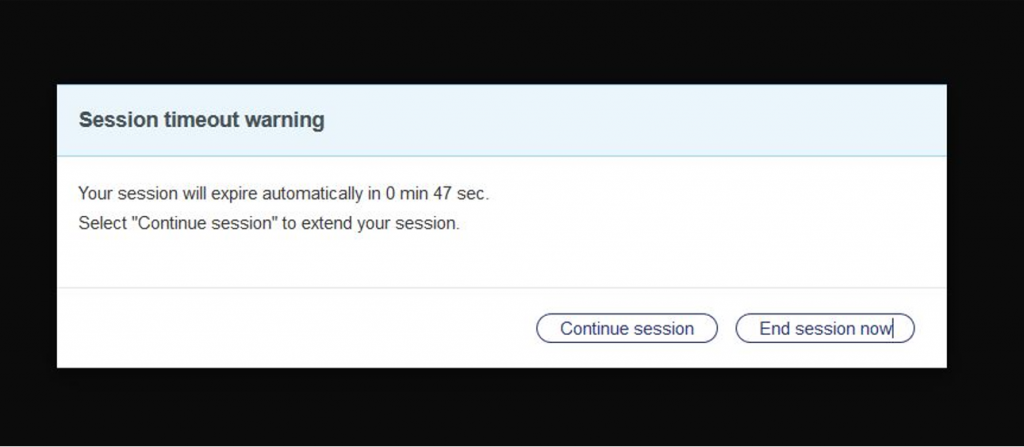
User session terminations are proceceeded by some warnings. If the sesssion is still active but will be disconnected soon, the user gets his warning:
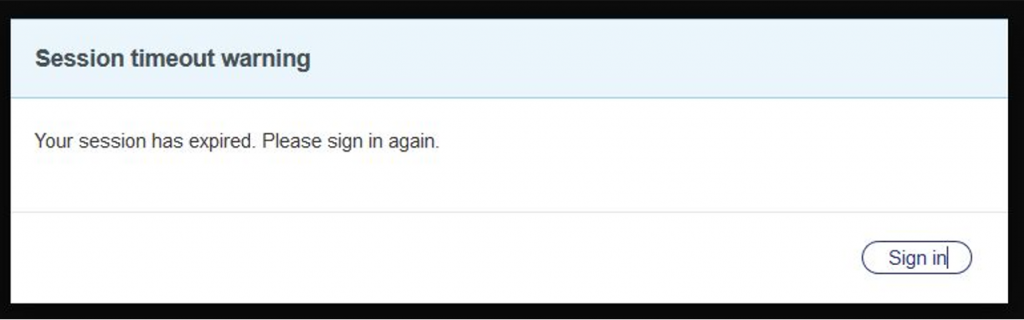
To keep the surprise as small as possible, the user can push the “Continue Session” button and extend his session. But if the session is expired the user gets this panel
The “Sign in” button redirects to OTDS and the user has to re-authenticate his session.
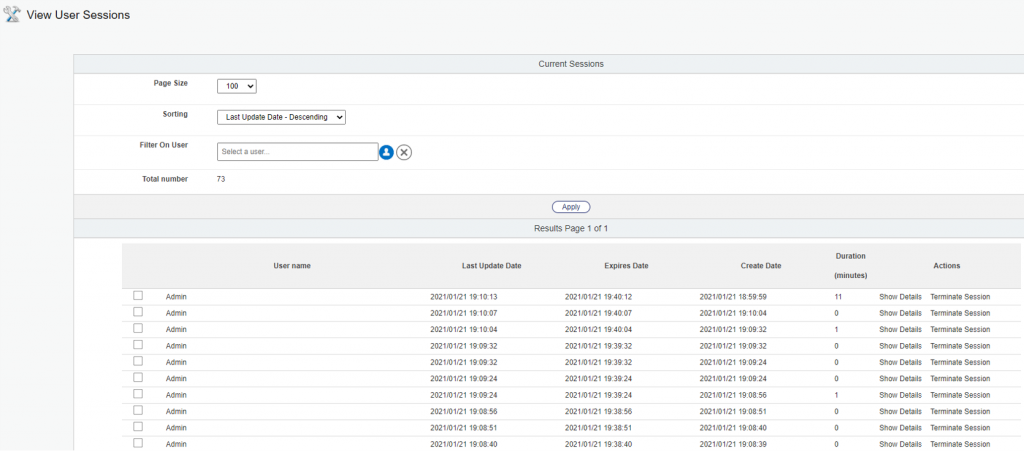
The other side: View Sessions
This will be the tool for the admin to view sessions.
And, for different reasons, there is a button ‘Terminate Session’ ends the user session, and the user will be forced to re-authenticate again.
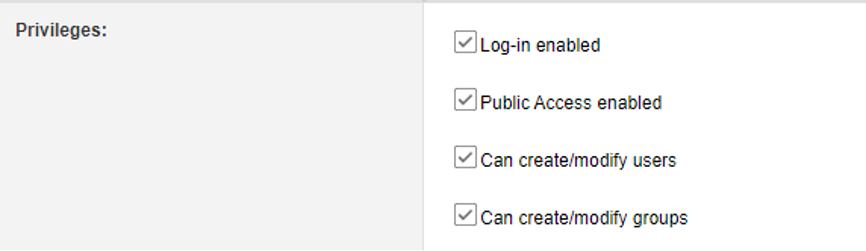
User Sessions will also be terminated by any “Logout” button and on removing the “Log-in enabled” privilege at the user profile edit page
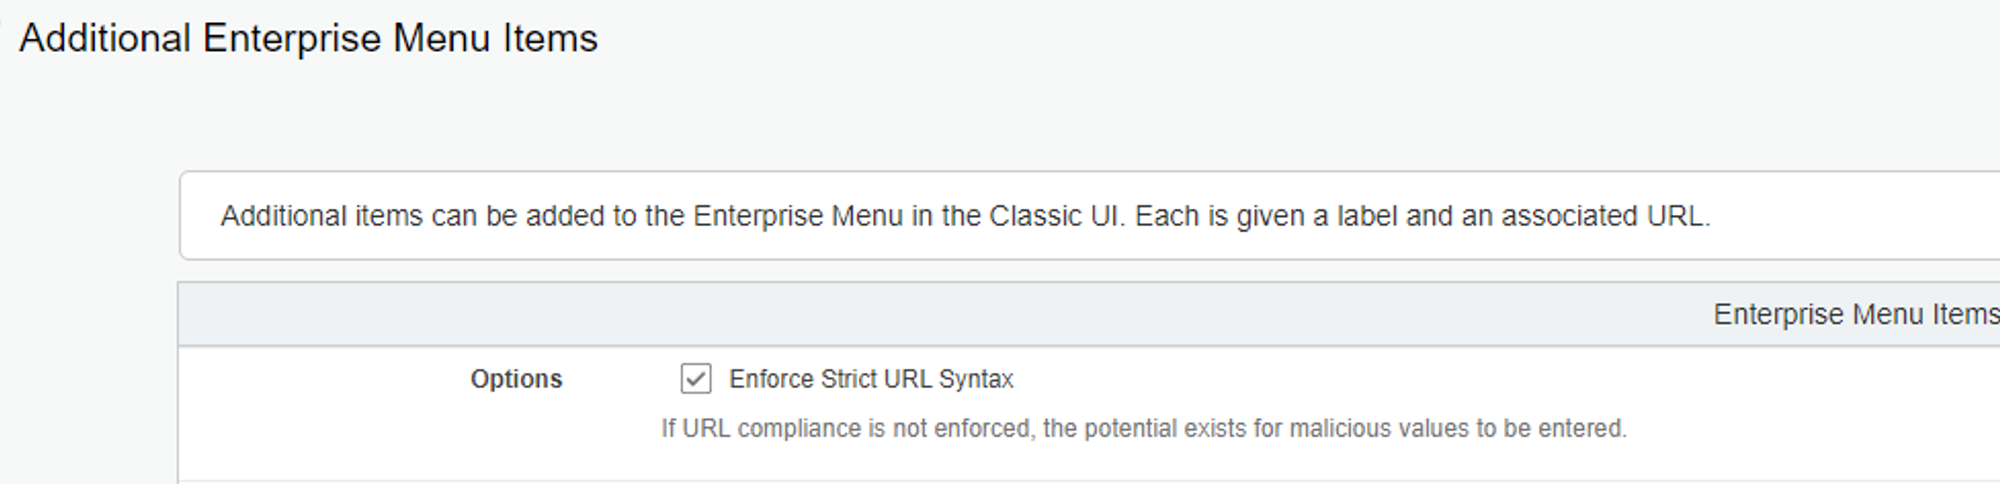
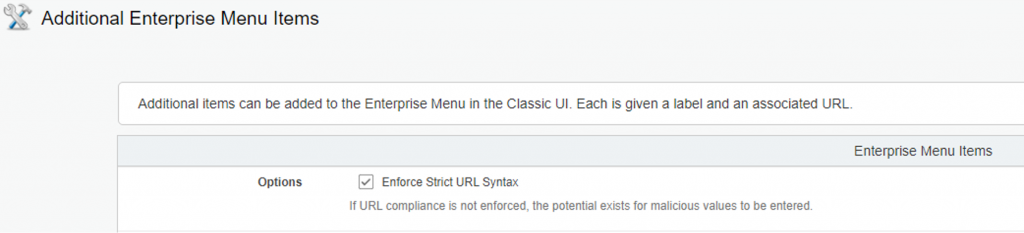
In 21. there is a new checkbox in the “Additional Enterprise Menu Items” Admin page. This allows you to enforce a stroct URL Syntax without Javascript or relative URL Syntax.
A small extension to 21.1, but a giant leap for Administrators to enforce more security on the Enterprise-Menus.
The Admins have an option to overrule this restriction by unchecking the new option. But this page is restricted to Content Server Administrators and not available for Business Administrators.
From time to time you’ll have to deal with distributed agents inside content server. This can be a little confusing, so maybe this post is helpful there
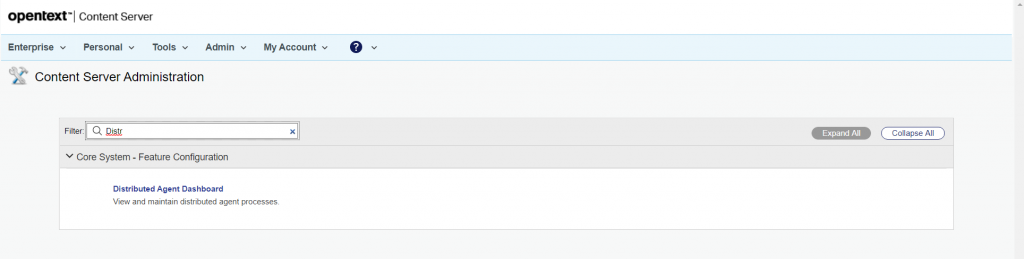
In the Admin Pages, you’ll find a dashboard to control the default setup. Either add a func=distributedAgent.AgentStatus to your servers URL or search inside the admin pages for distributed Agent things like this
Click on Distributed Agent Dashboard.
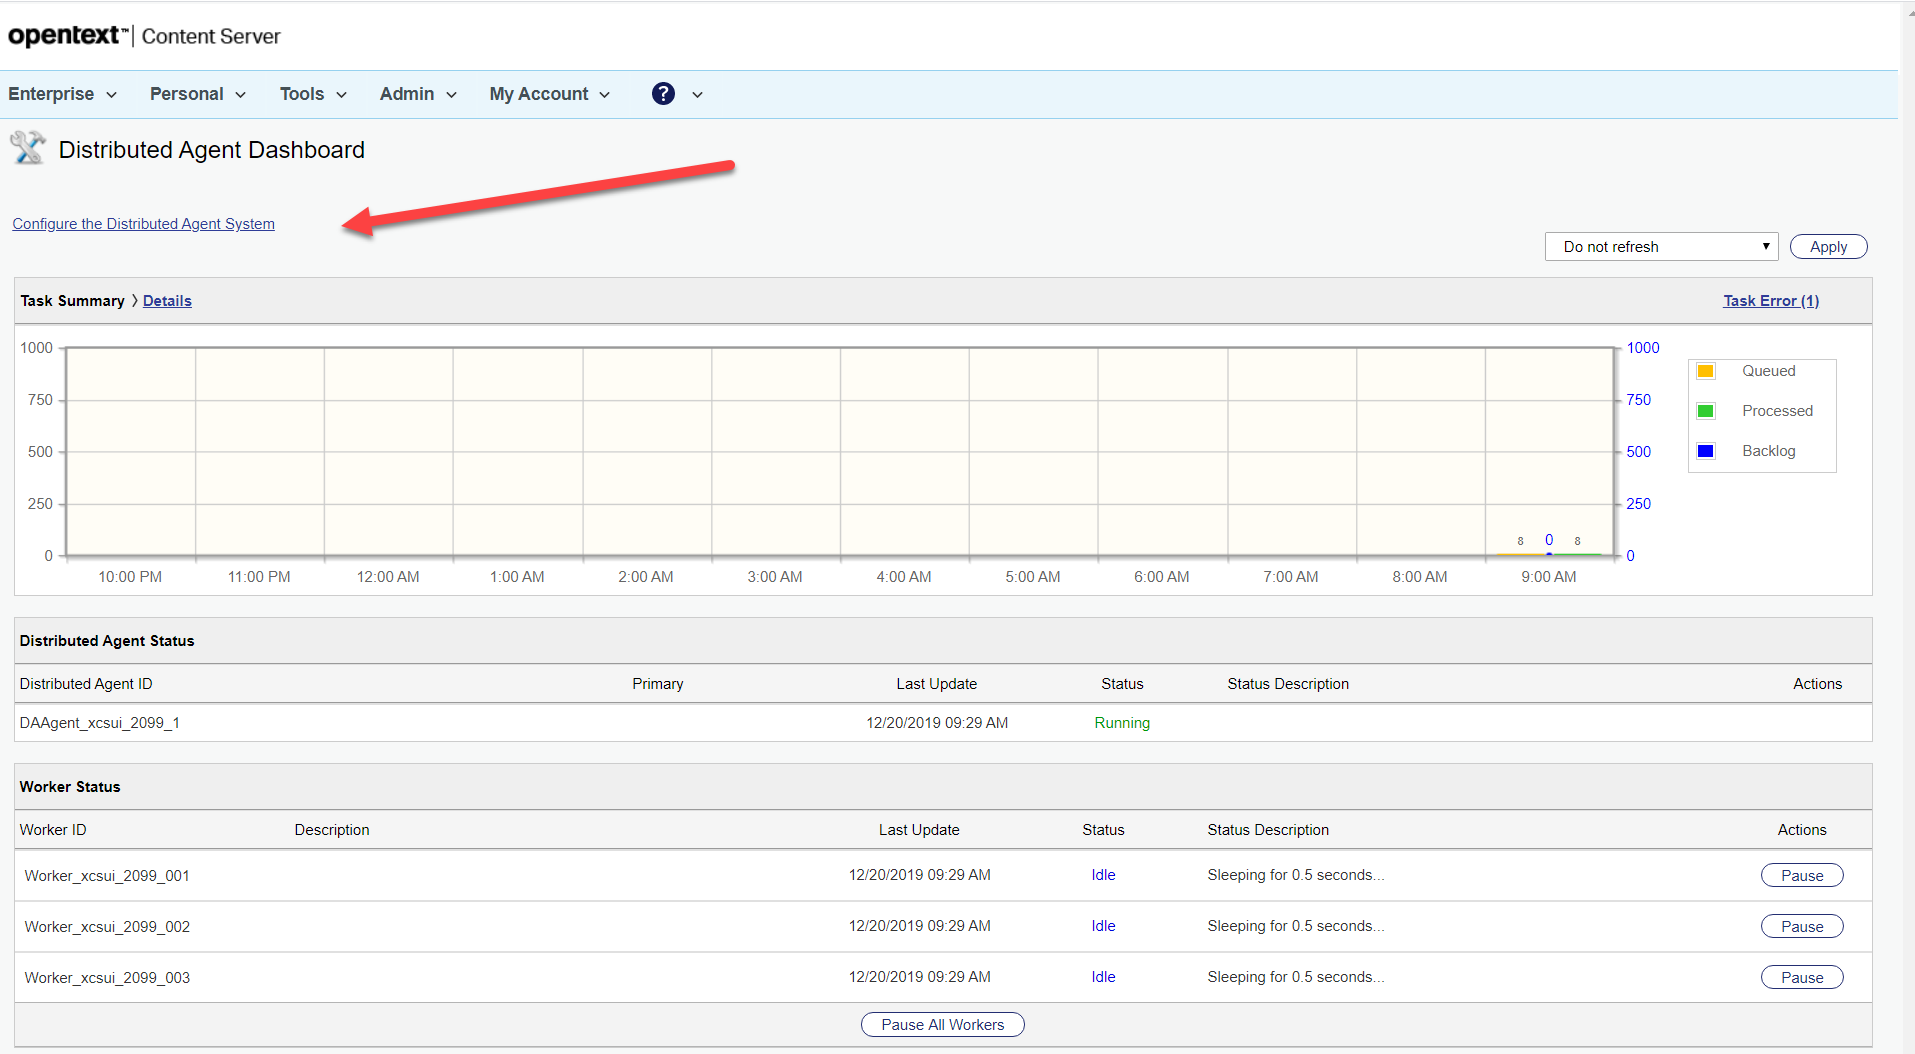
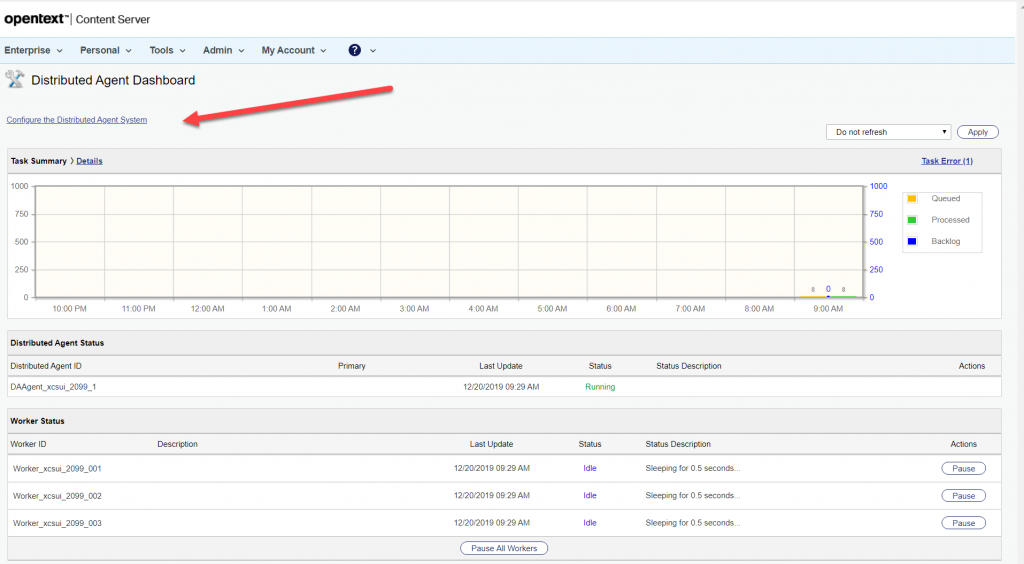
Then you’ll see the distributed Agent dasshboard
Here you’ll find all information about the current state of the system and the configuration of the distributed agent system
Per default a content server has one distributed agent with three workers. You can change the number of workers used by the agent by changing the number of workers in the opentext.ini file in the [distributedagent] section.
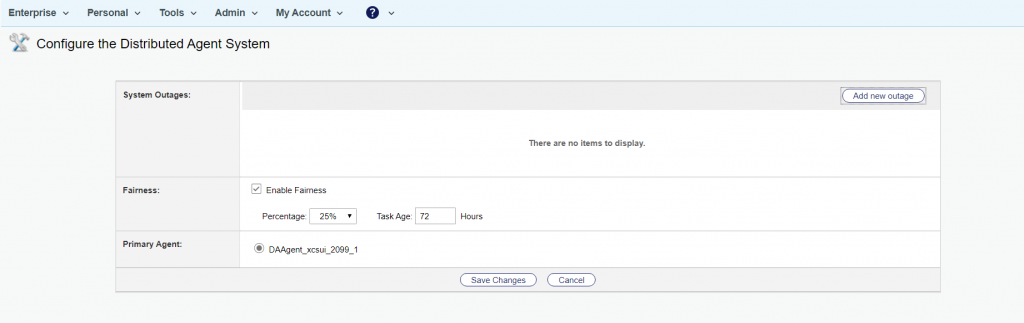
You can configure the whole distributed Agent system by clicking on the link indicated with the red arrow above. Then the configuration page opens:
Here you can set up values for the the treatment of low priority tasks (Enable Fairness). The agent can spent between 5% to 50% on low priority tasks, which will be processed aftera minimal age set by “Task Age”.
When you have more than 1 agent in the system, you can switch the priority Agent here also. OpenText recommends that you select the Distributed Agent with the greatest capacity to be your Primary Distributed Agent. Typically, the Distributed Agent with the greatest capacity resides on your most powerful or your least busy computer.
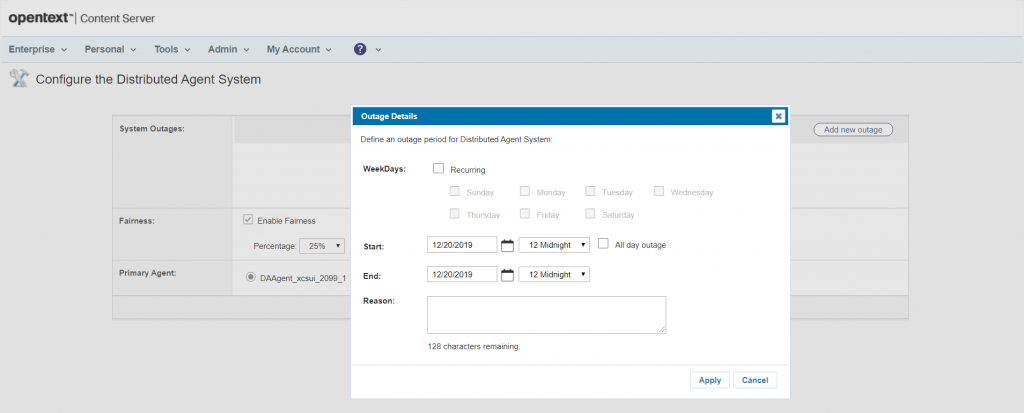
If you want a defined outage to be set, you can do this for the Agent by clicking on “Add new Outage” at the upper right. You can do the same for specific workers, we’ll discuss this later.
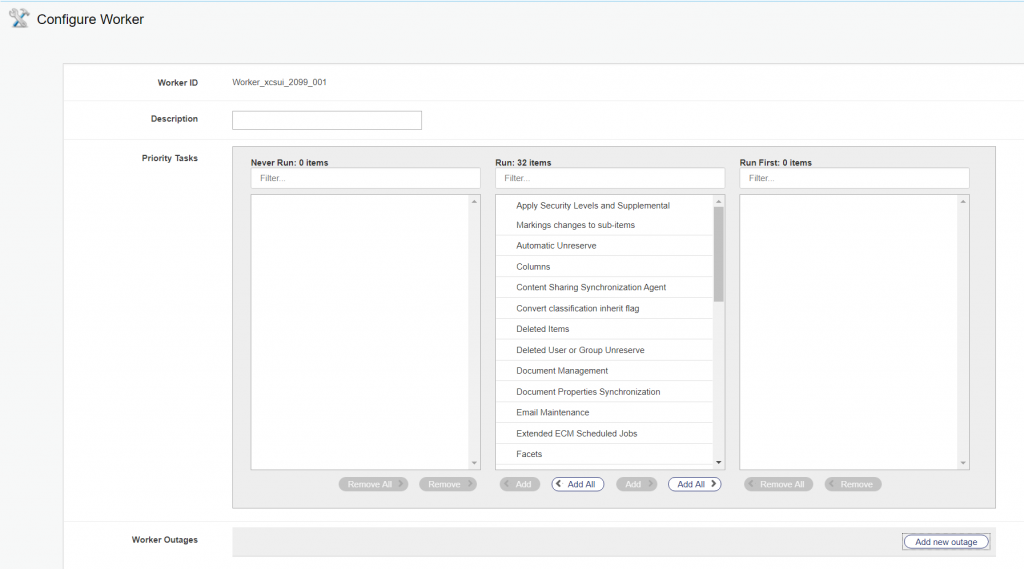
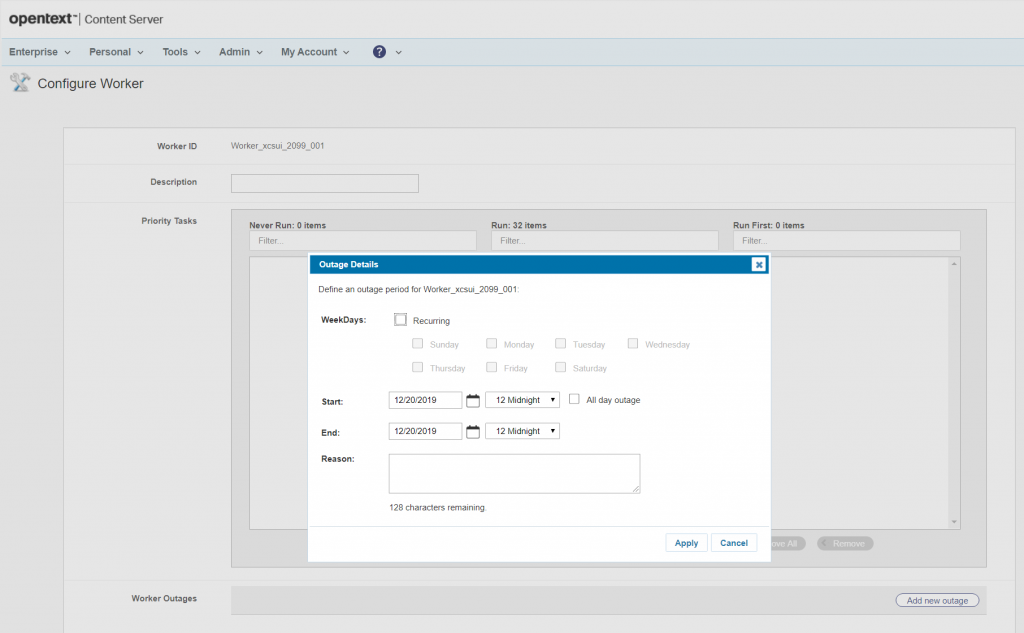
Back on the DashBoard, you cal also modify single workers. SImply click on the name of a worker, then the “Configure Worker” page opens
If you want to set a more specific name as that automatically generated, fill the Description field.
Much more important are the three columns “Never Run”, “Run” and “Run First”. The Run column contains all tasks this worker is supposed to do.
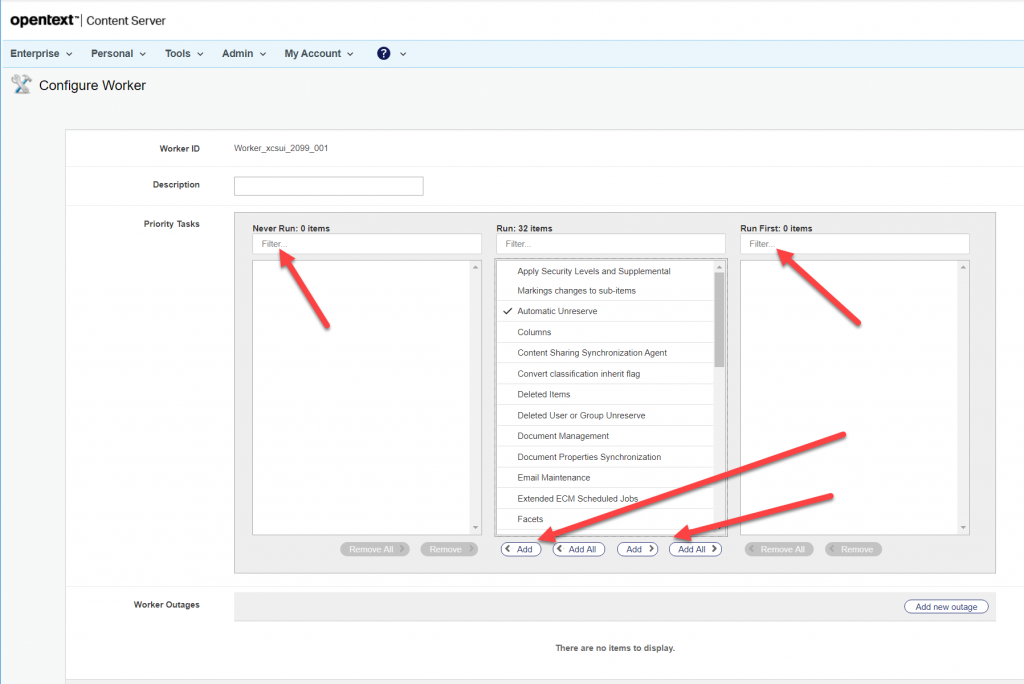
You can exclude tasks from this worker, then this worker will never execute this task. You can also prioritize a task, which means this worker will do this task at first.
To configure this, select either all of the tasklist under “Run” or one or more tasks from the tasklist and move the entries either to “Never Run” on the left (worker will never execute the tasks) or to “Run First” on the right (worker will execute this tasks at first).
This allows you an effective task prioritizing for a single worker.
You can also define an outage for this worker by clicking on the Button “Add new Outage” on the lower right.
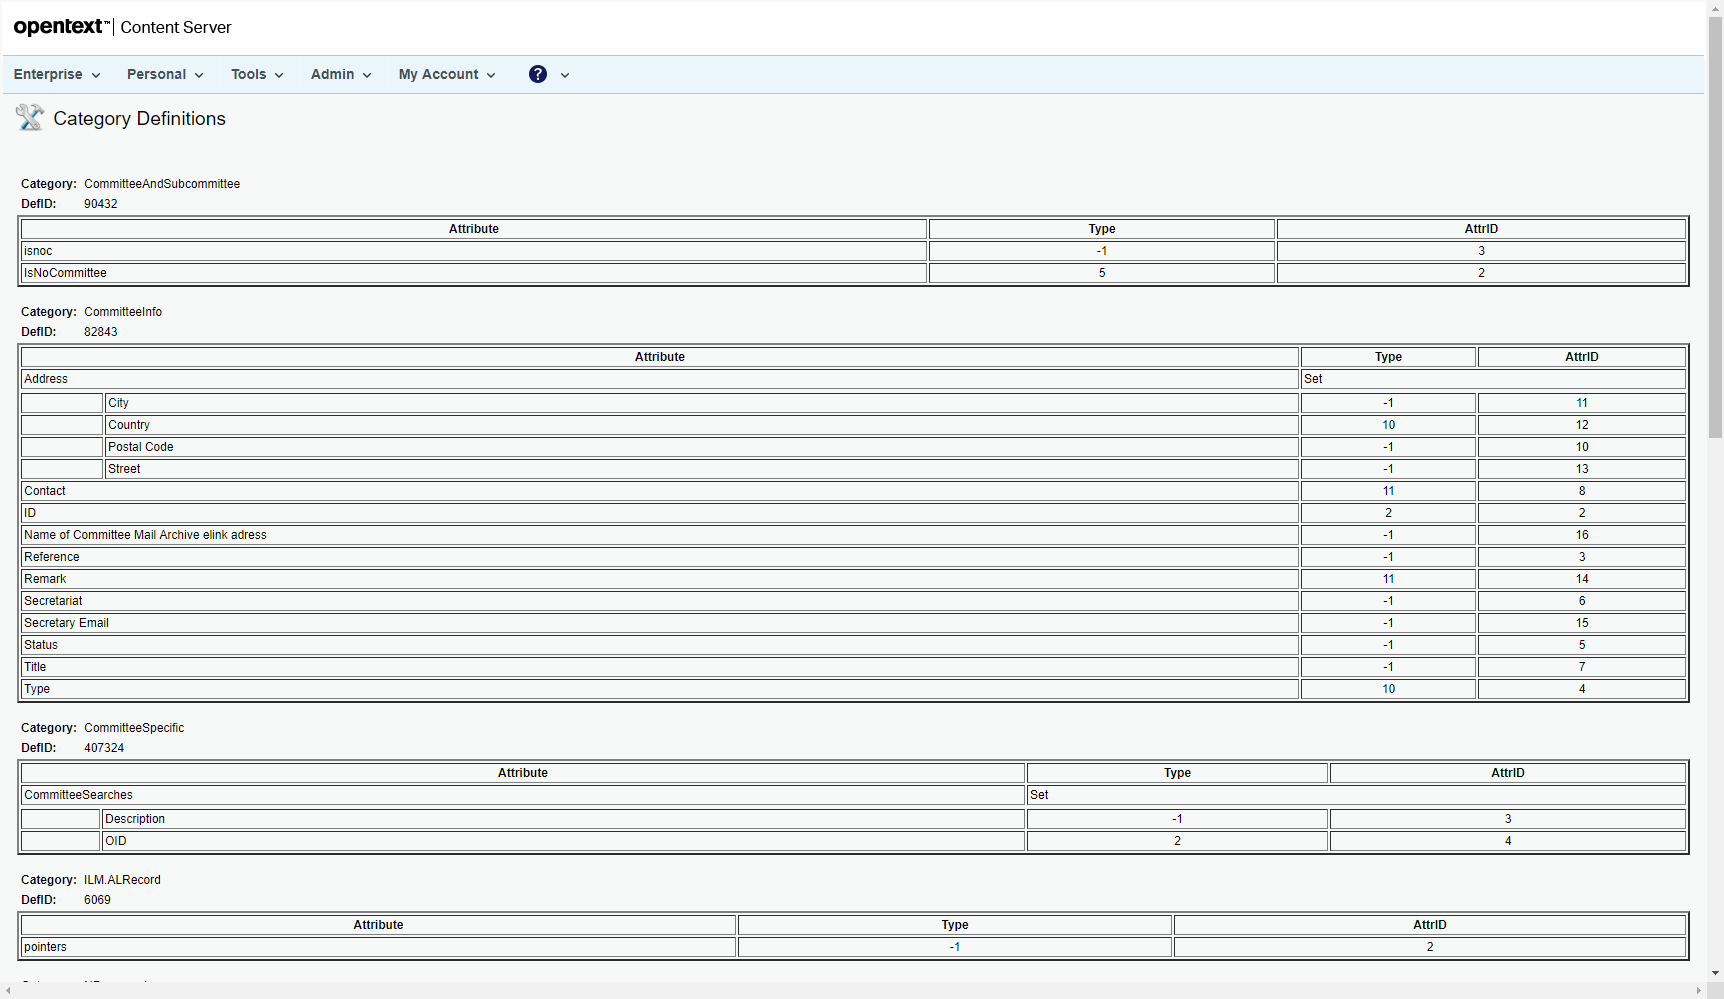
Looking for a quick list of all Categories and Attributes configured in a Content Server? Tired of browsing the Categories Volume? Want to see all attrobutes and their IDs in a list?
In Content Server 16.2.6 the Cluster Manager is gone.
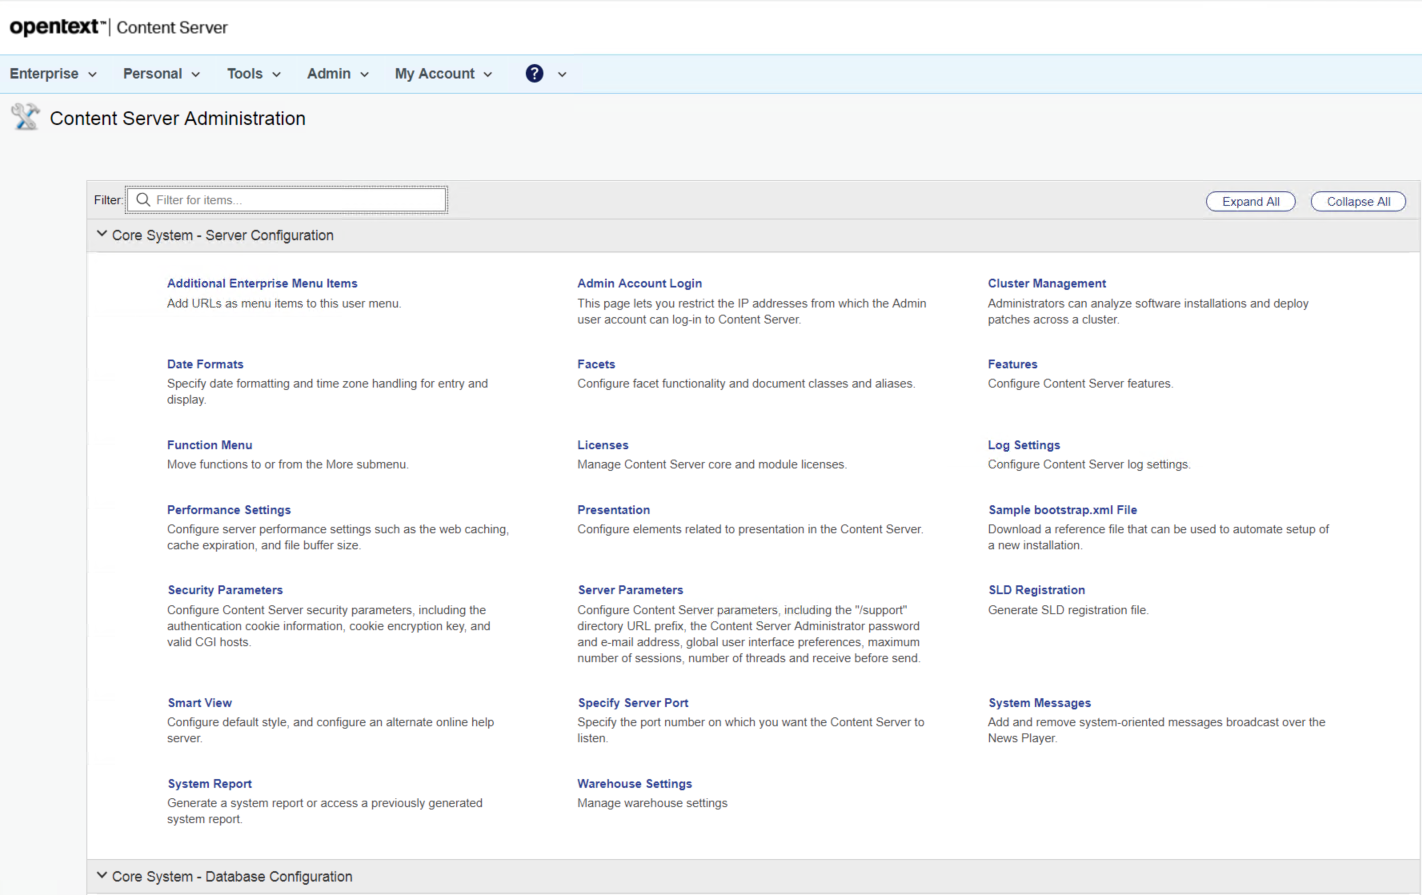
Whenever you try to open the Admin pages, you see this:
Admin Page 16.2.6
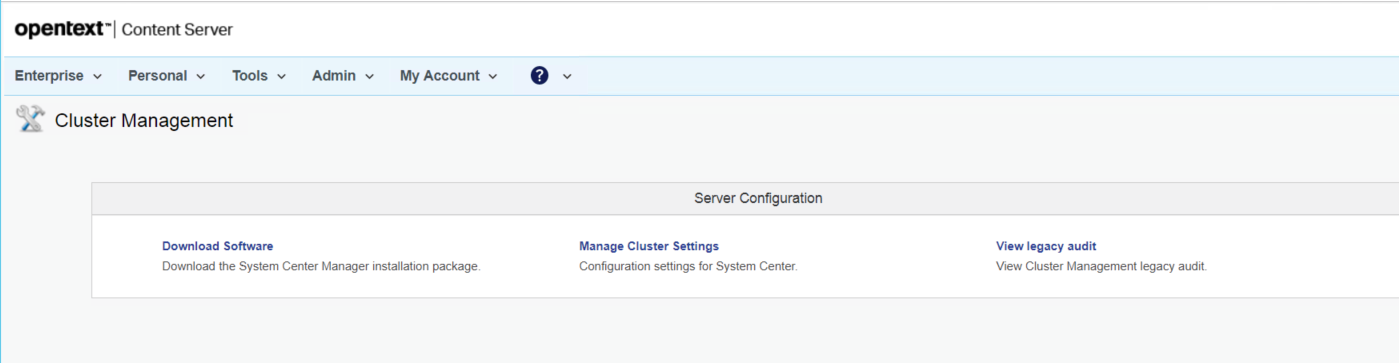
The new Entry “Cluster Management”
Install the System Center Software
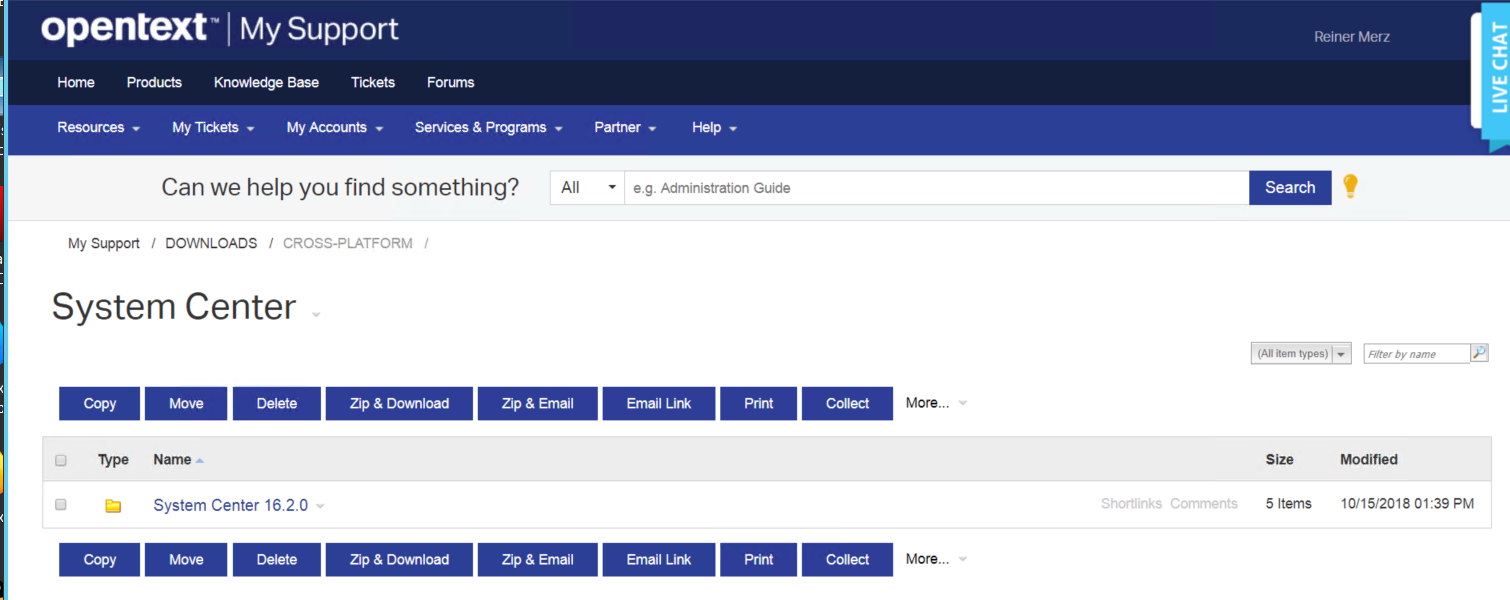
First, you have to download and install the System Center Software. Clicking on the Link “Download Software” directly connects you the the Knowledge Center. After logging into this Knowledge Center, you’ll arrive at the Landing Page for the System Center.
Knowledge Center “System Center Landing Page”
The System Center(s) are avaliable for Windows and for Linux servers. Select the proper version for your system and download it.
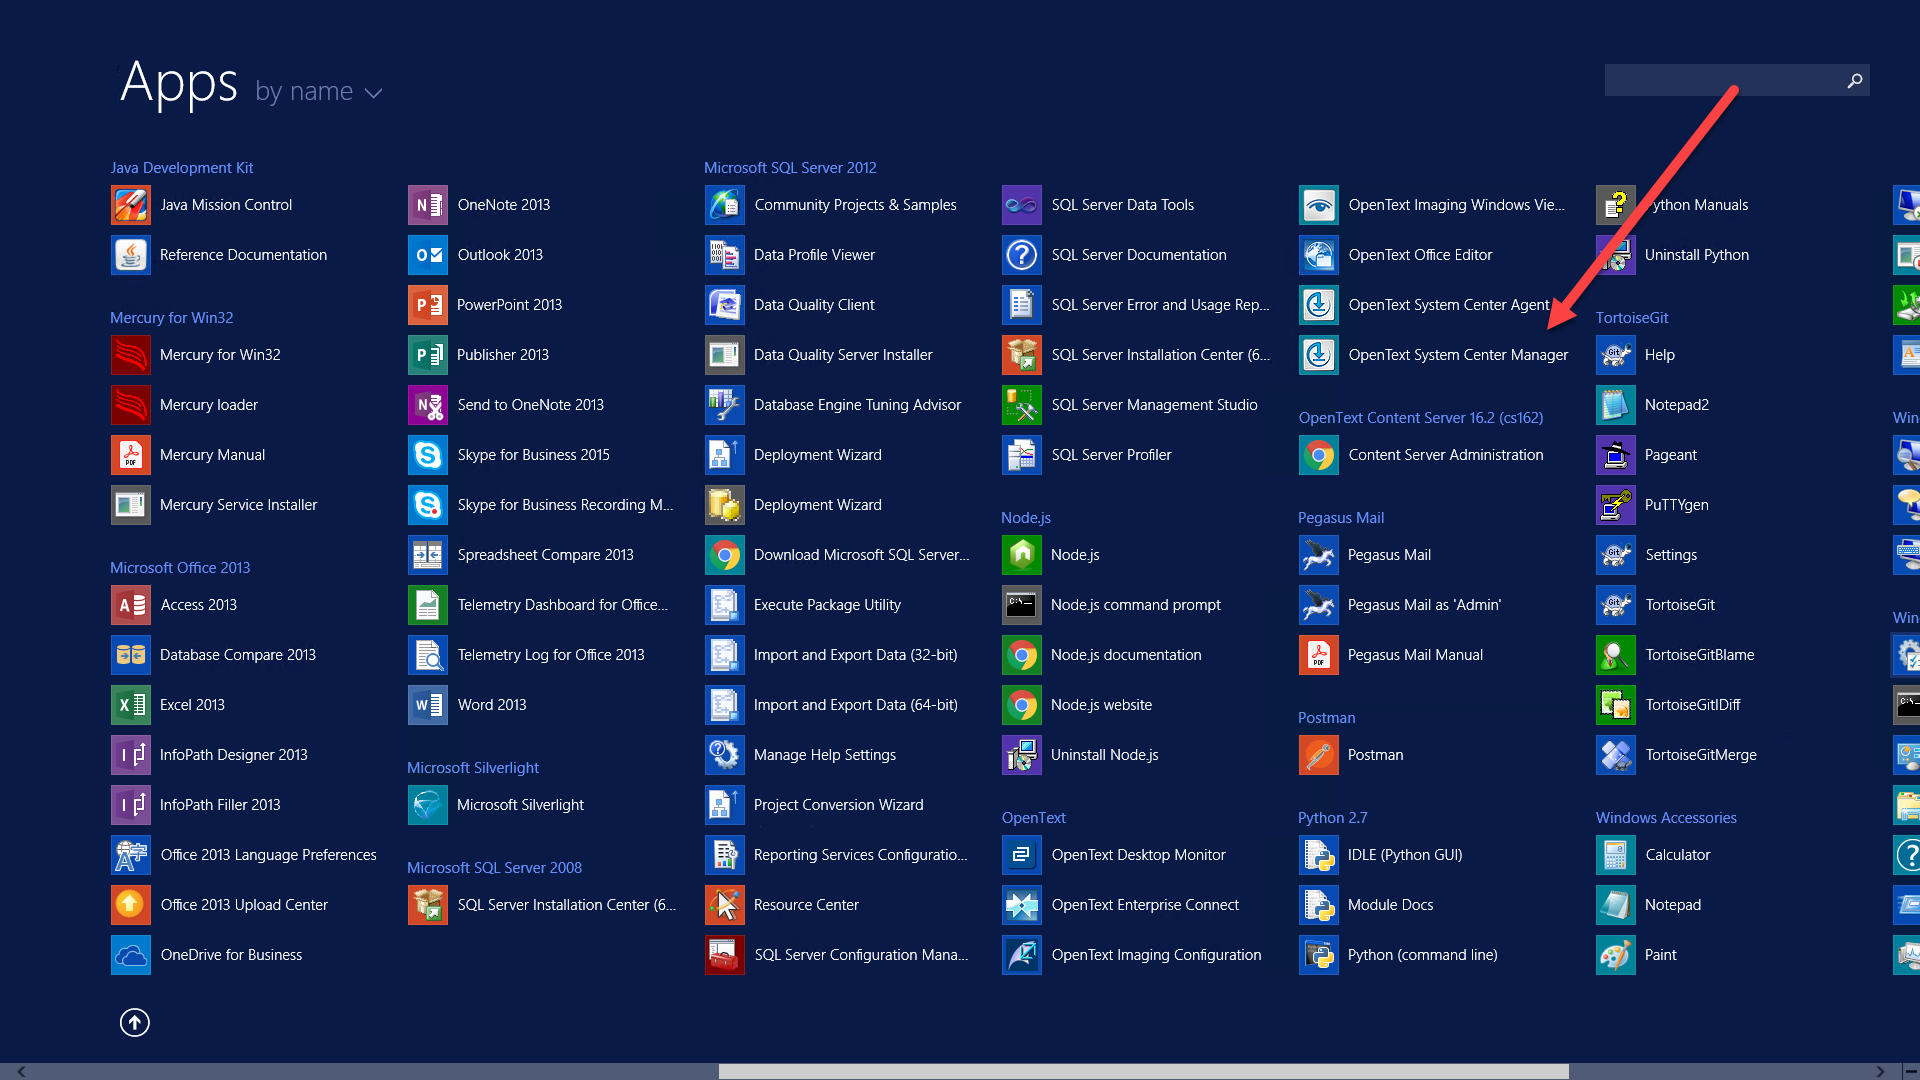
Install it.
You’ll find the System Center directly in the list of programs, like here in Windows Server 2012
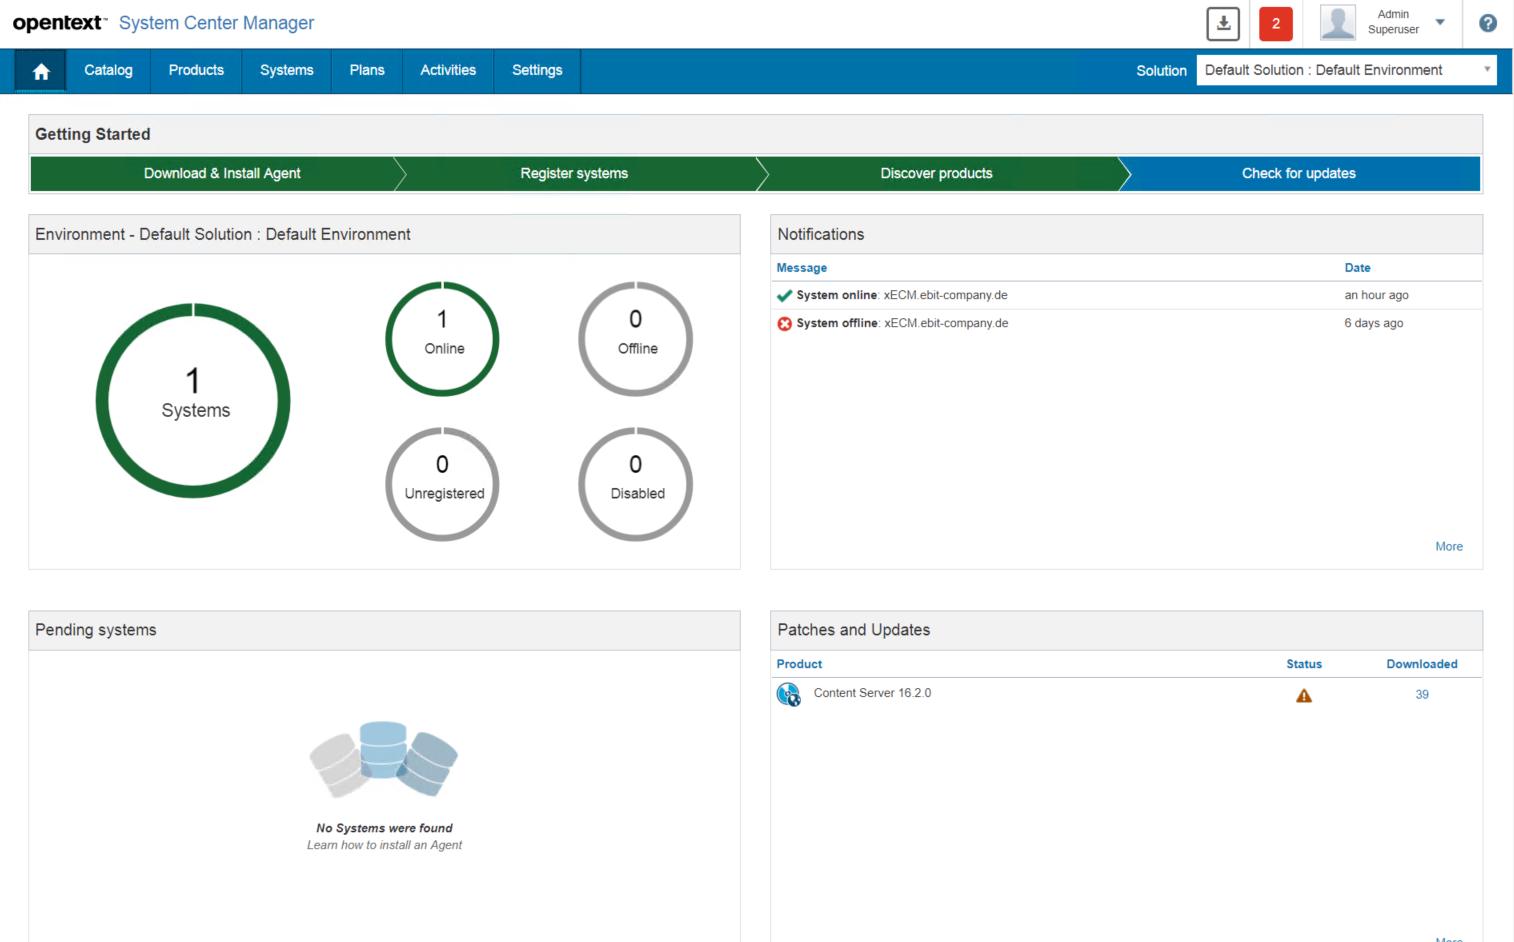
Configure it
Double Click to start. Next, you’ll see the System Center Home Page
Like in the cluster management, you’ll need to download an agent per Content Server system and install that agent at that particular system – Click on Download and Install Agent.
(dont forget your local system!).
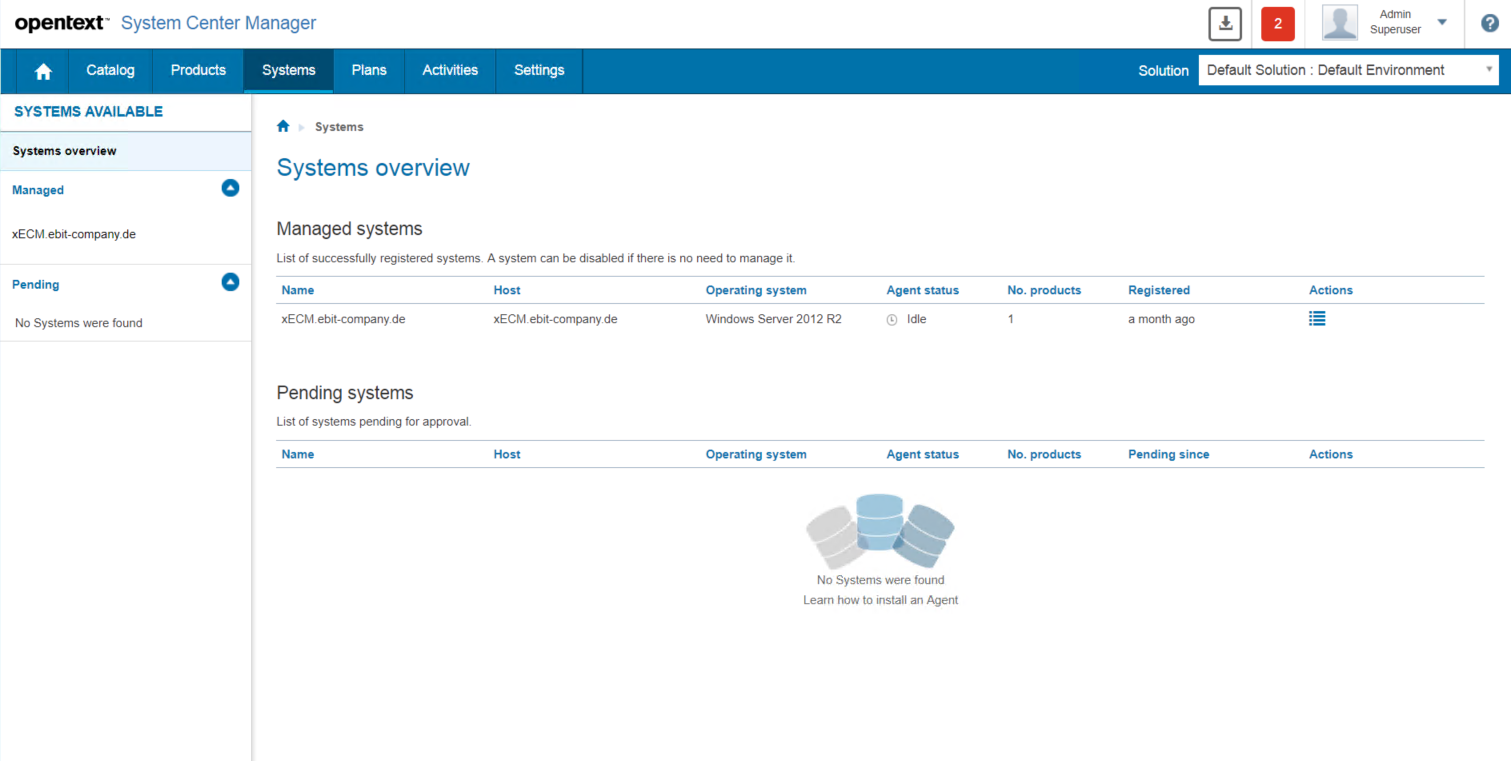
Next, you have to register the systems, onto which you just unstalled the agents. Go back to the “Home” of the System Center and click on “Register Systems”
Under “Managed Systems”, you see all systems already registered, under “Pendig systems” there are all systems with agents recognized by the System Center.
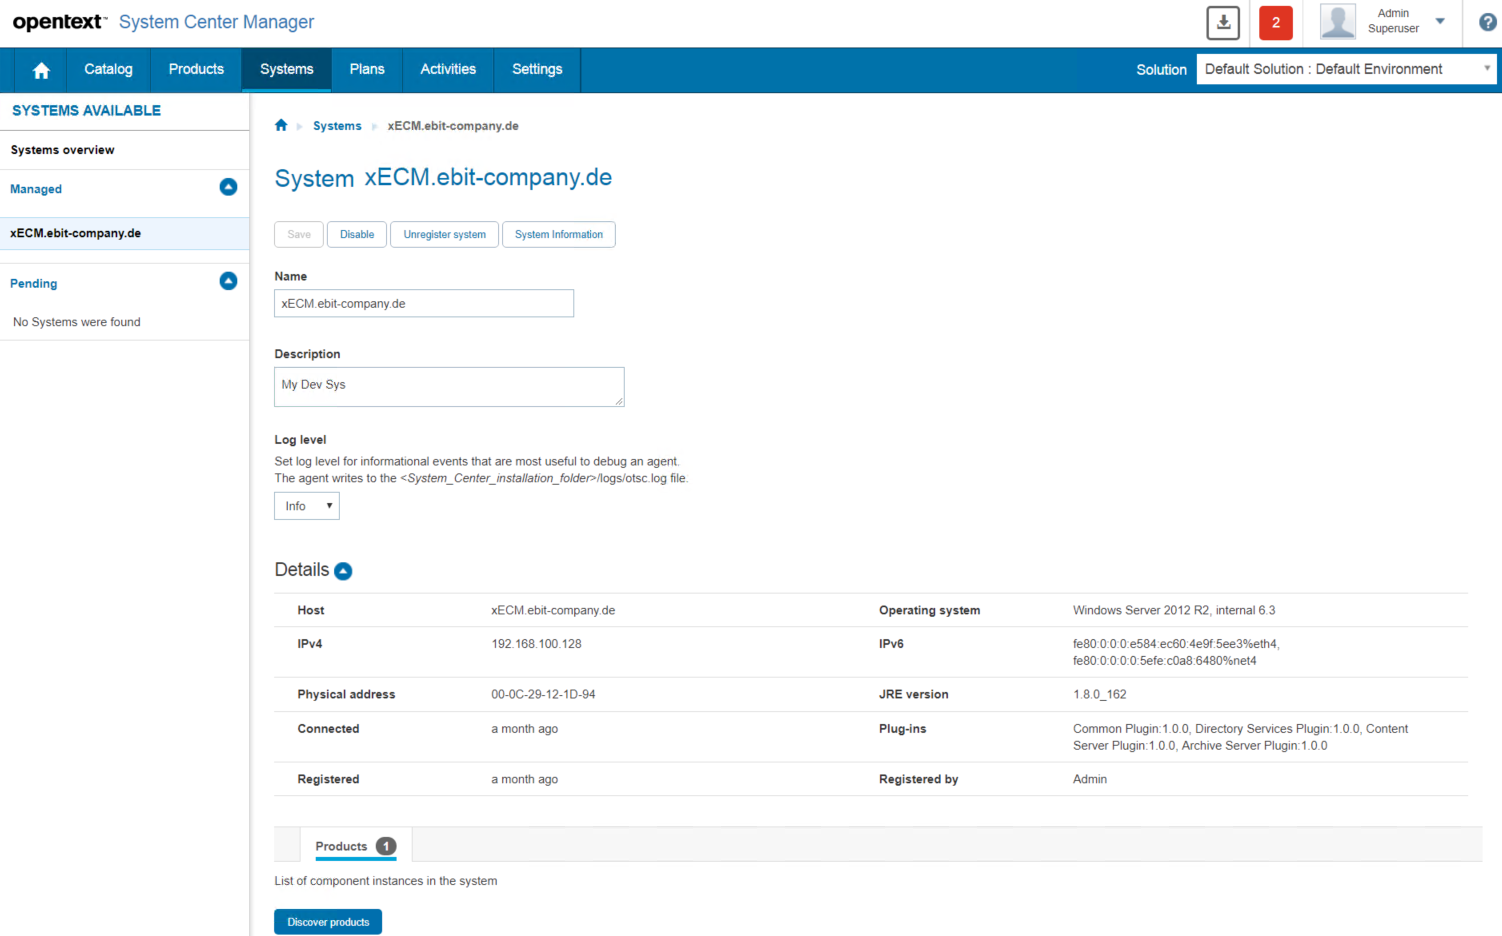
Click on the entry in the column “Actions” on the system pending, and you can register the agent. A Click will give you the detail view (here the system is already registered)
So you are nearly done!
Click on “Discover Products” for this particular system at the bottom of the page and the system is checked for all supported products and those installed are listed.
How to check for patches and install them?
Easy. Until now, you did the setup.
This has to be done only once.
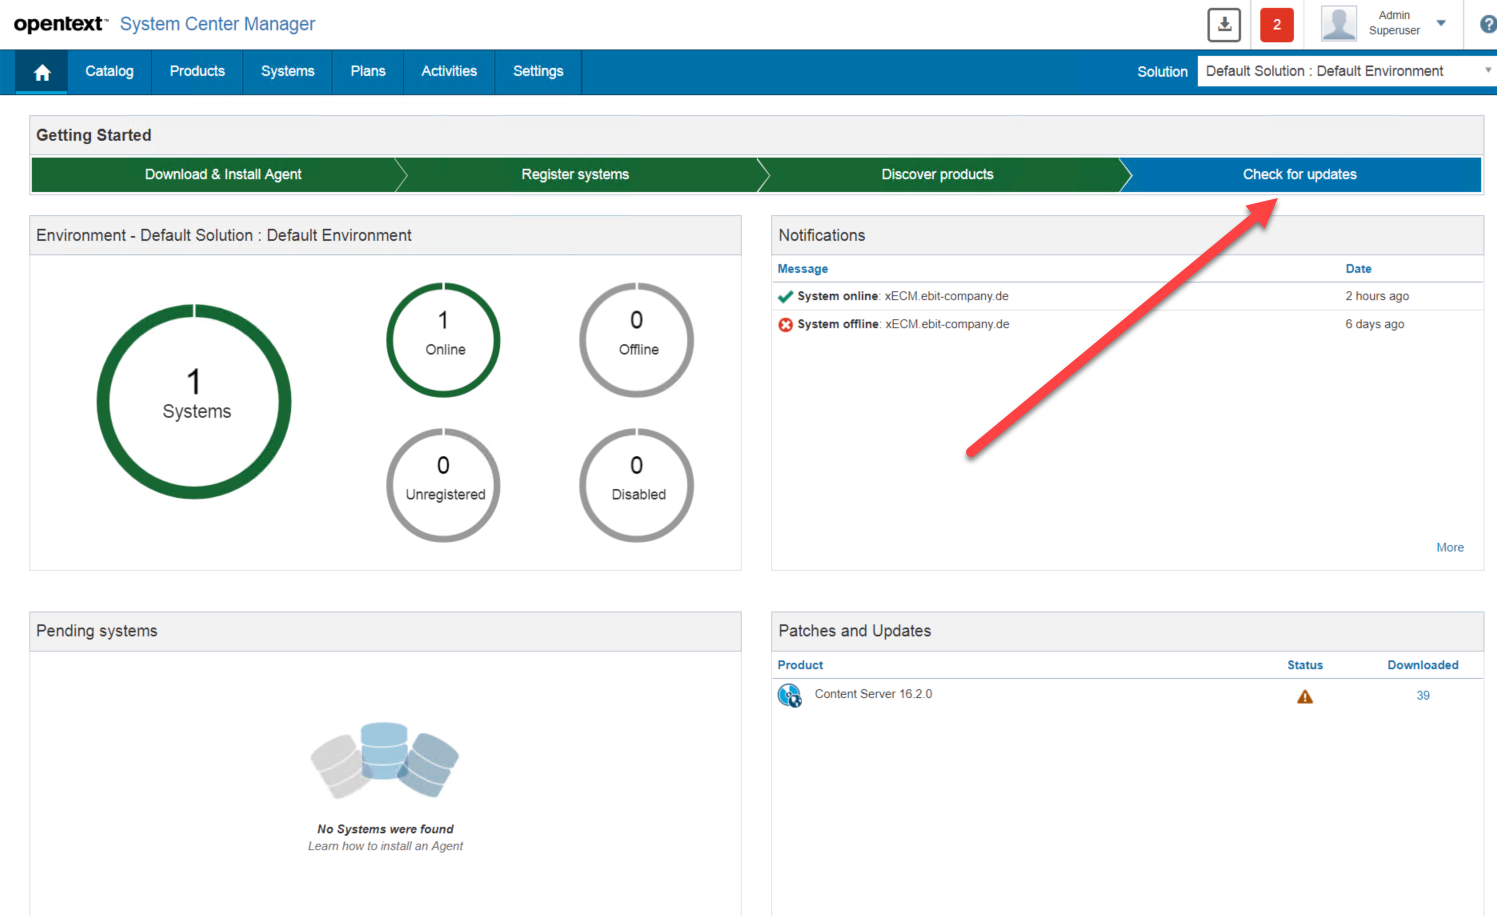
Go back to the “Home” and click on “Check for Updates”
This will lead you to the “Products” tab with Updates for the registered product.
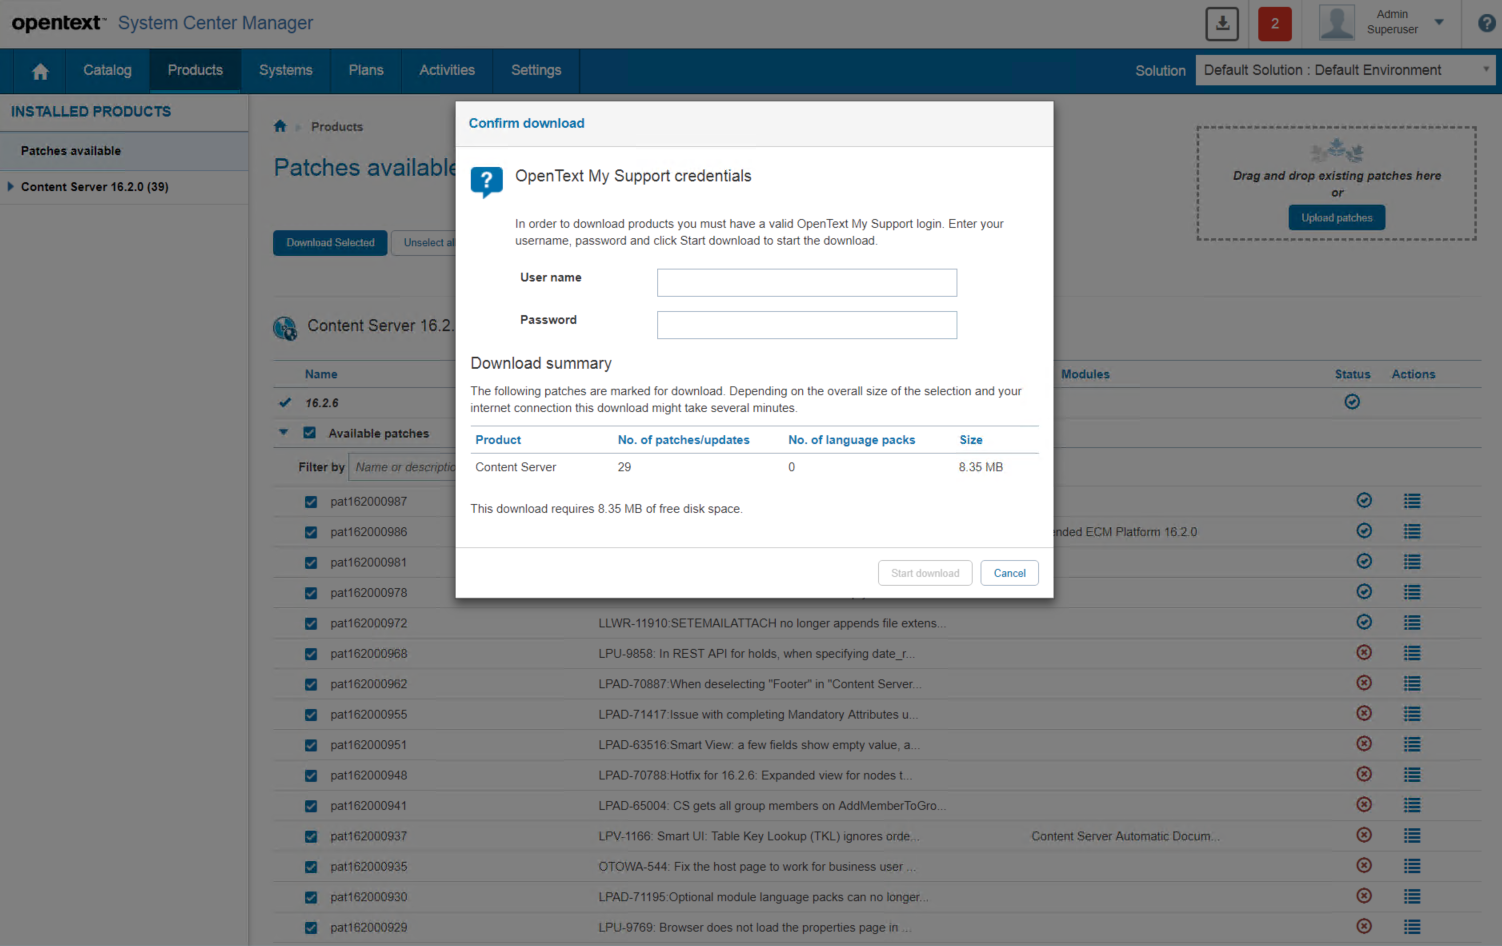
Either expand the “Avaliable Patches” entry and select the patches you want to install or select all by checking the checkbox at “Avaliable Patches”. Then click on “Download Selected” and see the system working.
First you need to login into Knowledge Center
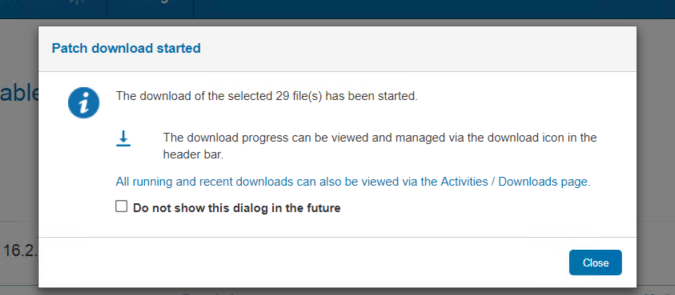
Patch Download started
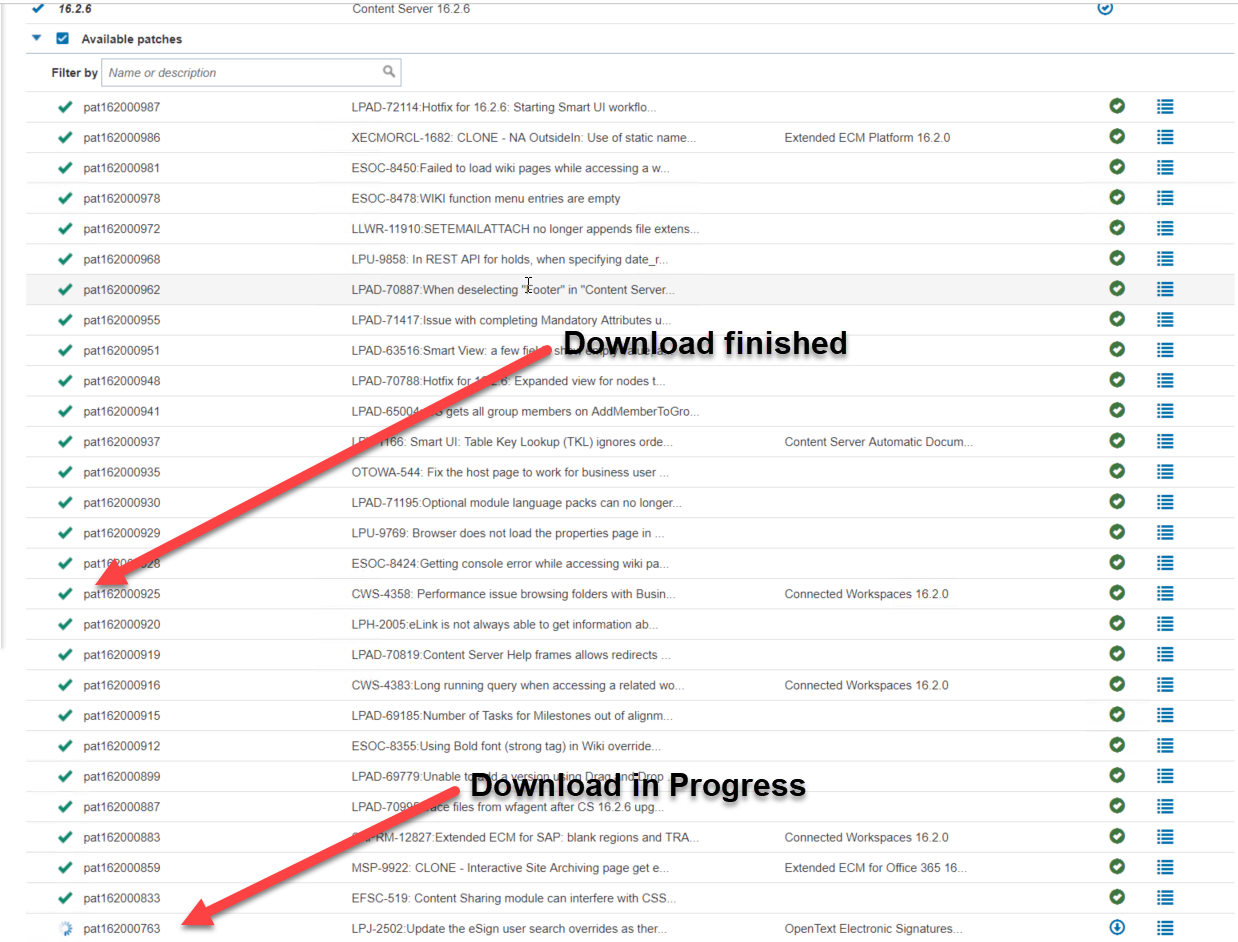
Press Close and you see the download window. As the download is done async, you see green marks (downloaded and installed) and also the moving circles (waiting for download or still in progress)
Download Window in System Center
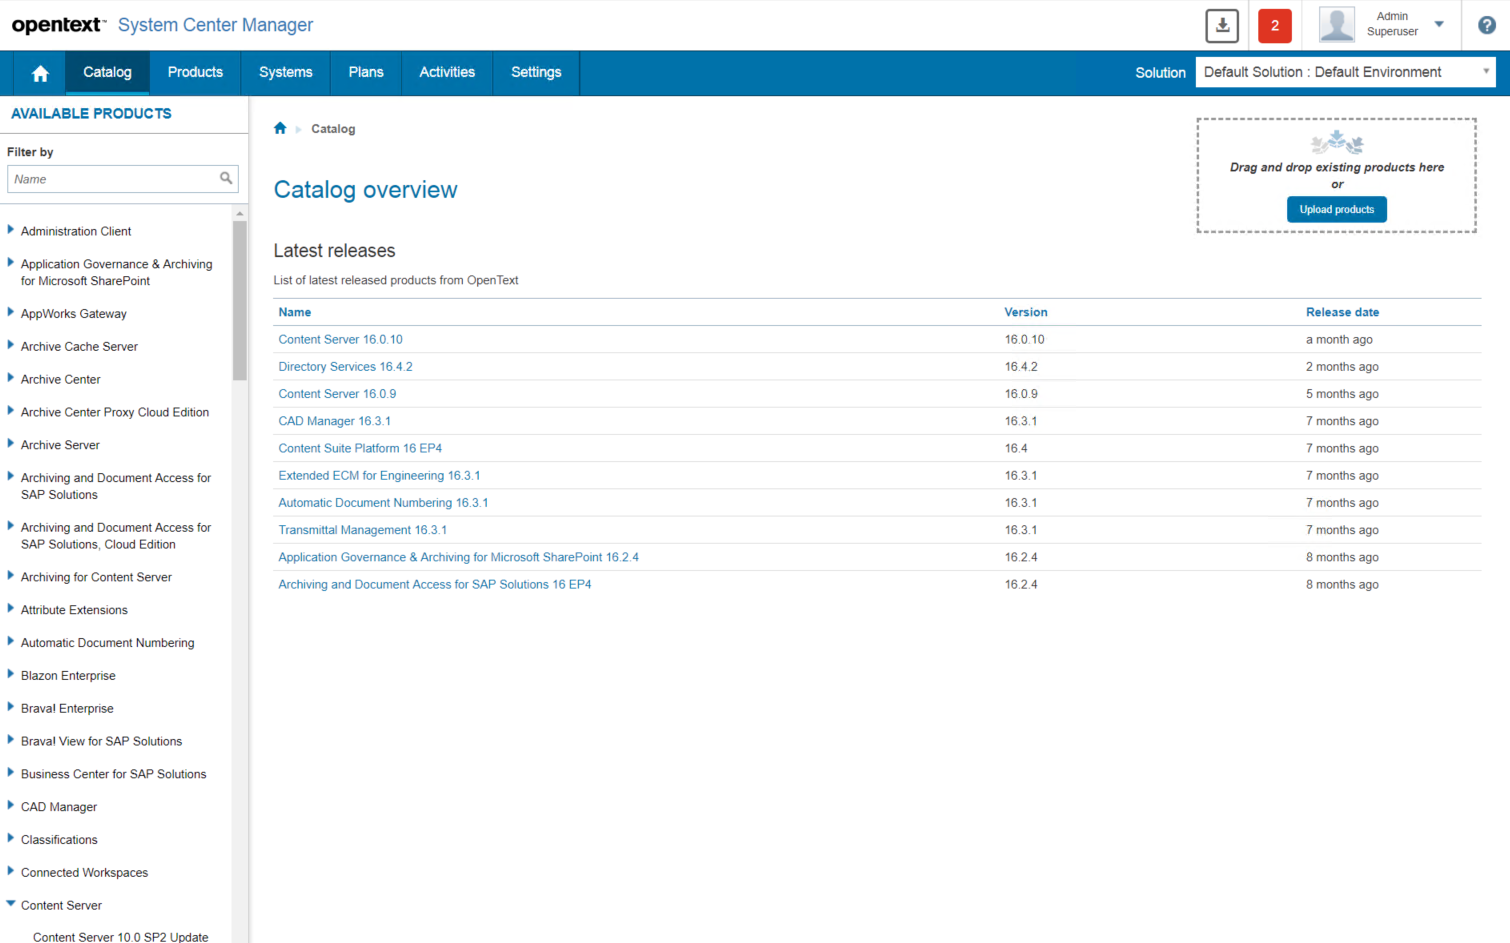
It also provides a list of supported products by clicking “Catalog” from the “Home” page of the system Center
Catalog of supported products
The latest releases are listed directly in the calalog overview.
So the System center is much better then the Cluster Management doing updates.
A new feature in the content server version 16.2 is the usage of smartGUI in workflows. This gives a standard workflow user a great new experience in using this workflow.
Lets see, how:
Setup
But first, you have to setup an few things.
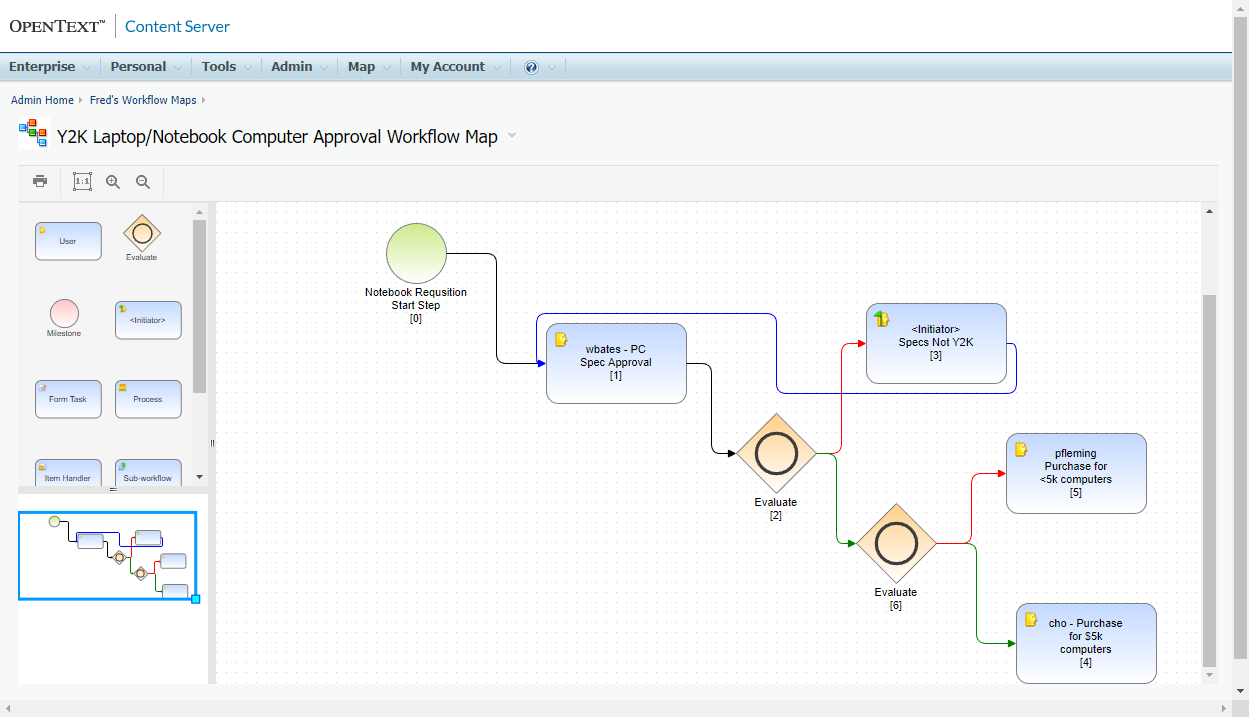
This is our workflow map which we use in this example:
Example Workflow Map: Computer Approval
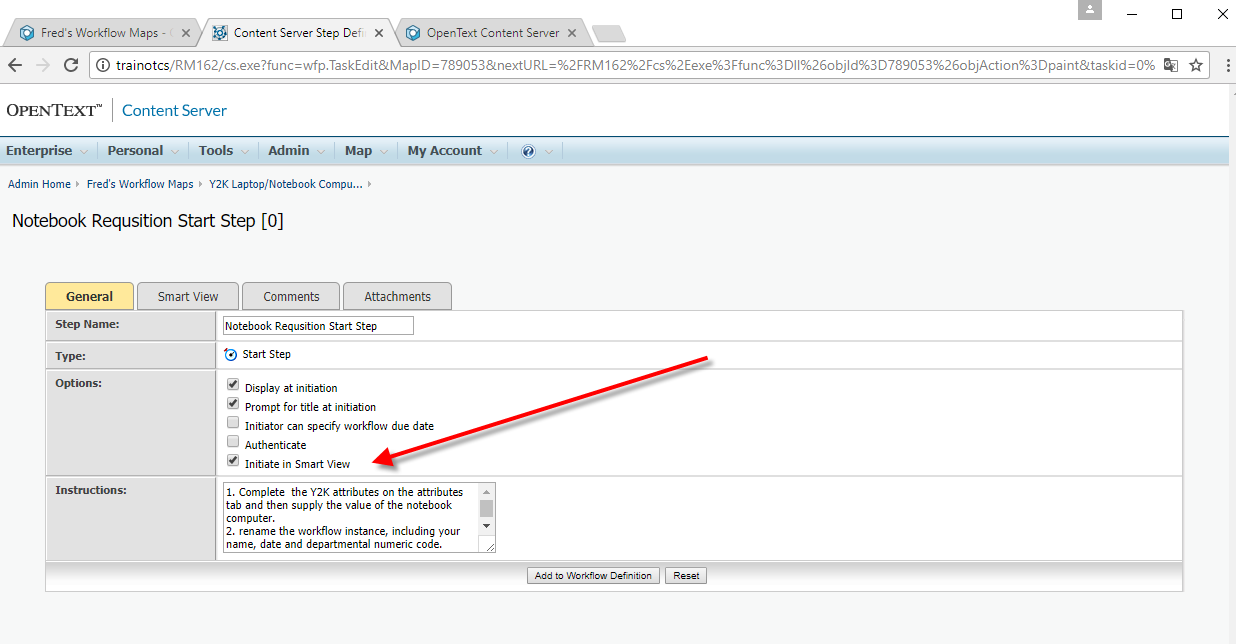
In the Classic UI edit the workflow map.
Goto to the Initiator. Mark „Initiate in Smart View“ . Add to Workflow Definition and save the map
Initiator
(optional)
goto the Tab „Smart View“ and add a form. Forms can be added to all steps, if they are enabled for display in Smart View.
This is an example of the last step on „How to enable a step for SmartUI“:
Enable a Step in smartGUI
Save the map and exit.
Now its time to see our workflow in the smartGUI.
Usage
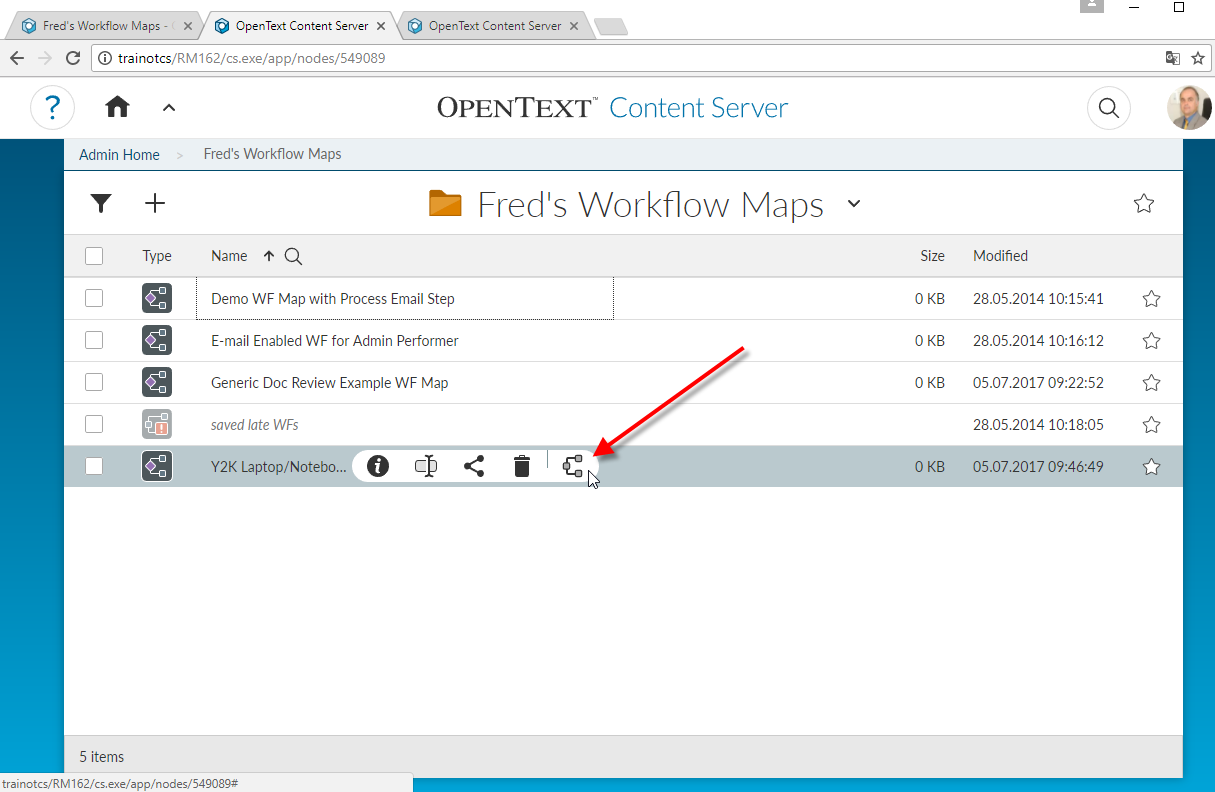
Switch to the smartGUI and instantiate the workflow from the map.
Instantiate a Workflow
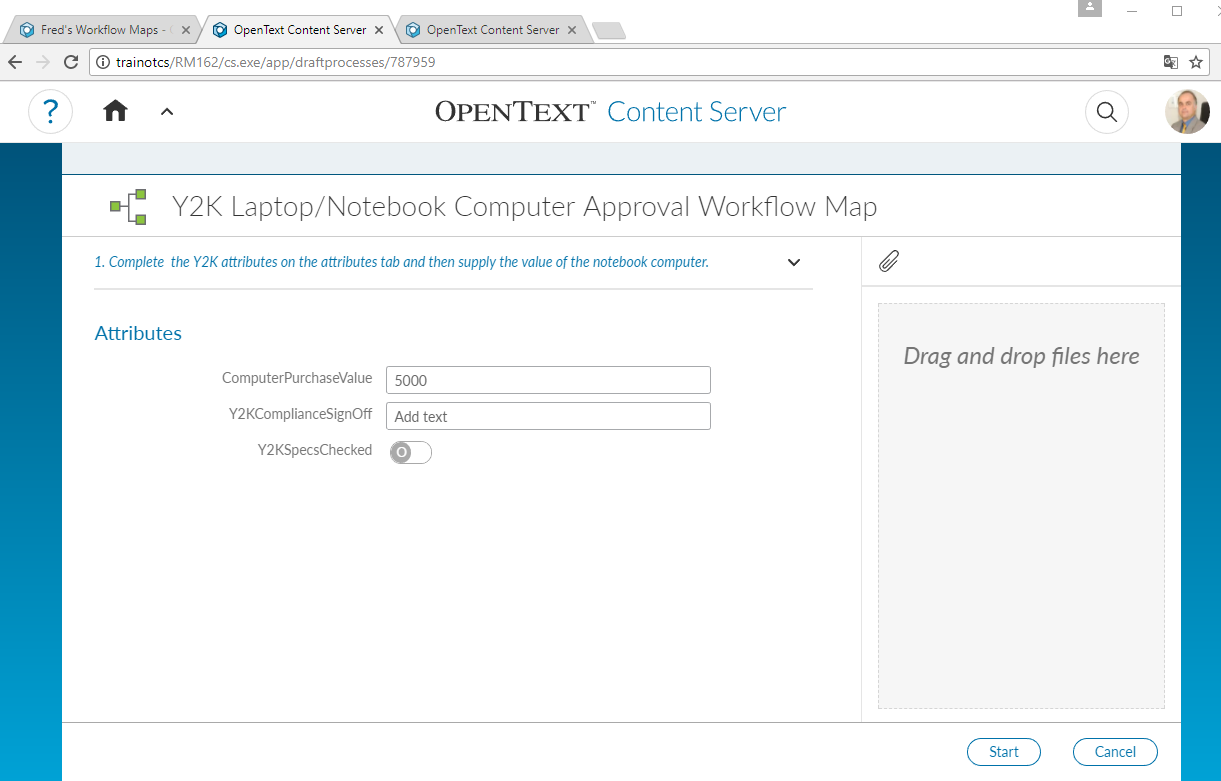
Then the Workflow Widget appears. At this stage, you can set all attributes as usual, you can add files at to the workflow by dragging and dropping these to the right side of the widget
Workflow Widget
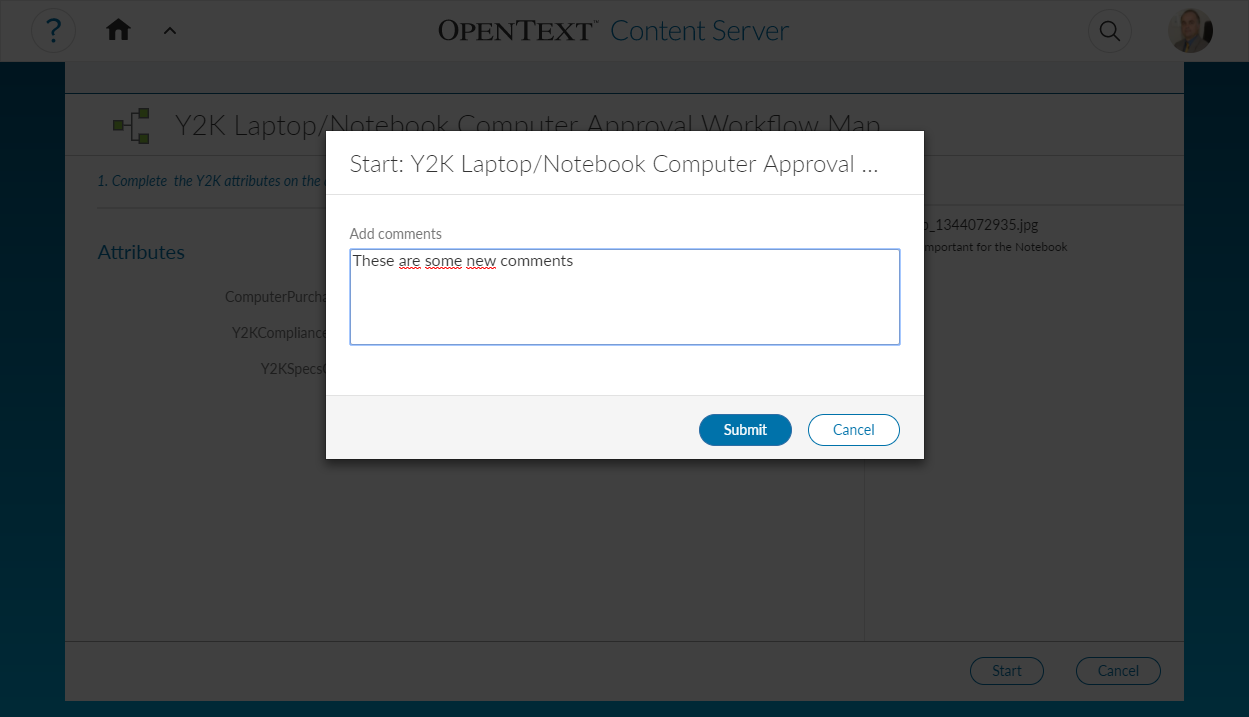
Add some comments
Comments on the Workflow
Click submit and login with the userid of the first step assignee.
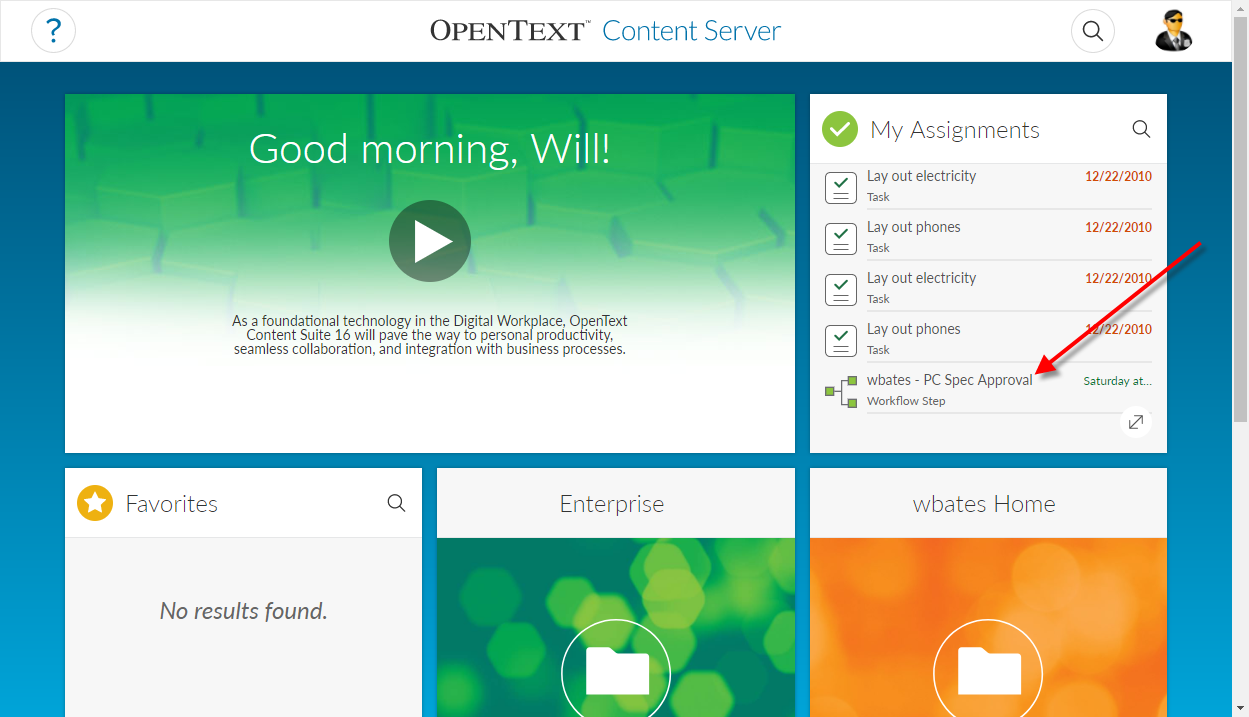
An open workflow in a landing page
Here, you see your open workflow step in the “My Assignments” widget. Clicking on the entry opens the Approval widget
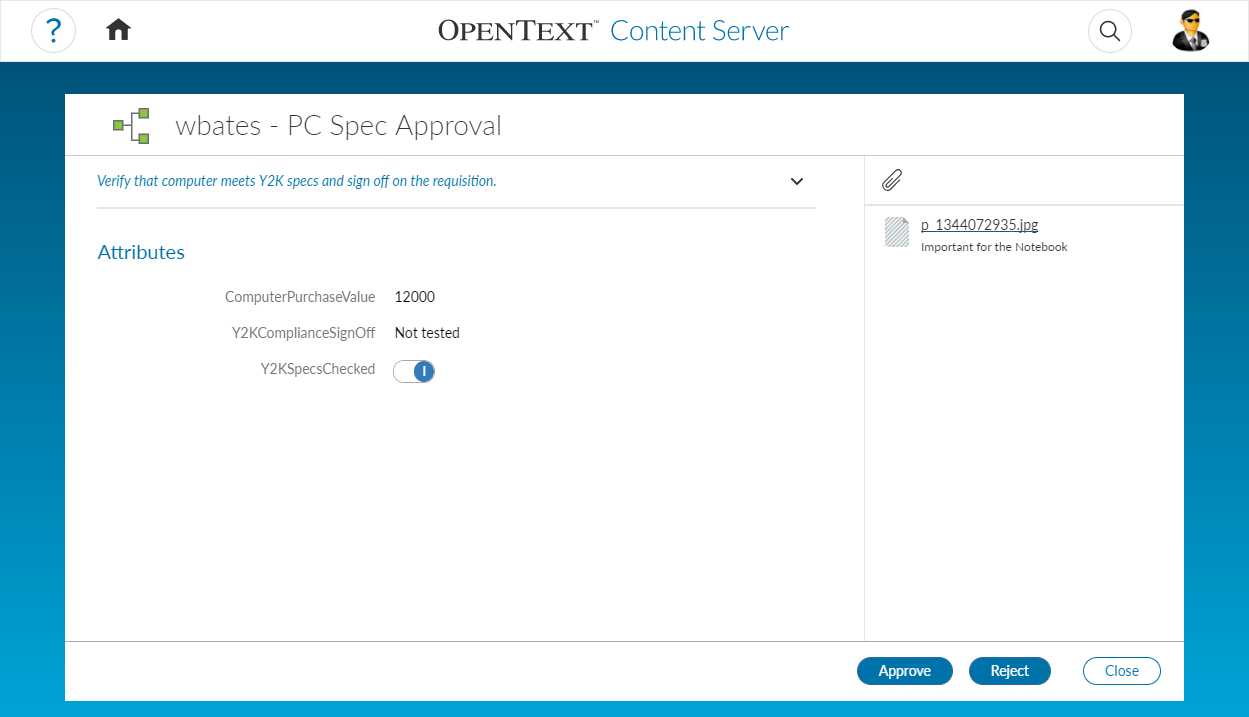
Approval in the workflow
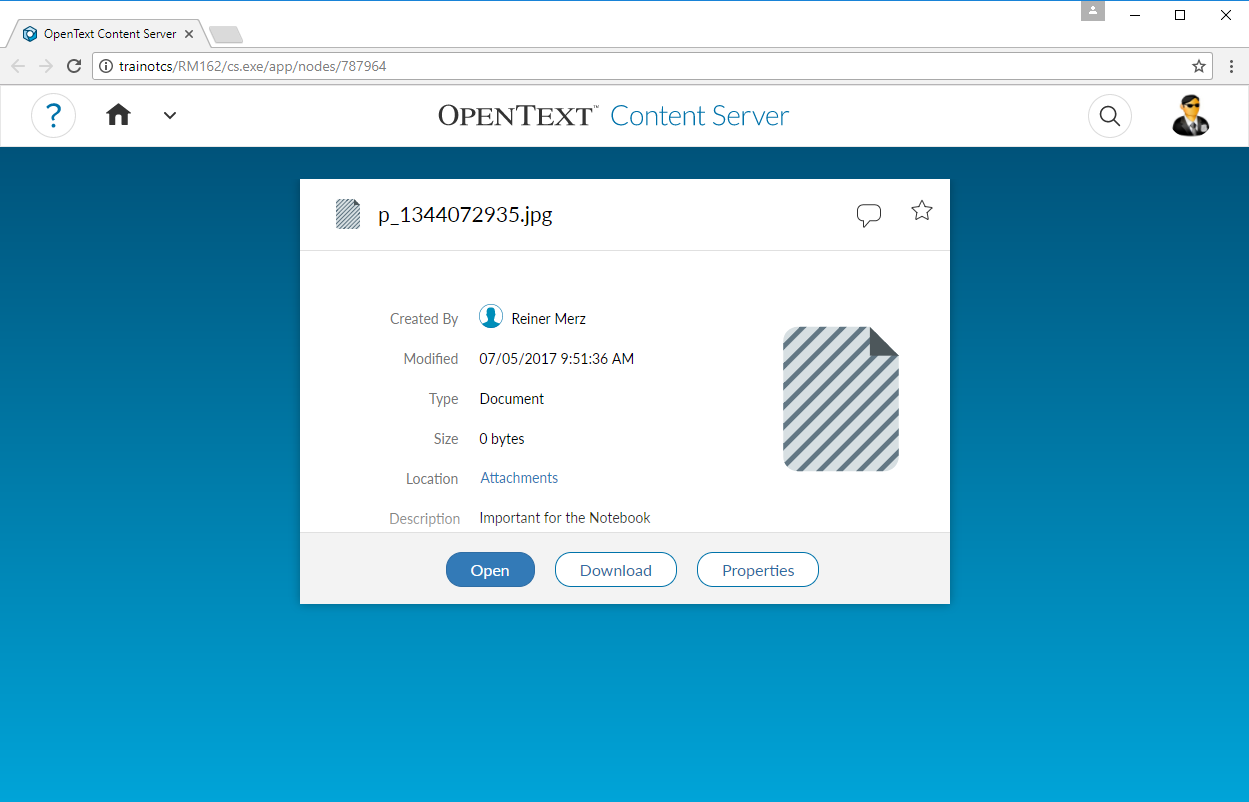
By clicking on the attachment at the right side, the attachment can be opened, downloaded or the properties can be checked.
Attachment
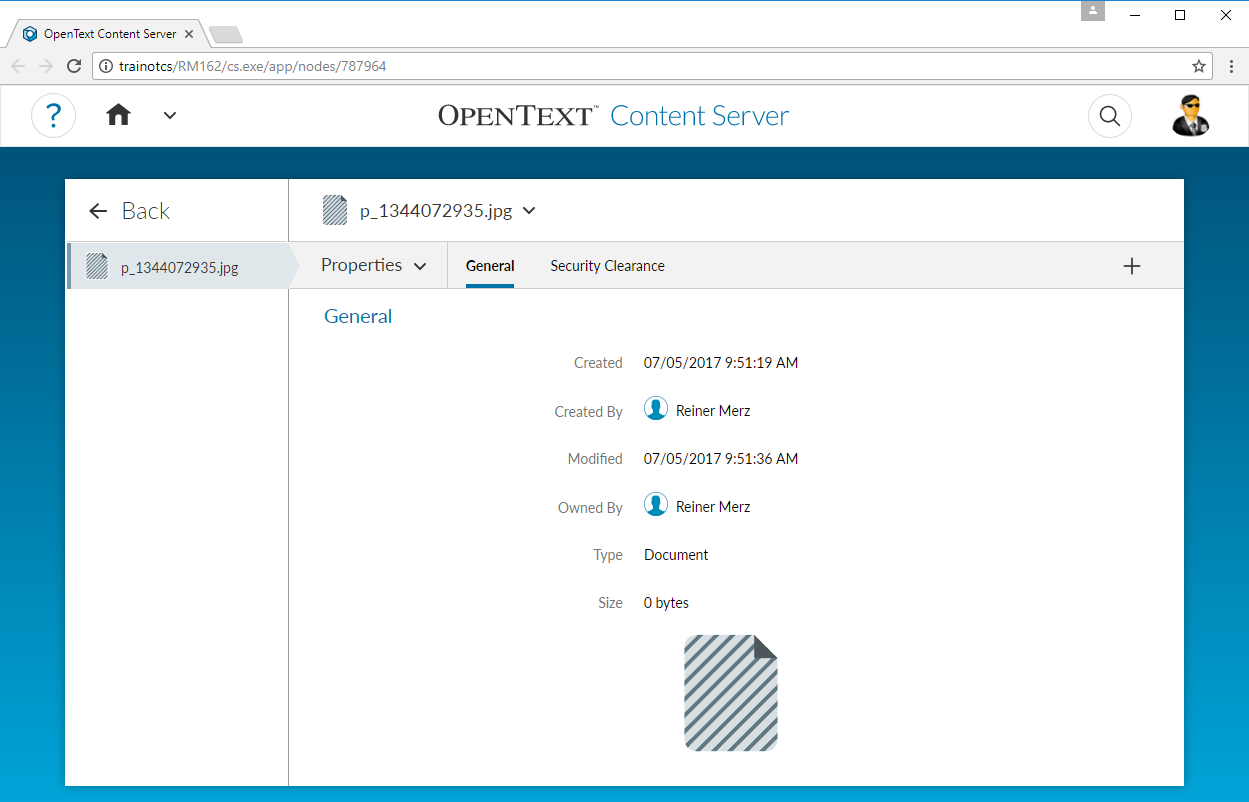
The properties look like
Attachment Properties Window
Now after the examination, you can click on “Approve” and add a comment.
Then the Workflow Step is approved. The entry in MyAssignments is removed. The workflow is on the next step.
From time to time, you need a test email server on a VM or on a test environment to configure the Content Server elink capabilities. Or maybe a Exchange is too powerful for you?
Then Mercury as an email server and Pegasus as email client may be a good choice for you. You can download this at http://www.pmail.com/ .
But having a mail server up and running is only half of the price. You still have to configure elink and the mail server.
elink is a Content Server mechanism, which allows you to store documents via email or post replies to to discussions or send documents also via email.
Setting up elink is simple.
You have to imagine, that elink has to have a mailbox on the mail server, which is used to retrieve messages to the content server. This means, a mail to this mailbox is processed by the content server. The mail server must be configured that all mails from a domain will be stored in this mailbox.
for example the message
<123BeDessfdj>@elink.net must be stored in the elink mailbox to be processed by the content server.
First, lets configure the Mercury Server. First, we need to setup a Content Server used. Lets call it elink.
User Administration on Mercury
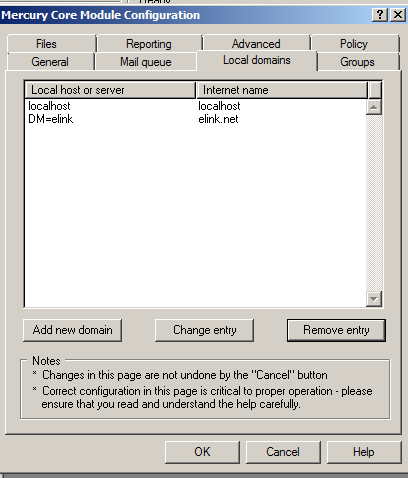
Second, we need to setup the Domain for this mailbox. If we enter the DM=user with the username just defined and an Internet Name (here elink.net) for our mails to the content server, we define that all mails from the Domain elink.net will be stored in the elink mailbox.
Domain Administration on Mercury
Next, we need to configure elink. This must be done on the Content Server admin pages.
Configuration of elink on the admin pages
Virtual Hostname is the name of the Domain, from which we want to store all messages in the elink mailbox.
Username/Password is the name of out mailbox user (elink) and its password. You can test the connection by pressing the “Test Connection” button.
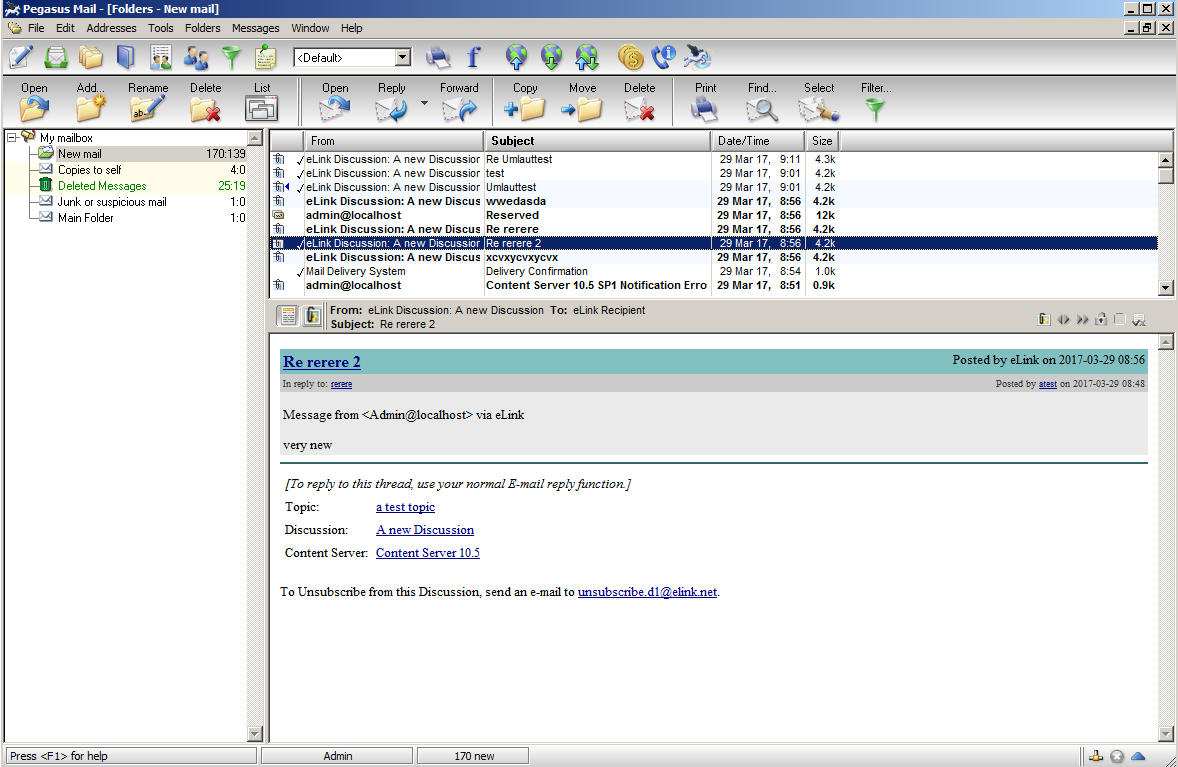
If everything runs, you’ll see mails like these in the Pegasus mail client.
If everything runs, Content Server can be used though Pegasus
If you are thinking on using Content Server Webservices (CWS´) you may wonder how to activate this on a standard Content Server Installation. Normally, right out of the box, CWS is not active or installed, although you got the license to use it in your basic license.
As Administrator, you have to do a couple of things to activate CWS.
Decide which architecture you will use.
CWS can be used inside of the Microsoft Internet Information Server or inside a Java Application Server like Tomcat. Both ways to activate will be described here.
Locate the CWS Software
Look in your install directory of the content server. There, you will find a directory named “webservices”.
Webservices Basedirectory
Here, there are three entries:
dotnet contains all CWS service definitions for use inside the Microsoft IIS
java contains all webapps for use inside the Tomcat application server
java6 contains the same thing as in 2. but for use with java 6.
Installing CWS inside the Microsoft Internet Information Server IIS
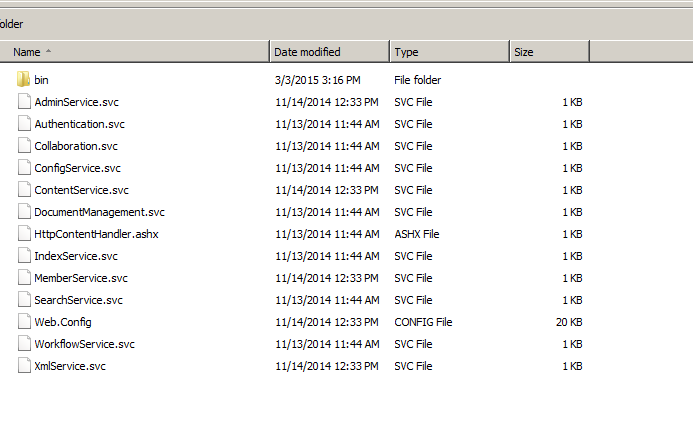
First, let’s examine how to install CWS inside IIS. Switch to the dotnet subdirectory, then to cws (do not use les-services, this is an old version supporting legacy clients)
All svc files for installation
Locate the .svc files you wish to install and use in CWS.
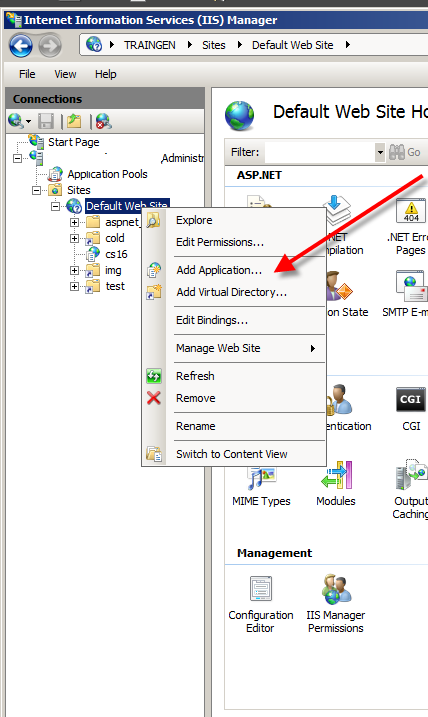
Open the IIS Manager. Create a new Application at the default web site
Create a new Application
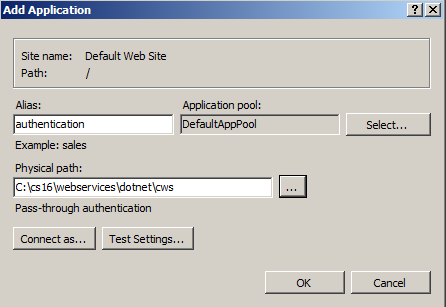
App pointing to CWS
Enter the path to the dotnet\cws directory , enter for example CWS as alias.
Remark: IIS must be configured to
execute .NET 2.0 apps
allow “Read” and “Script” rights to the new app
execute WCF (can be ensured for example by “%SystemRoot%\Microsoft.NET\Framework\v3.0\Windows Communication Foundation\ServiceModelReg.exe -i” (check, if something changed, if you are using newer versions)
allow “Read” and “Execute” rights for the ID of the Application pool on $OTHOME/webservices/dotnet
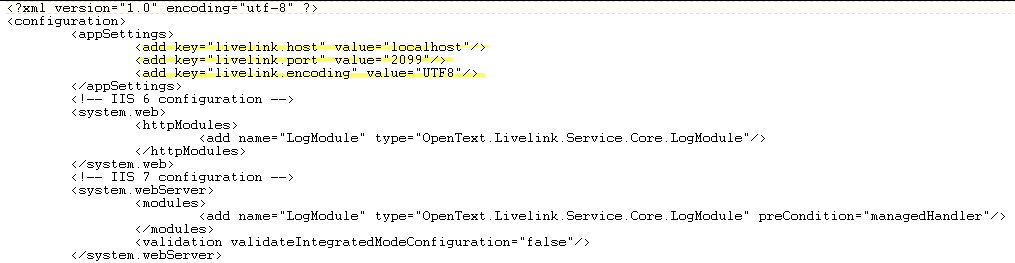
And (don’t forget), ensure that your webservides will use the same port as your content server uses. If you use a nonstandard port (not 2099) you need to change the port in the file $OTHOME\webservices\dotnet\cws\web.conf
If you use the standard port, there is nothing for you to do.
Installing CWS in Tomcat
Alternatively, you can use Tomcat as a base for CWS.
In this case, go to the java6 base directory in the webservices dir.
The war files
In this dir, you’ll find the war (web application archive) files, which you need to deploy.
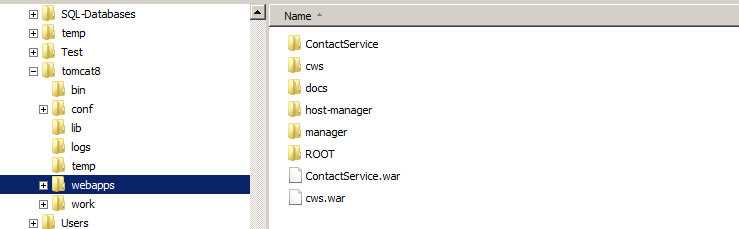
Deploy the cws.war file either to the TOMCAT\webapps directory or use the Tomcat service manager to deploy this file.
The tomcat webapps dir
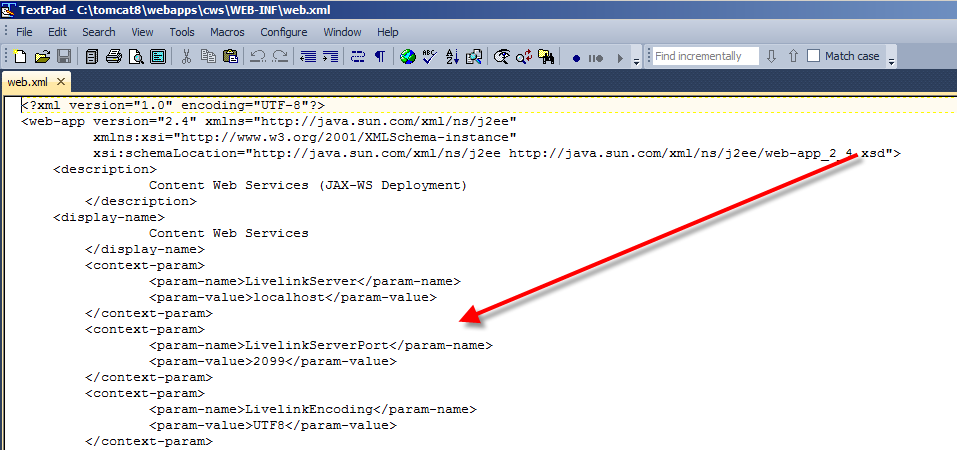
Don’t forget, if you changed your port number of your content server from 2099 to something else, change also the value in the web.xml of the unpacked cws web app.
The port in the web.xml file
If you don’t use the same port numbers, the whole system will listen to different ports and will do nothing.
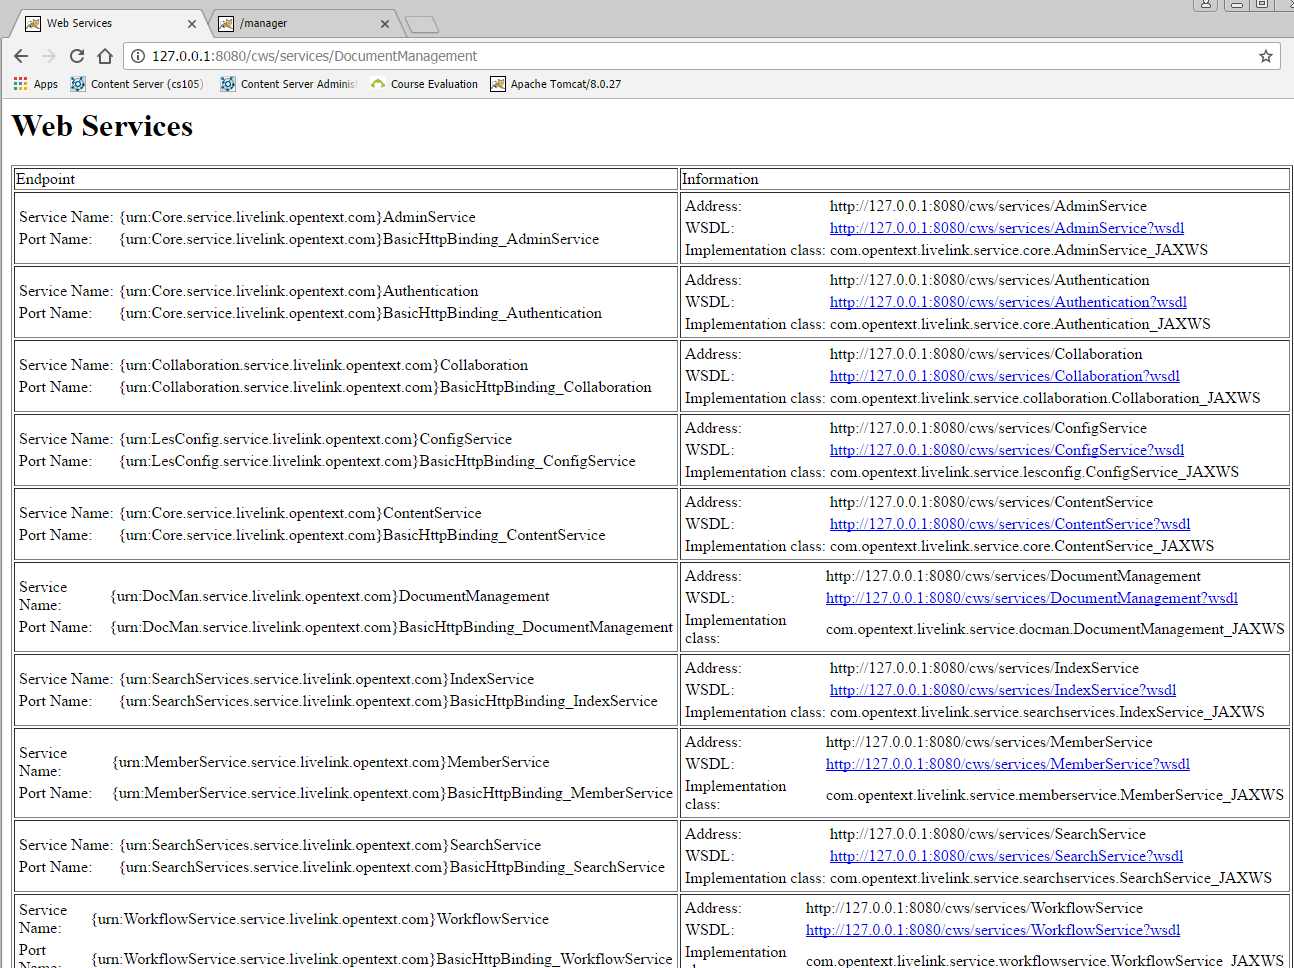
Test your installation
Your installation is correct, if a browser, pointing to
http://127.0.0.1:8080/cws/services/DocumentManagement (Tomcat) or